Configure custom domains and subdomains
By default, Baserow applications exist in the editor. To make them accessible to your users, you must attach them to a domain. You can choose between a quick, free subdomain provided by Baserow or a fully branded custom domain.
Learn how to publish your application to a branded URL or a free Baserow subdomain.
Overview
Configuring a domain allows you to “publish” your application to the public web. Baserow offers two types of domains:
| Domain type | Example URL | Best for |
|---|---|---|
| Baserow Subdomain | my-app.baserow.site |
Internal tools, prototypes, and quick testing. No configuration required. |
| Custom Domain | portal.yourcompany.com |
Client-facing apps, brand consistency, and professional use. Requires DNS access. |
Multiple Environments: You can add multiple domains to a single application. This allows you to publish a “Test” version to one domain (e.g., test.yoursite.com) and a “Live” version to another (e.g., www.yoursite.com), giving you a safe staging environment.
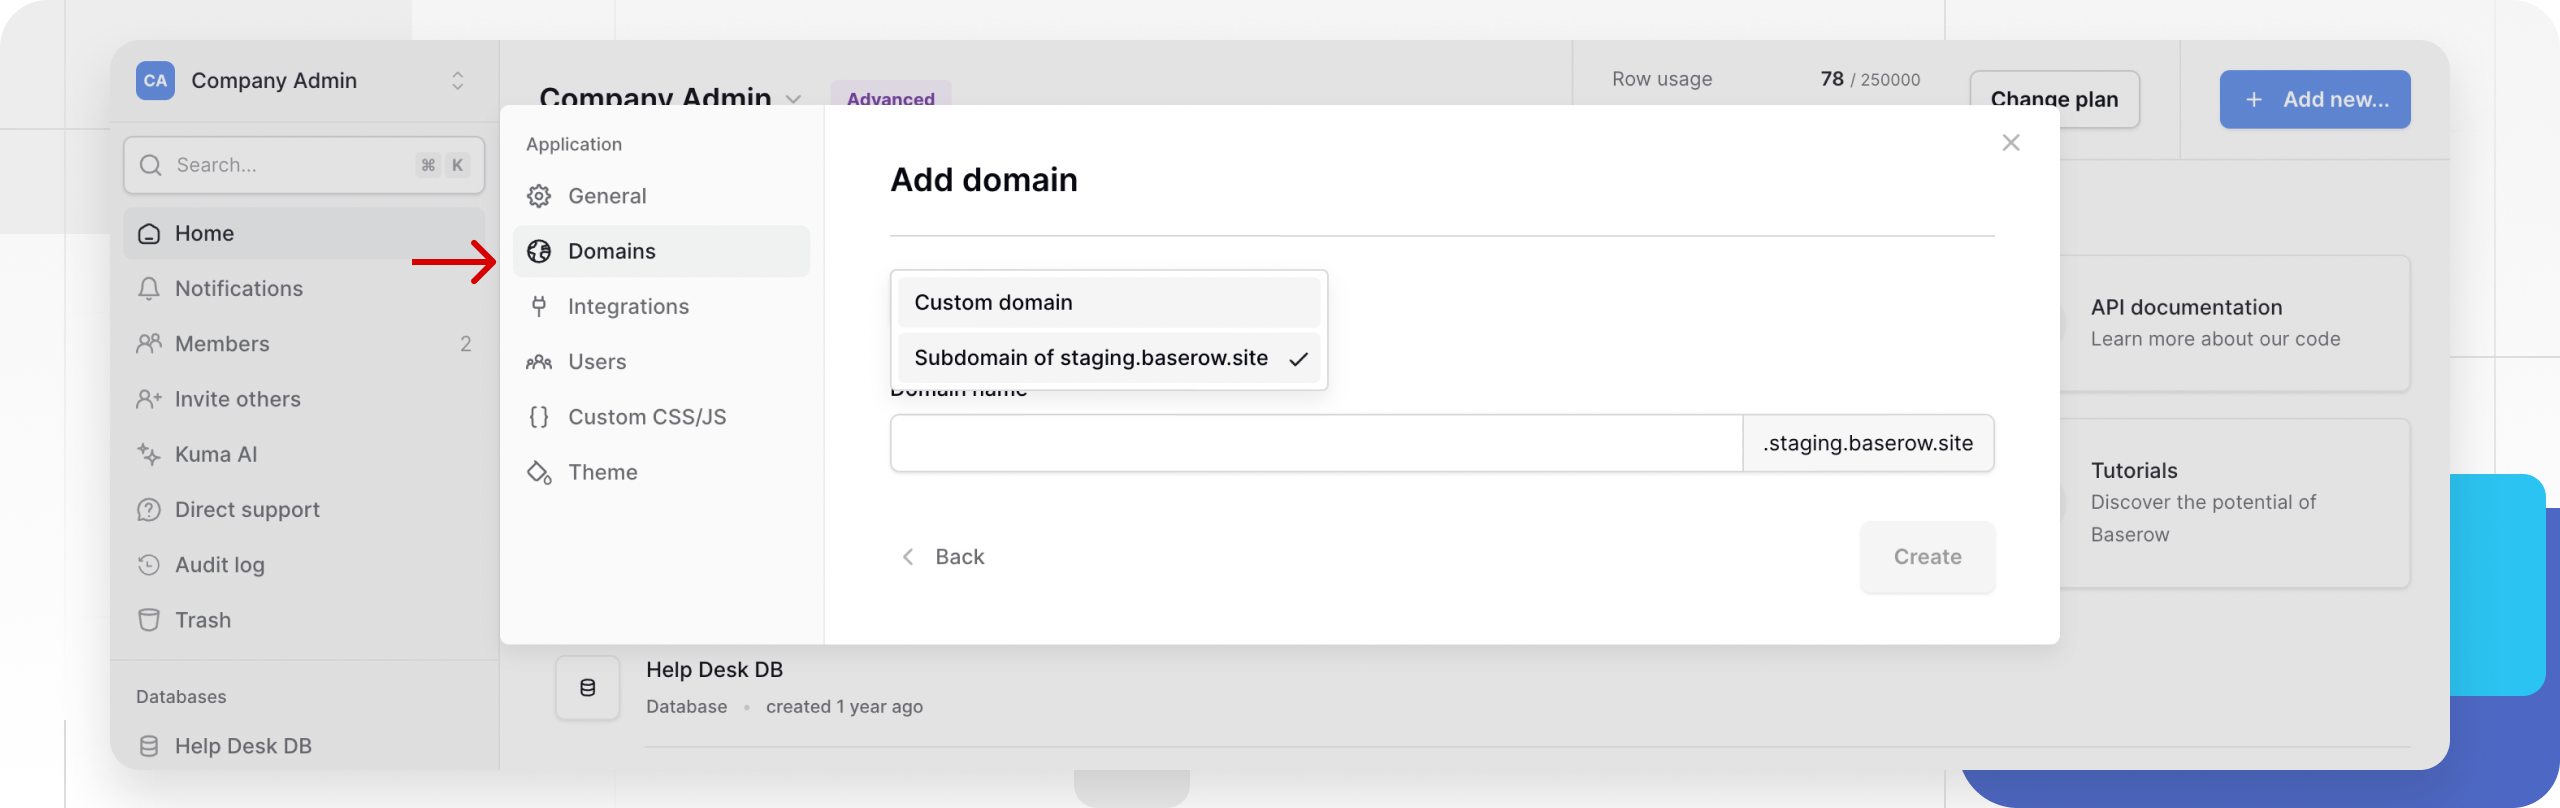
Option 1: Use a Baserow subdomain (Free)
This is the fastest way to get your application online. It requires no technical setup.
- Open your application and go to Settings → Domains.
- Click + Add domain.
- Select Baserow subdomain from the dropdown menu.
- Enter your desired prefix (e.g.,
project-tracker).- Resulting URL:
project-tracker.baserow.site
- Resulting URL:
- Click Create.
Your domain is now active. You can immediately publish your application to this URL.
Option 2: Add a custom domain
Using a custom domain (white-labeling) establishes trust and professionalism. This process involves two parts: configuring Baserow and configuring your DNS provider.
Part 1: Configure Baserow
- Open your application and go to Settings → Domains.
- Click + Add domain.
- Select Custom domain.
- Enter your full domain name (e.g.,
portal.example.com).- Note: Baserow may automatically suggest adding the
wwwversion as well.
- Note: Baserow may automatically suggest adding the
- Click Create.
- Important: A modal or setting panel will appear displaying the Target Value (often a URL like
custom-domain.baserow.site). Copy this value; you will need it for the next step.
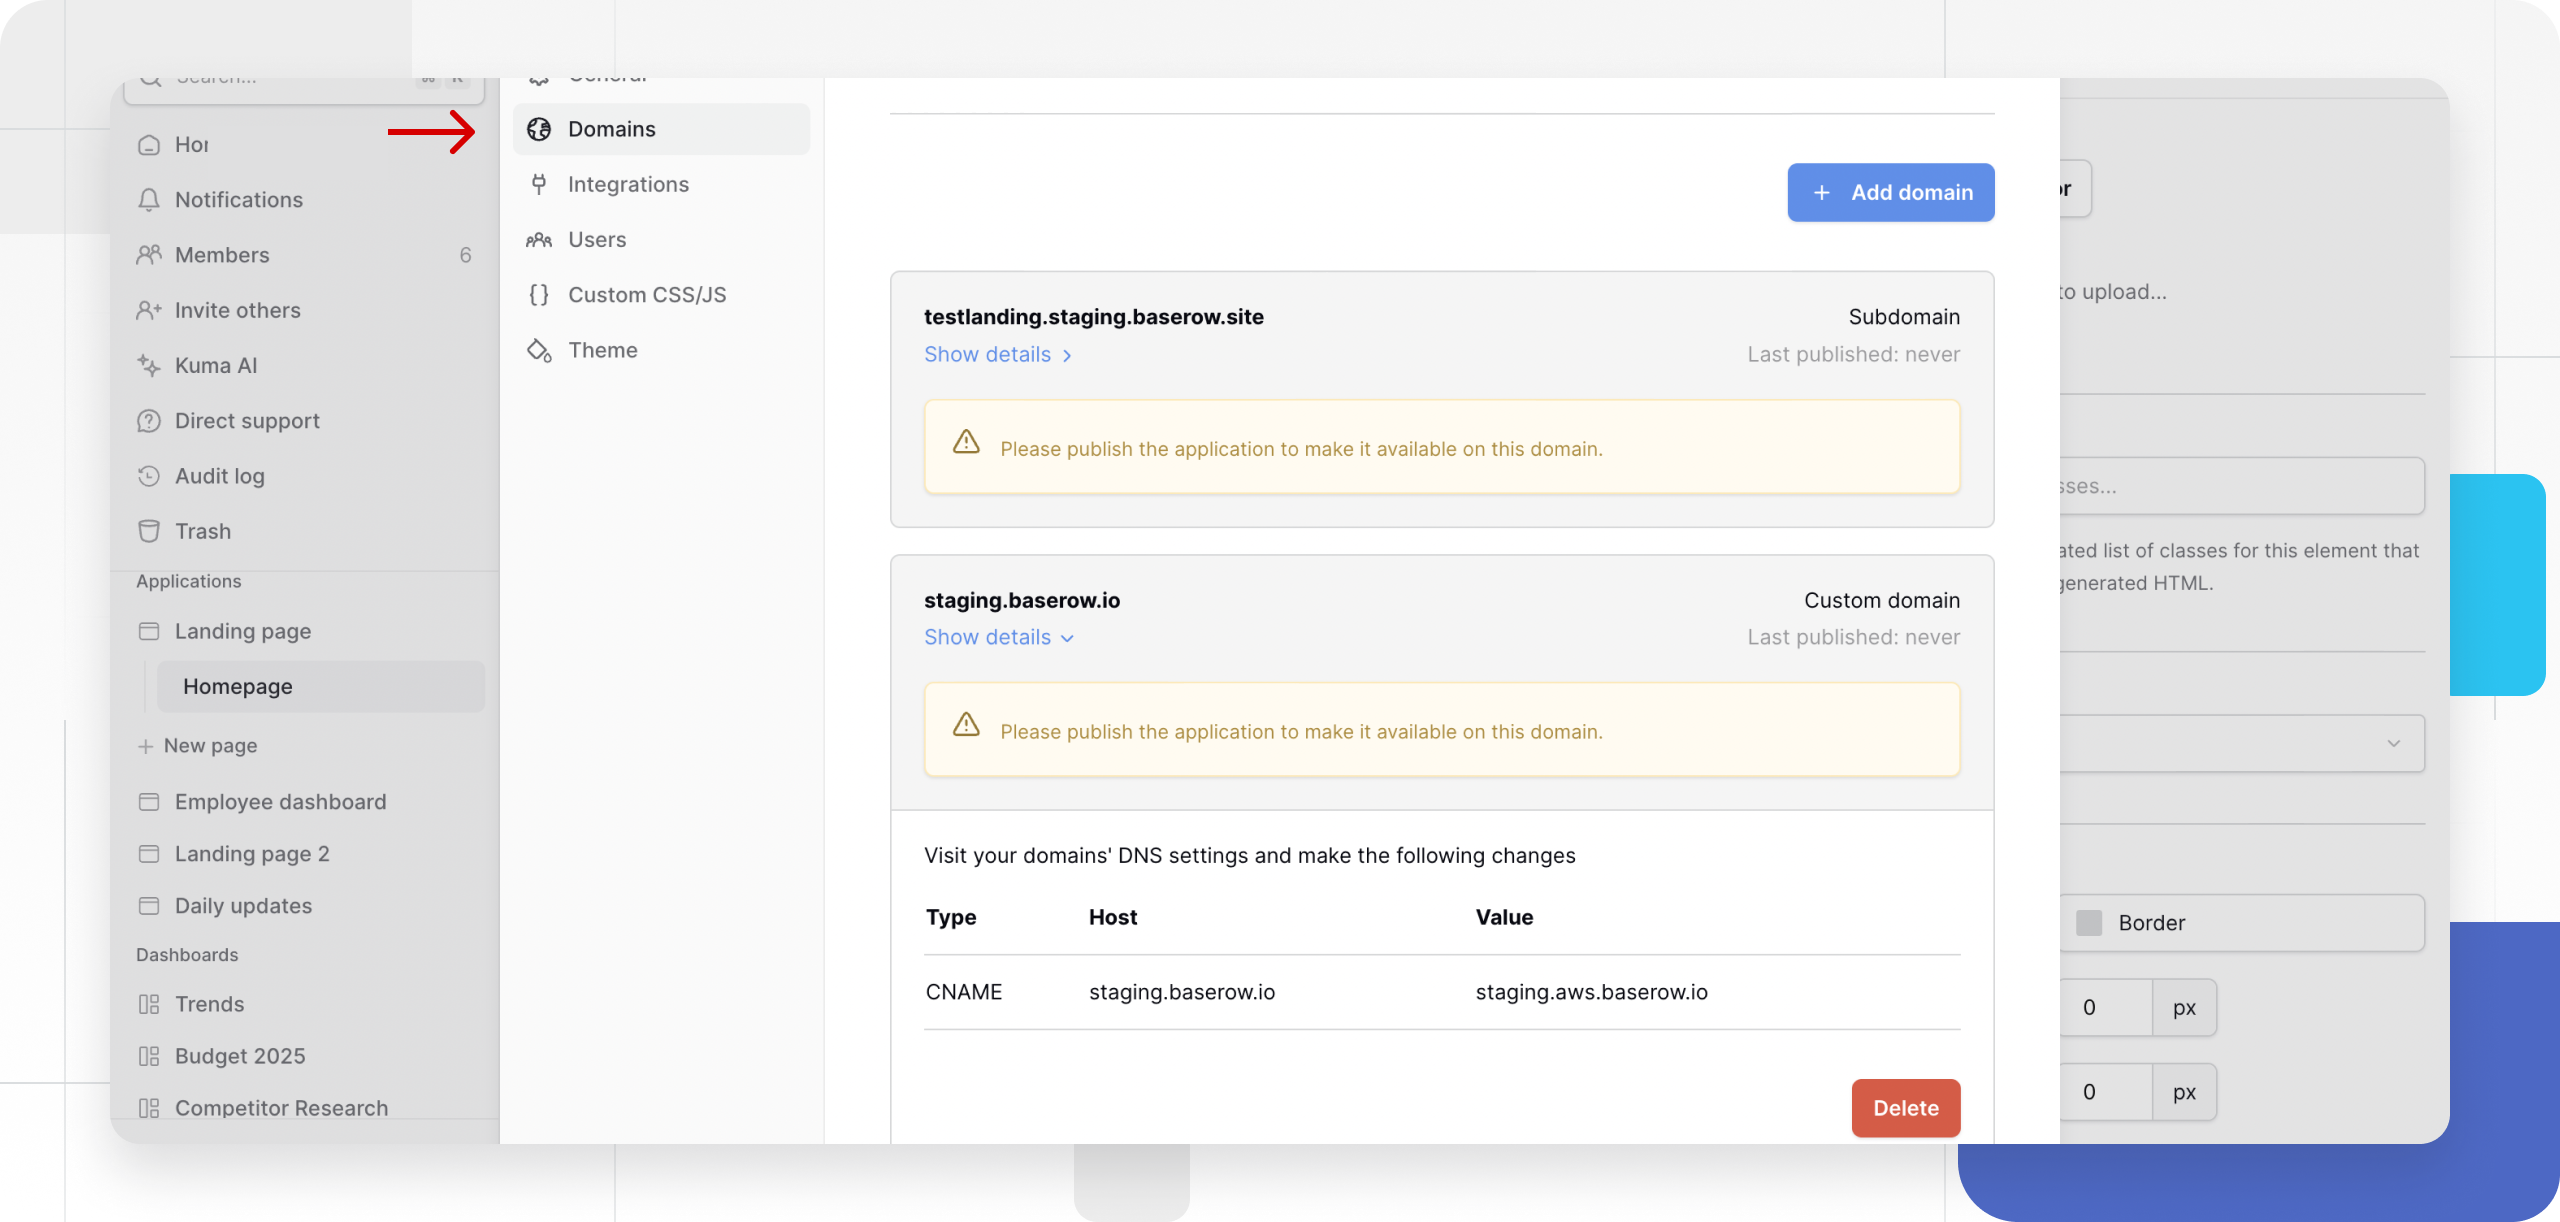
Part 2: Update DNS records
To verify ownership and route traffic, you must create a record with your domain registrar (e.g., GoDaddy, Namecheap, Cloudflare).
- Log in to your domain registrar’s dashboard.
- Locate the DNS Settings or DNS Management page.
- Create a new record with the following settings:
- Type:
CNAME(orALIAS/ANAMEif supported by your provider). - Host/Name: The subdomain part of your URL (e.g.,
portalforportal.example.com). If using the root domain, use@. - Value/Target: Paste the Target Value copied from Baserow in Part 1.
- TTL: Default (usually 1 hour or Automatic).
- Type:
- Save the record.
Part 3: Verify and Publish
- Return to Baserow.
- Baserow will attempt to verify the DNS connection.
- Once the status indicator turns green, go to the Publish button in the top navigation.
- Select your new custom domain and click Publish.
Frequently asked questions (FAQ)
How long does DNS verification take?
DNS changes can take anywhere from a few minutes to 48 hours to propagate across the internet. If your domain does not verify immediately, please wait and try again later.
Do I need to buy an SSL certificate?
No. Baserow automatically provisions and renews SSL certificates (HTTPS) for your custom domains, ensuring your application is secure.
Can I use a “naked” domain (e.g., example.com)?
Yes, but you must ensure your DNS provider supports ALIAS or ANAME records at the root level (or CNAME flattening). Standard CNAME records technically cannot be placed at the root (example.com), only on subdomains (www.example.com).
Why can’t I publish my self-hosted Baserow app using a free Baserow subdomain?
If Baserow is self-hosted, the free Baserow subdomain option appears when the BASEROW_BUILDER_DOMAINS variable is set in your .env file. When this variable is missing, only the Custom Domain option is shown. After setting it and restarting Baserow, the subdomain option becomes available.
You can read more on how to configure your Baserow here.
Related content
Still need help? If you’re looking for something else, please feel free to make recommendations or ask us questions; we’re ready to assist you.
- Ask the Baserow community
- Contact support for questions about Baserow or help with your account