Configure SAML SSO with Microsoft Entra ID (Azure AD)
This guide explains how to configure Single Sign-On (SSO) using Microsoft Entra ID (formerly Azure AD) as your Identity Provider for Baserow.
For other IdPs, visit this page
Feature Availability: SSO is available on the Baserow Advanced and Enterprise plans. You must have a valid license activated to configure these settings.
Overview
Connecting Azure AD allows your users to log in to Baserow using their Microsoft 365 credentials.
The integration requires creating an “Enterprise Application” in the Azure Portal, mapping specific user attributes (claims), and cleaning up the Microsoft metadata XML before importing it into Baserow.
Recommended Protocol: We strongly recommend using SAML 2.0 for Azure AD integrations. Using OpenID Connect (OIDC) with Azure AD is currently not recommended due to PKCE compatibility requirements.
Prerequisites
- Baserow: You must be an Instance Admin on a self-hosted plan.
- Azure: You must have Global Administrator, Cloud Application Administrator, or Application Administrator permissions in your Entra ID tenant.
Phase 1: Create the Azure Application
- Log in to the Microsoft Entra Admin Center (formerly Azure AD Portal).
- Navigate to Entra ID -> Enterprise applications in the side bar.
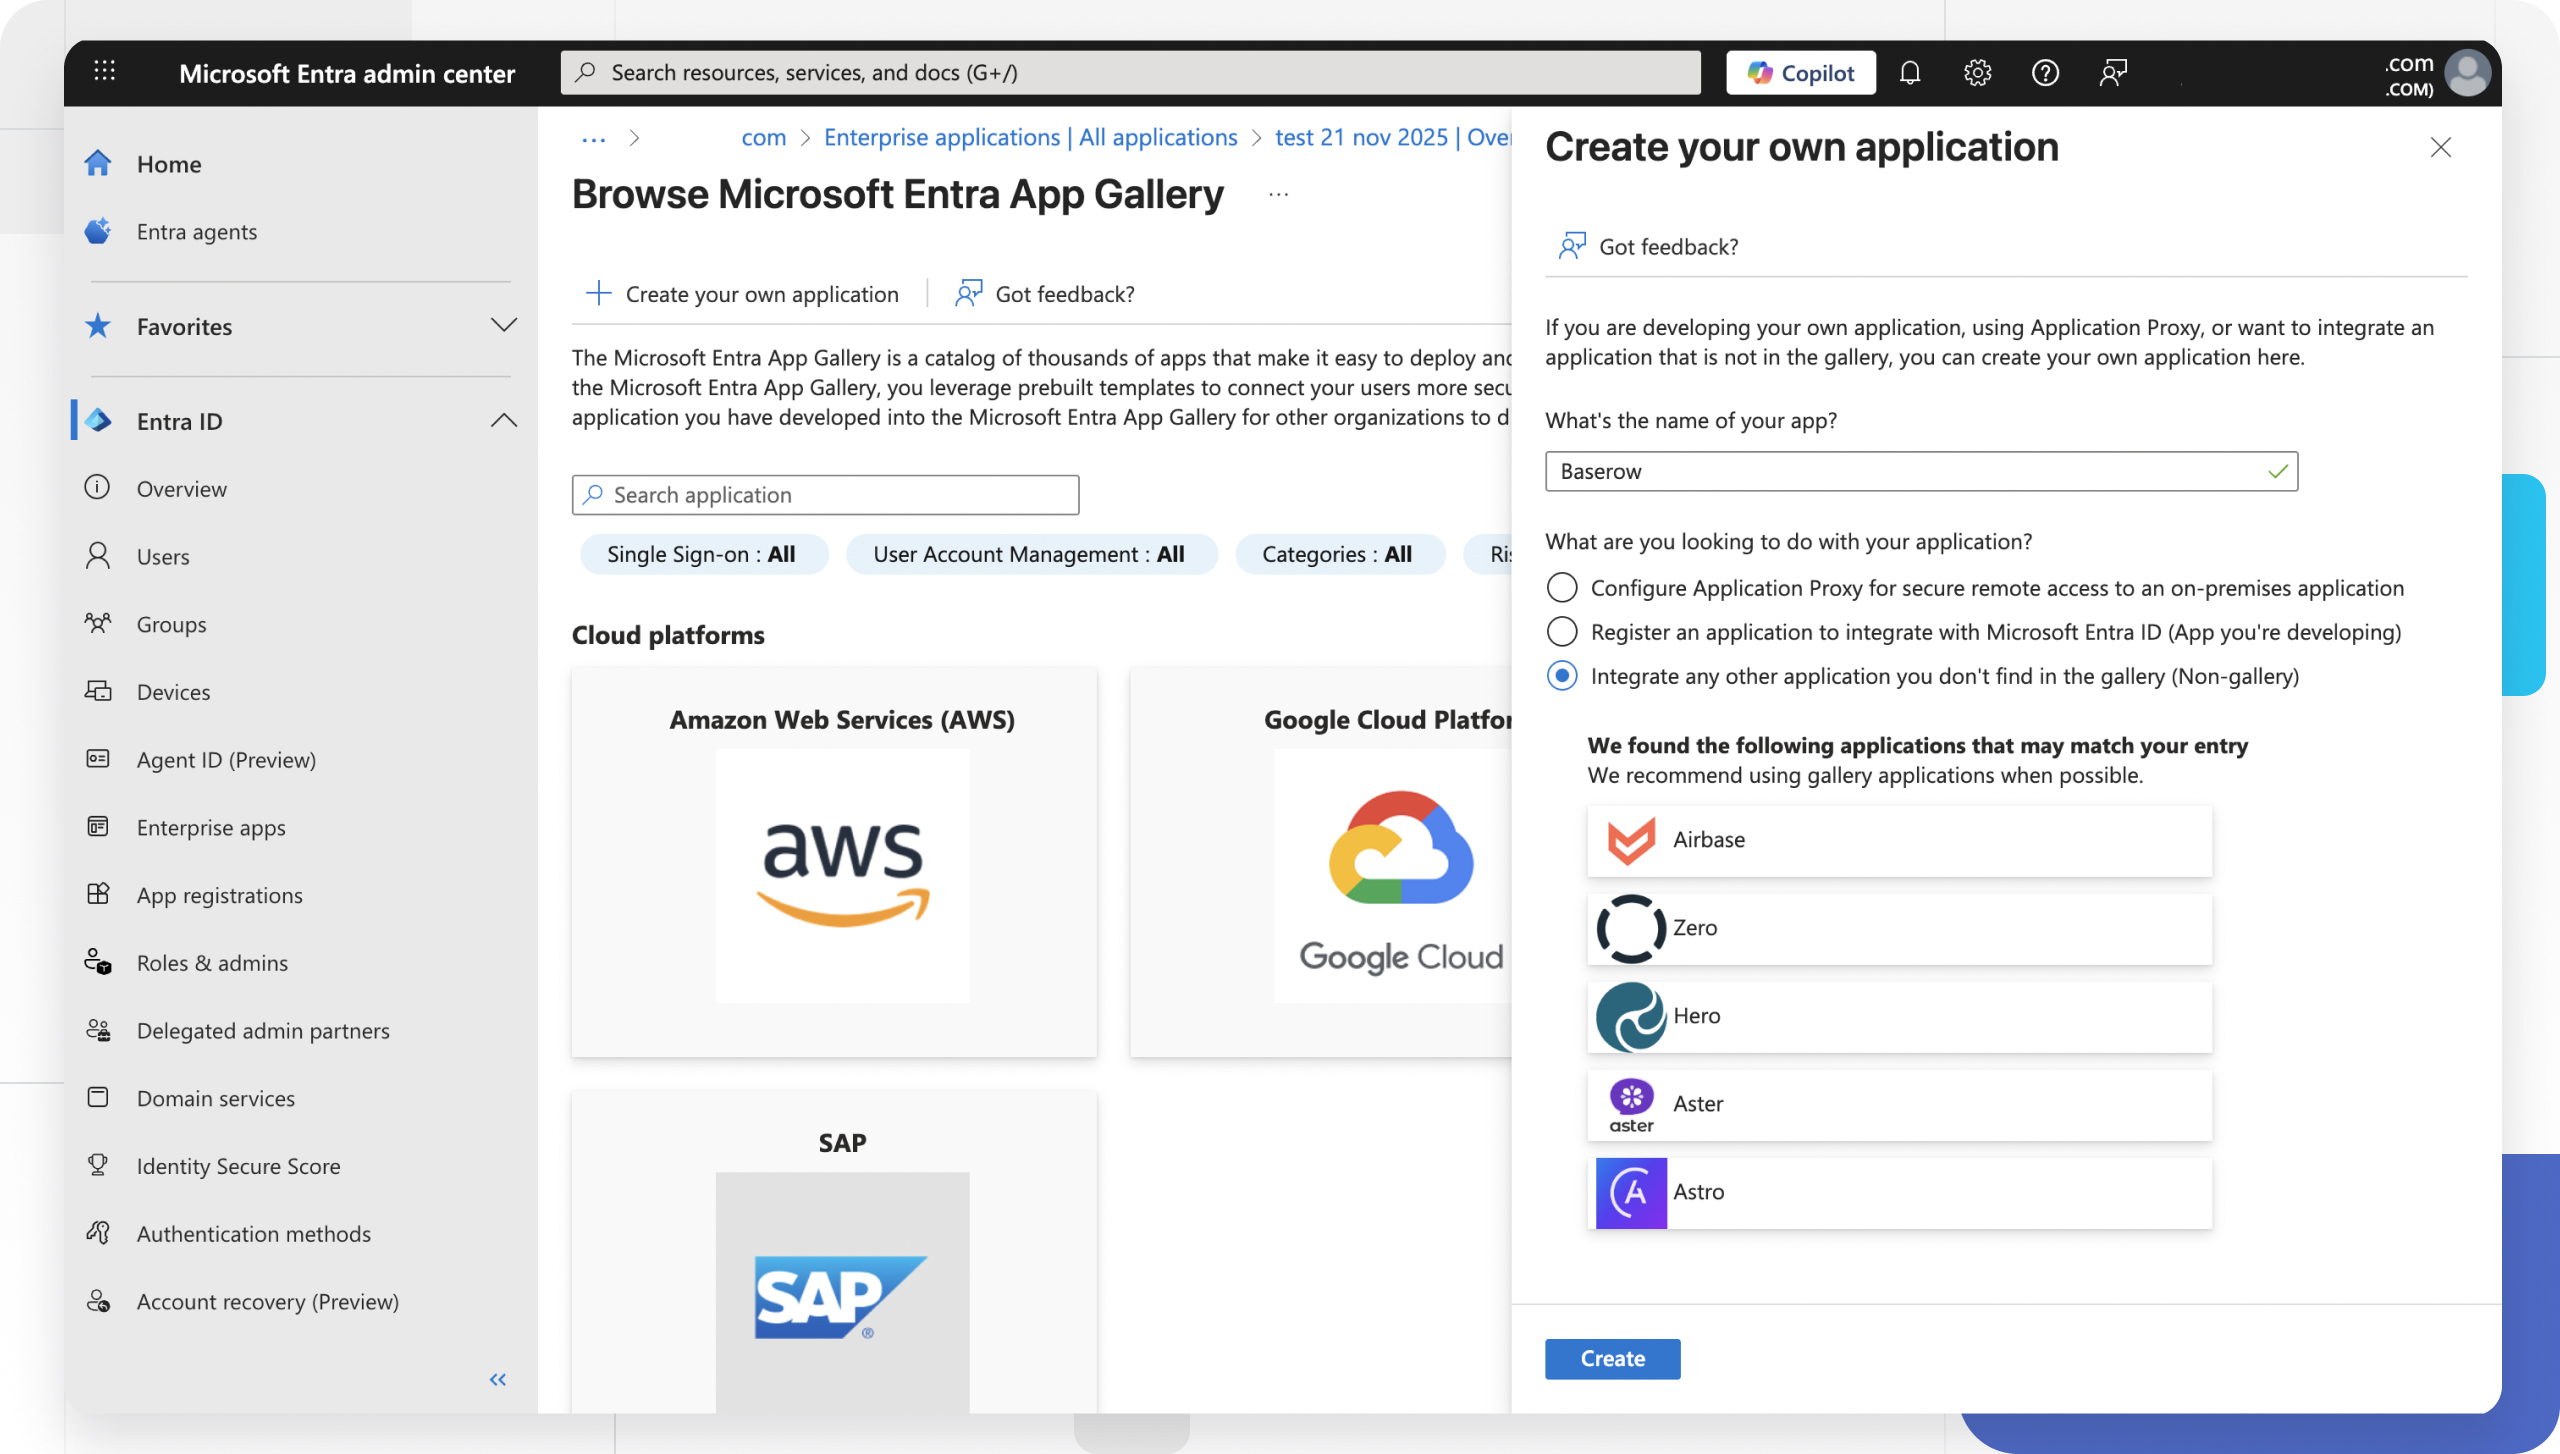
- Click + New application.
- Click + Create your own application.
- Enter a name (e.g.,
Baserow). - Ensure “Integrate any other application you don’t find in the gallery (Non-gallery)” is selected.
- Click Create.
- Once created, select Single sign-on from the left sidebar and choose SAML.
Phase 2: Configure Baserow URLs
You need to copy specific URLs from Baserow to Azure to establish the connection.
- In Baserow: Open a new tab, log in as Instance Admin, and go to Admin tools -> Authentication.
- Click + Add Provider and select SSO SAML Provider.
- Copy the Single Sign On URL and Default Relay State URL.
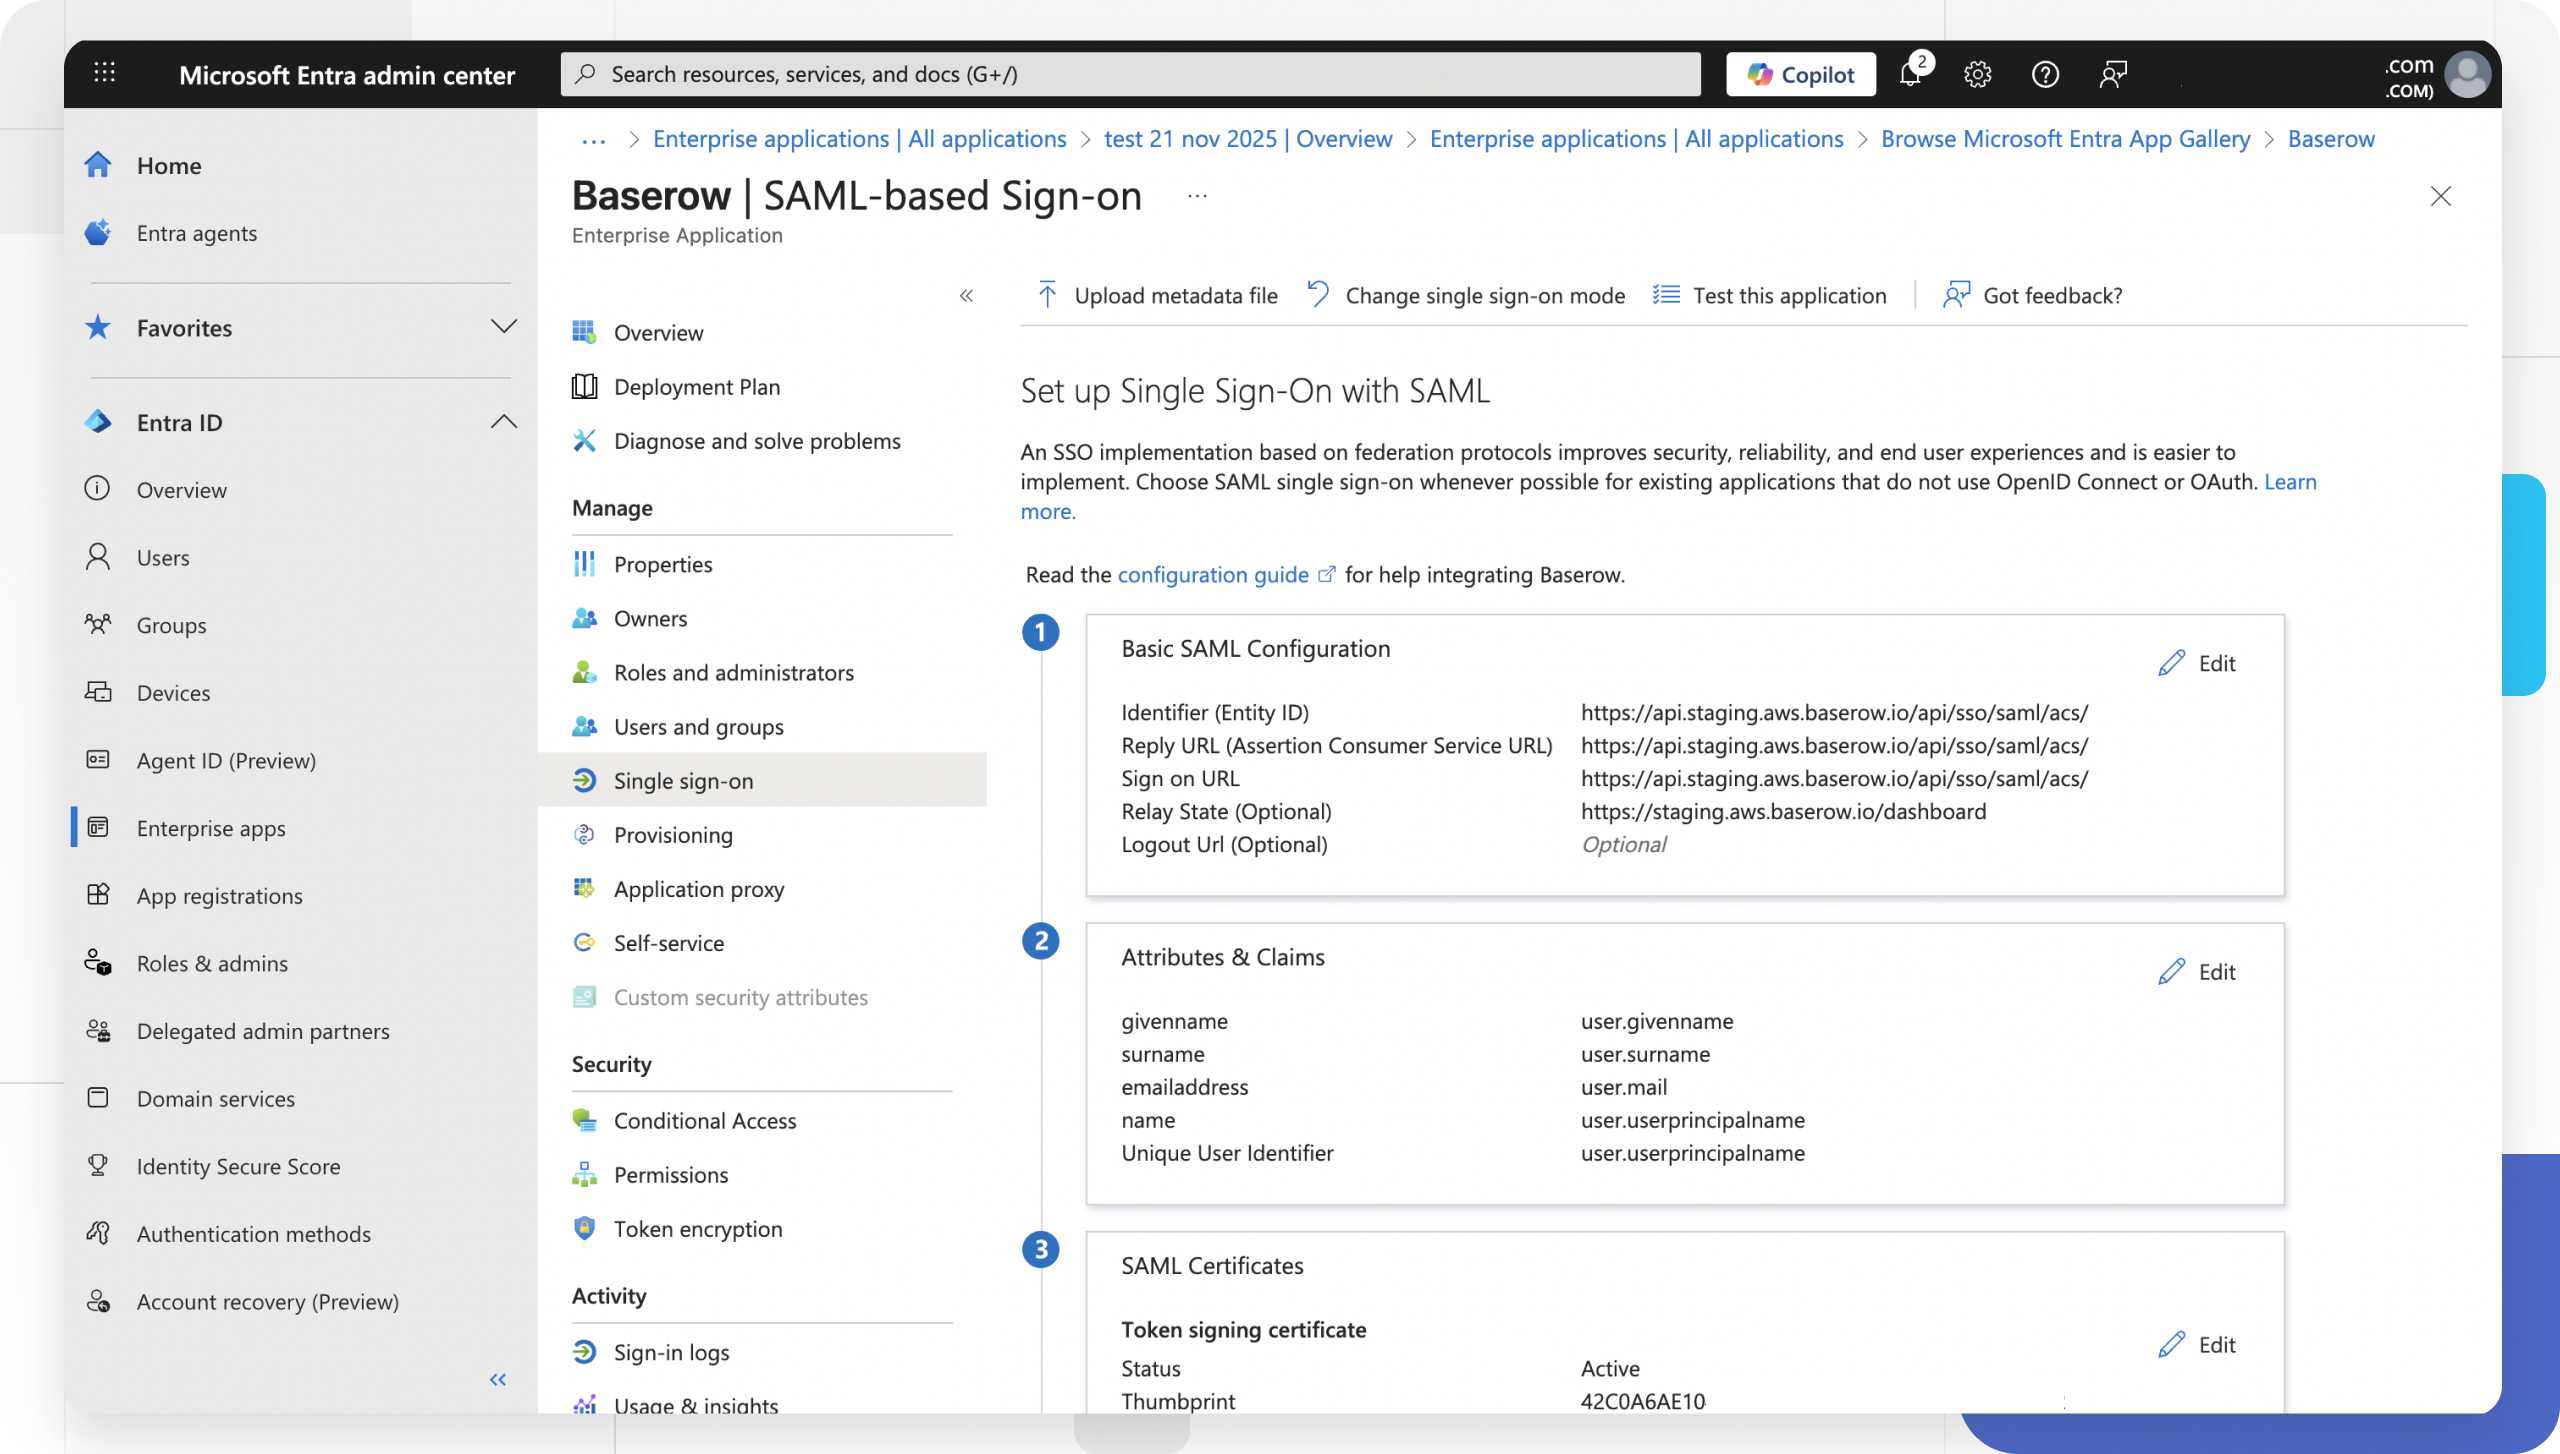
- In Azure: On the “Set up Single Sign-On with SAML” page, click Edit in Section 1 (Basic SAML Configuration).
- Paste the values as follows:
| Azure Field | Value from Baserow |
|---|---|
| Identifier (Entity ID) | Paste Single Sign On URL |
| Reply URL (Assertion Consumer Service URL) | Paste Single Sign On URL |
| Sign on URL | Paste Single Sign On URL |
| Relay State | Paste Default Relay State URL |
- Leave Logout URL empty (Single Log Out is not currently supported).
- Click Save.
Learn more: Get your Baserow SSO URLs
Phase 3: Configure attributes & claims
You must map Azure’s user data to the format Baserow expects.
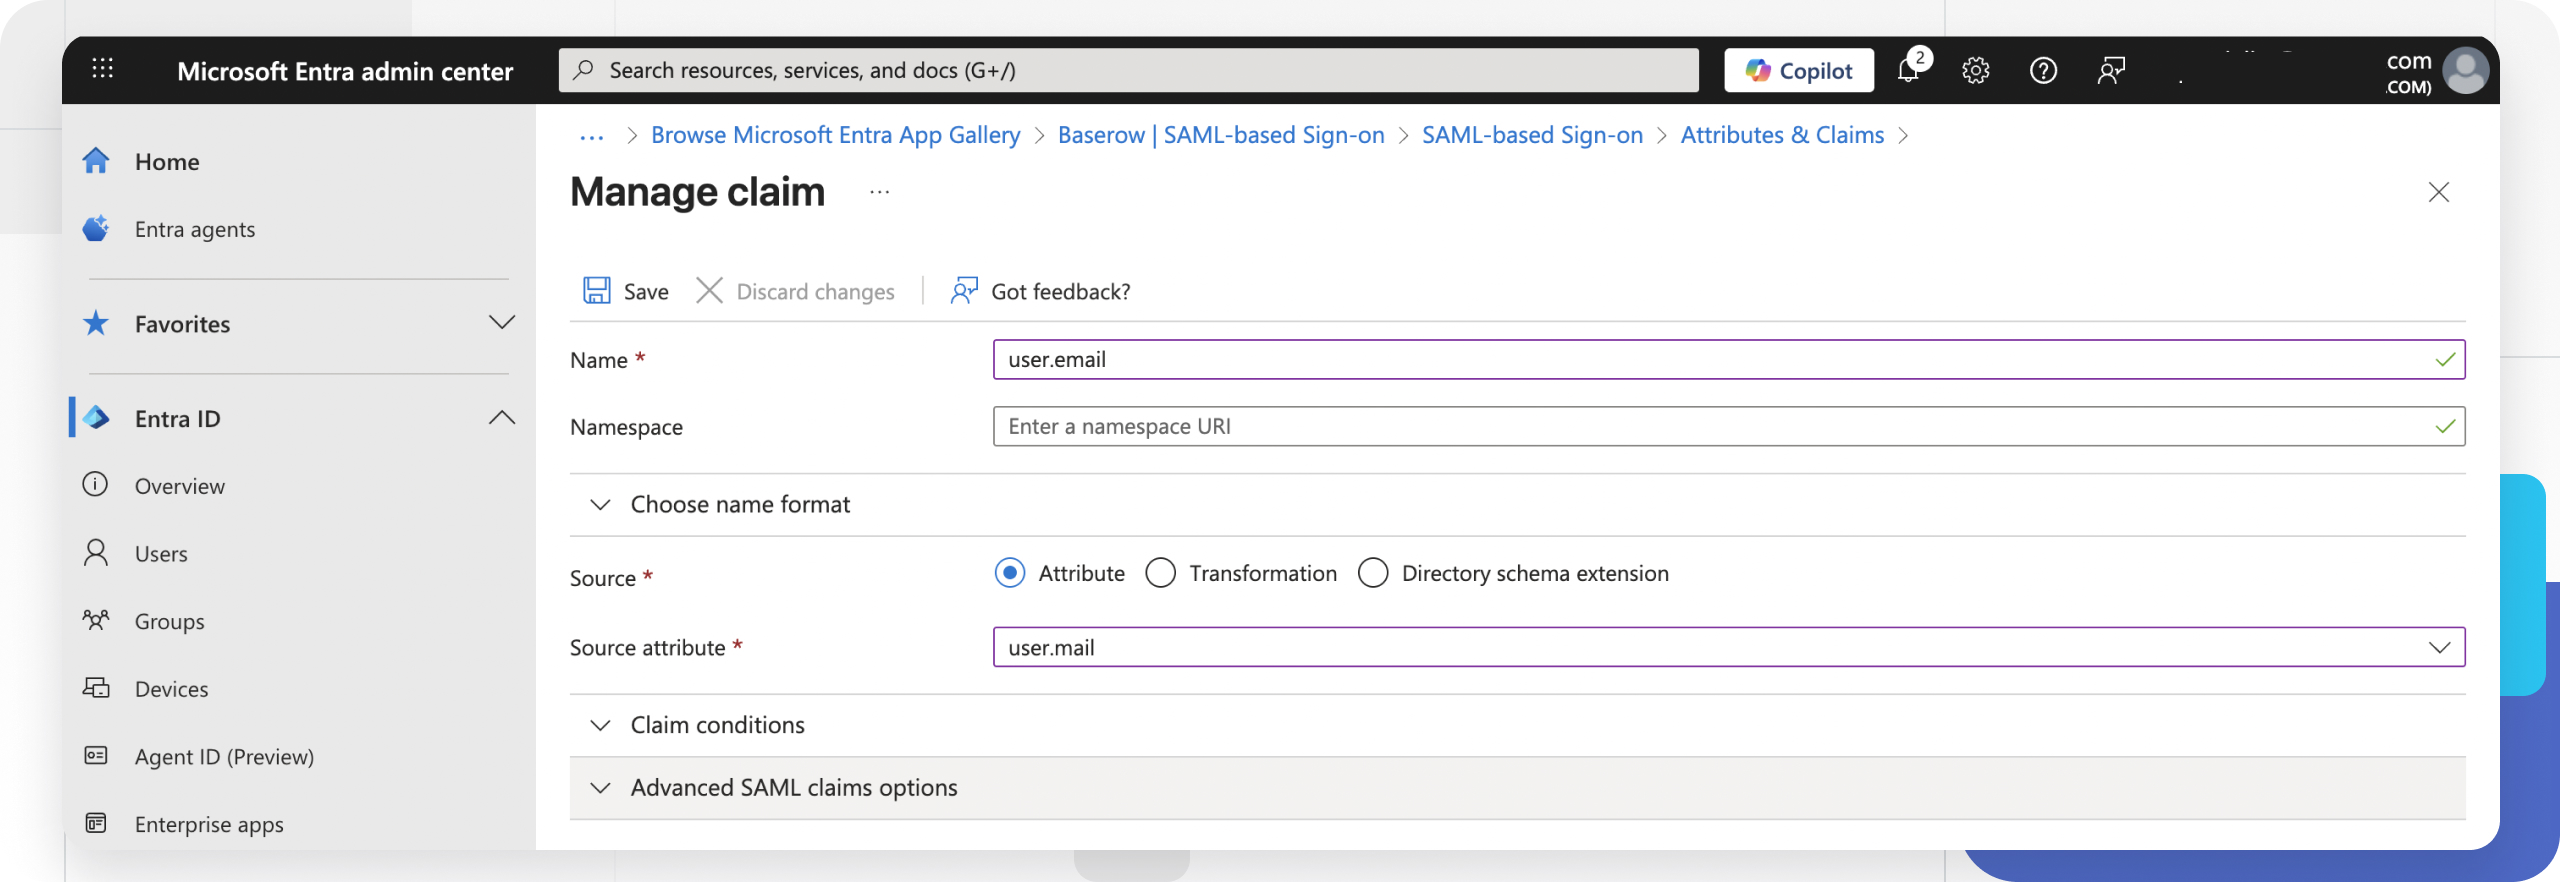
- In Azure, click Edit in Section 2 (Attributes & Claims).
- Click Add new claim to create the following mappings.
- Note: You may need to delete existing default claims if they conflict.
| Name (Baserow Variable) | Source Attribute (Azure Value) |
|---|---|
user.email |
user.mail |
user.first_name |
user.givenname |
Ensure the Namespace field is left completely blank for these claims. If Azure includes a namespace URL (e.g.,
http://schemas.xml...), Baserow will not recognize the attribute.
- Click Save after adding each claim.
Phase 4: Import and clean metadata
Azure exports metadata that includes “Web Services Federation” tags by default. Baserow only supports SAML 2.0, so you must remove these extra tags for the import to work.
- In Azure, scroll to Section 3 (SAML Certificates).
- Click Download next to Federation Metadata XML.
- Open the downloaded XML file in a text editor (like Notepad or TextEdit).
- Clean the XML:
- Locate the tags starting with
<RoleDescriptor ...>. - Delete everything starting from
<RoleDescriptordown to and including the closing</RoleDescriptor>tag. - Goal: You should only have the
IDPSSODescriptorsections remaining.
- Locate the tags starting with
- Import to Baserow:
- Return to the Baserow Add SAML Provider modal.
- Paste the edited XML text into the Metadata field.
- Click Save.
Learn more: Add SAML Provider
Phase 5: Assign users
Users cannot log in until they are explicitly assigned to the application in Azure.
- In the Azure Portal sidebar, select Users and groups.
- Click + Add user/group.
- Select the users or groups you wish to authorize.
- Click Assign.
Troubleshooting & common issues
Error parsing metadata
If Baserow refuses the metadata, ensure you successfully removed the <RoleDescriptor> tags in Phase 4. Baserow’s parser will reject the file if these Microsoft-specific tags are present.
OIDC Error: “Proof Key for Code Exchange is required”
If you attempted to set this up using OpenID Connect instead of SAML, you may see this error regarding PKCE. Azure AD enforces PKCE (Proof Key for Code Exchange) for security on OpenID Connect connections. Please switch to the SAML 2.0 method described in this guide.
My users are created without names.
This is an issue with Attributes & Claims. Check that you cleared the “Namespace” field in Azure AD. Baserow looks for user.first_name, not http://schemas.xmlsoap.org/ws/2005/05/identity/claims/givenname.
Frequently Asked Questions (FAQ)
Can I map Azure AD Groups to Baserow Roles?
Not currently. While users are automatically created upon login (JIT provisioning), their Azure group memberships are not used to assign roles (e.g., Admin vs. Editor). You must manually assign roles in Baserow after the user logs in for the first time.
Why do I need to edit the XML file?
Microsoft includes configuration data for multiple protocols (SAML and WS-Federation) in a single file. Baserow strictly validates the file as SAML 2.0, so the extra WS-Federation data causes a validation error if not removed.
The Admin UI shows a generic error. How do I troubleshoot?
If the Baserow UI displays a generic “Something went wrong” message during setup, checking the Baserow container logs is the most reliable way to find the root cause (e.g., XML parsing errors or missing attributes).
Related content
Still need help? If you’re looking for something else, please feel free to make recommendations or ask us questions; we’re ready to assist you.
-
Contact support for questions about Baserow or help with your account.
- On this page
- Overview
- Prerequisites
- Phase 1: Create the Azure Application
- Phase 2: Configure Baserow URLs
- Phase 3: Configure attributes & claims
- Phase 4: Import and clean metadata
- Phase 5: Assign users
- Troubleshooting & common issues
- My users are created without names.
- Frequently Asked Questions (FAQ)
- Related content