How to purchase and install a self-hosted license
Baserow paid licenses unlock paid features on self-hosted installations. This approach gives you complete control over which users access paid features while maintaining data sovereignty on your servers.
This guide covers how to purchase and install a Baserow self-hosted license. Visit this page if you want to purchase a cloud subscription. Visit this page to activate an Enterprise license.
Overview
Self-hosted licenses work differently from cloud subscriptions. Instead of automatic feature activation, you receive a license key that must be manually registered with your specific Baserow instance.
The licensing system operates on a seat-based model where you assign paid access to specific users rather than entire workspaces. This flexibility allows mixing free and paid users within the same Baserow installation.
Please get in touch with a sales representative if you’re interested in the Enterprise plan.
Step-by-step license installation
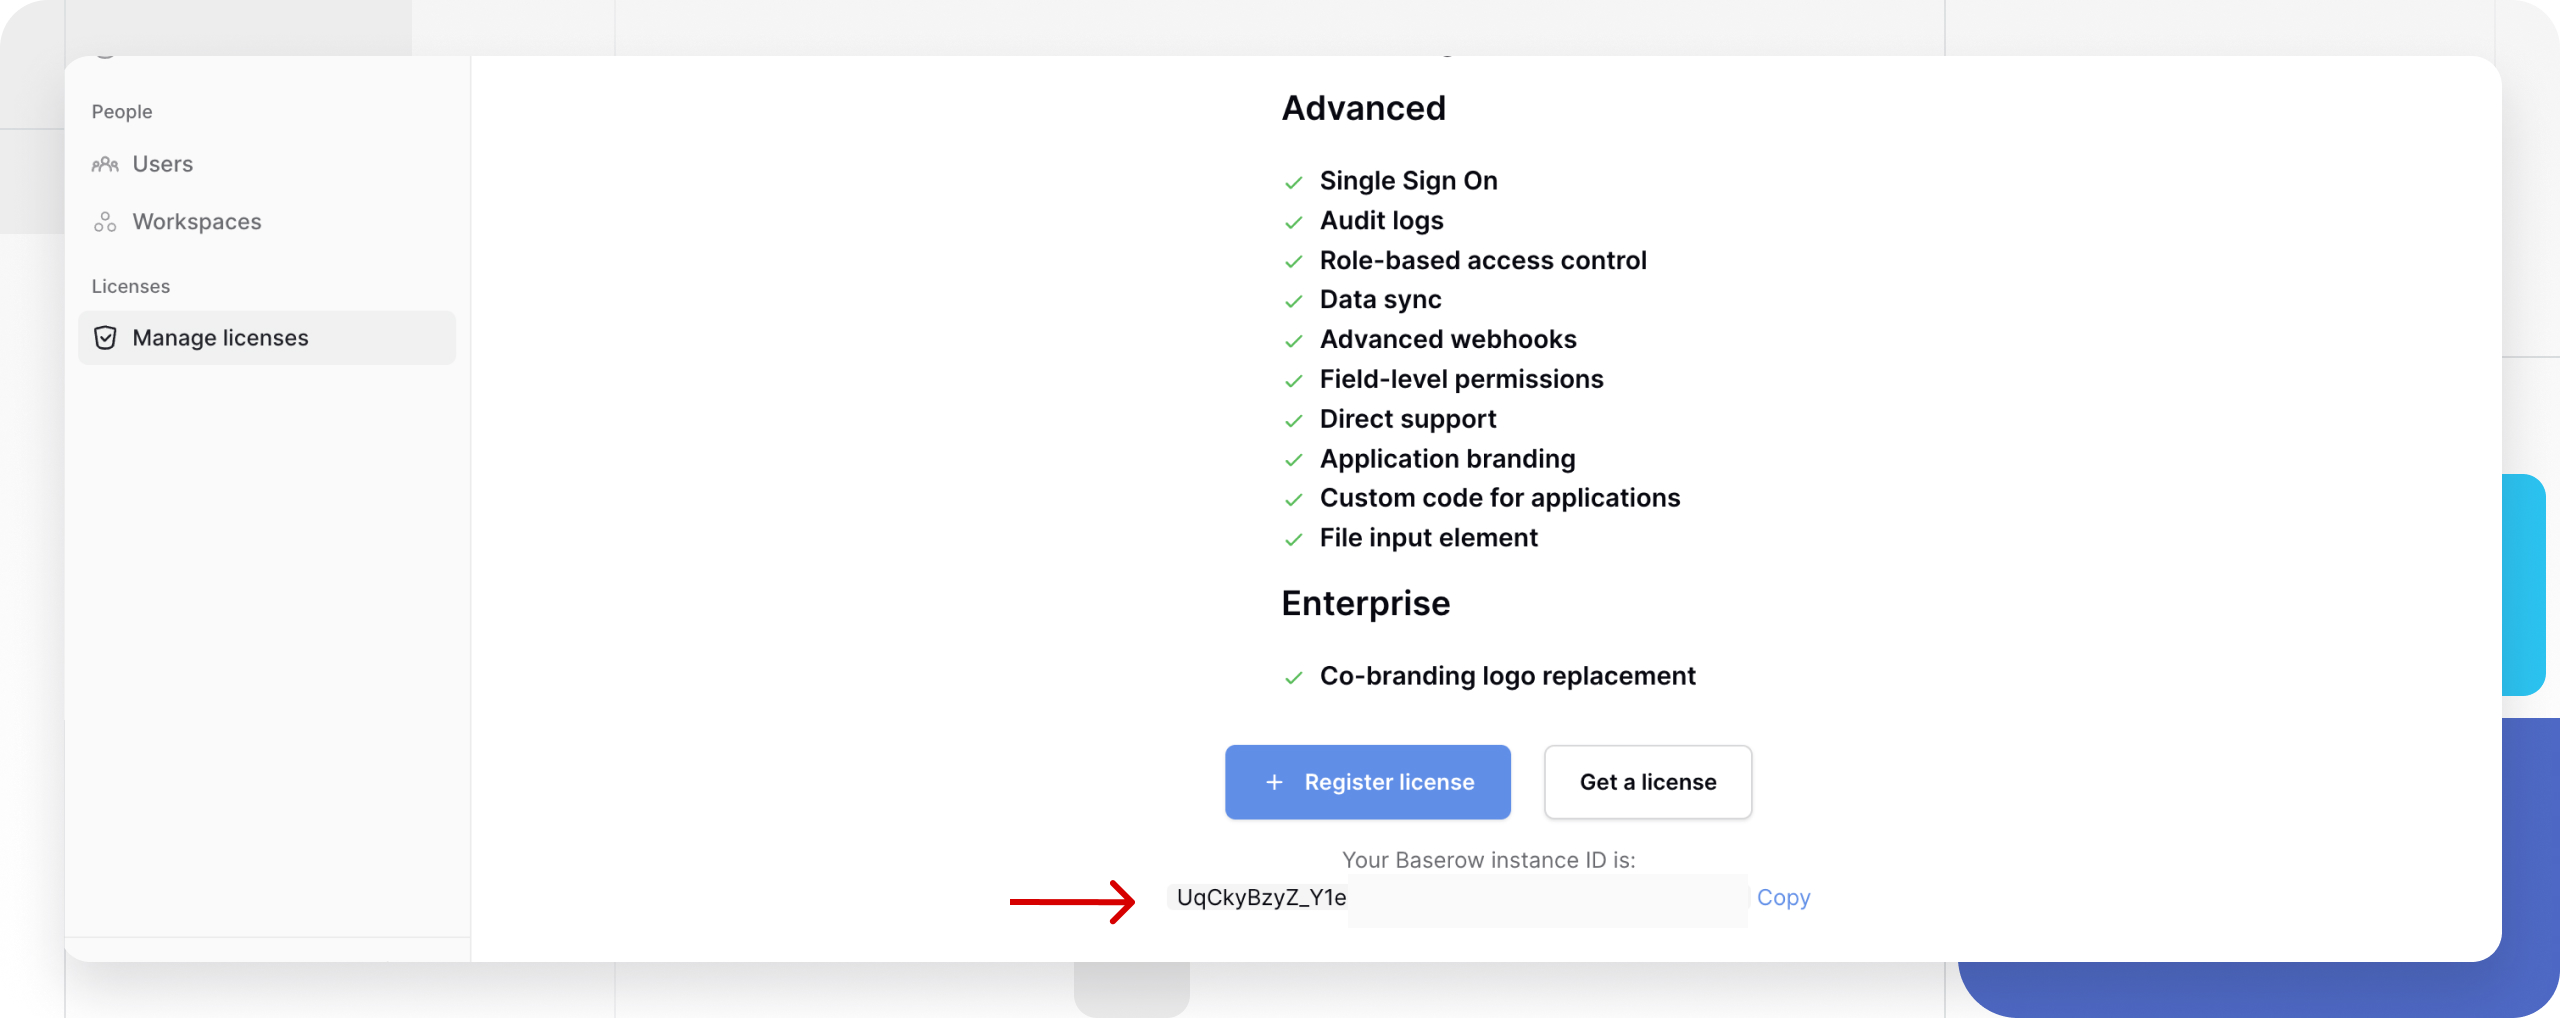
Step 1: Get your instance ID
Your instance ID connects your self-hosted installation to the license. Only Instance Admins can access this information through the admin panel.
- Log in to your self-hosted Baserow as an Instance Admin.
- Click on your workspace in the top left corner -> Admin tools -> Manage licenses.
- Copy your unique instance ID.
Step 2: Access subscription portal
A license can only be obtained on baserow.io. Sign in to https://baserow.io, then click on your workspace in the top left corner -> Subscriptions. If you have existing subscriptions, click on the + Add new button at the top-right of the page.
If you have already purchased a license, it will be delivered to you by email, and you can get it from the overview in your account.
Learn more: Manage existing subscription
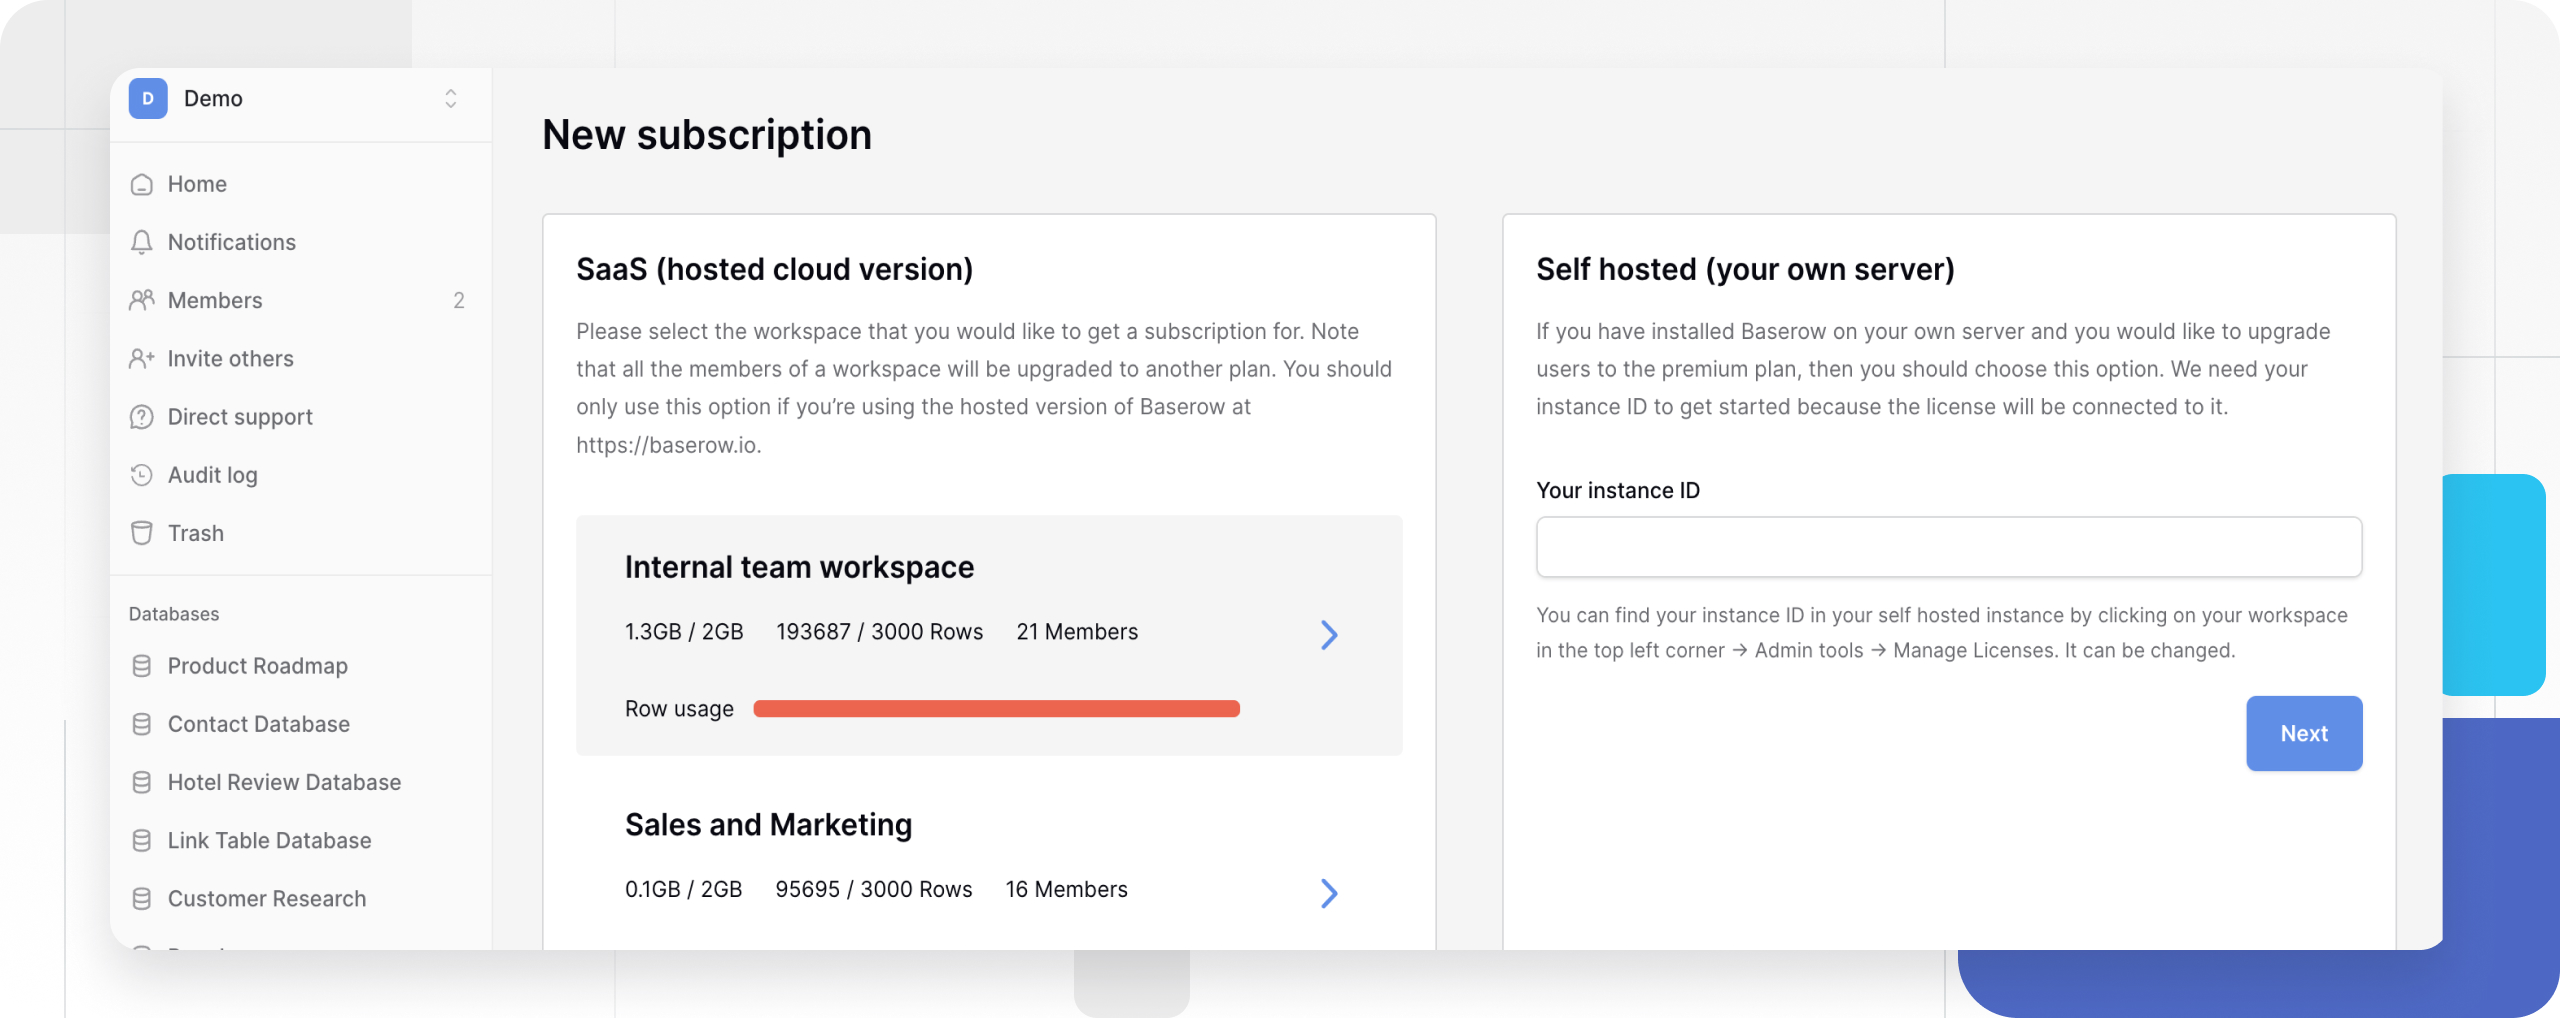
Step 3: Select the self-hosted option
Within the subscriptions page, the right side of the screen will hold the self-hosted version. Choose this option if you have installed Baserow on your own server. Visit this page to purchase a cloud subscription to set up your Baserow database at baserow.io.
Step 4: Enter instance ID
On the Subscriptions page, enter your instance ID in the field provided and click Next. We need your instance ID because the license will be connected to it.
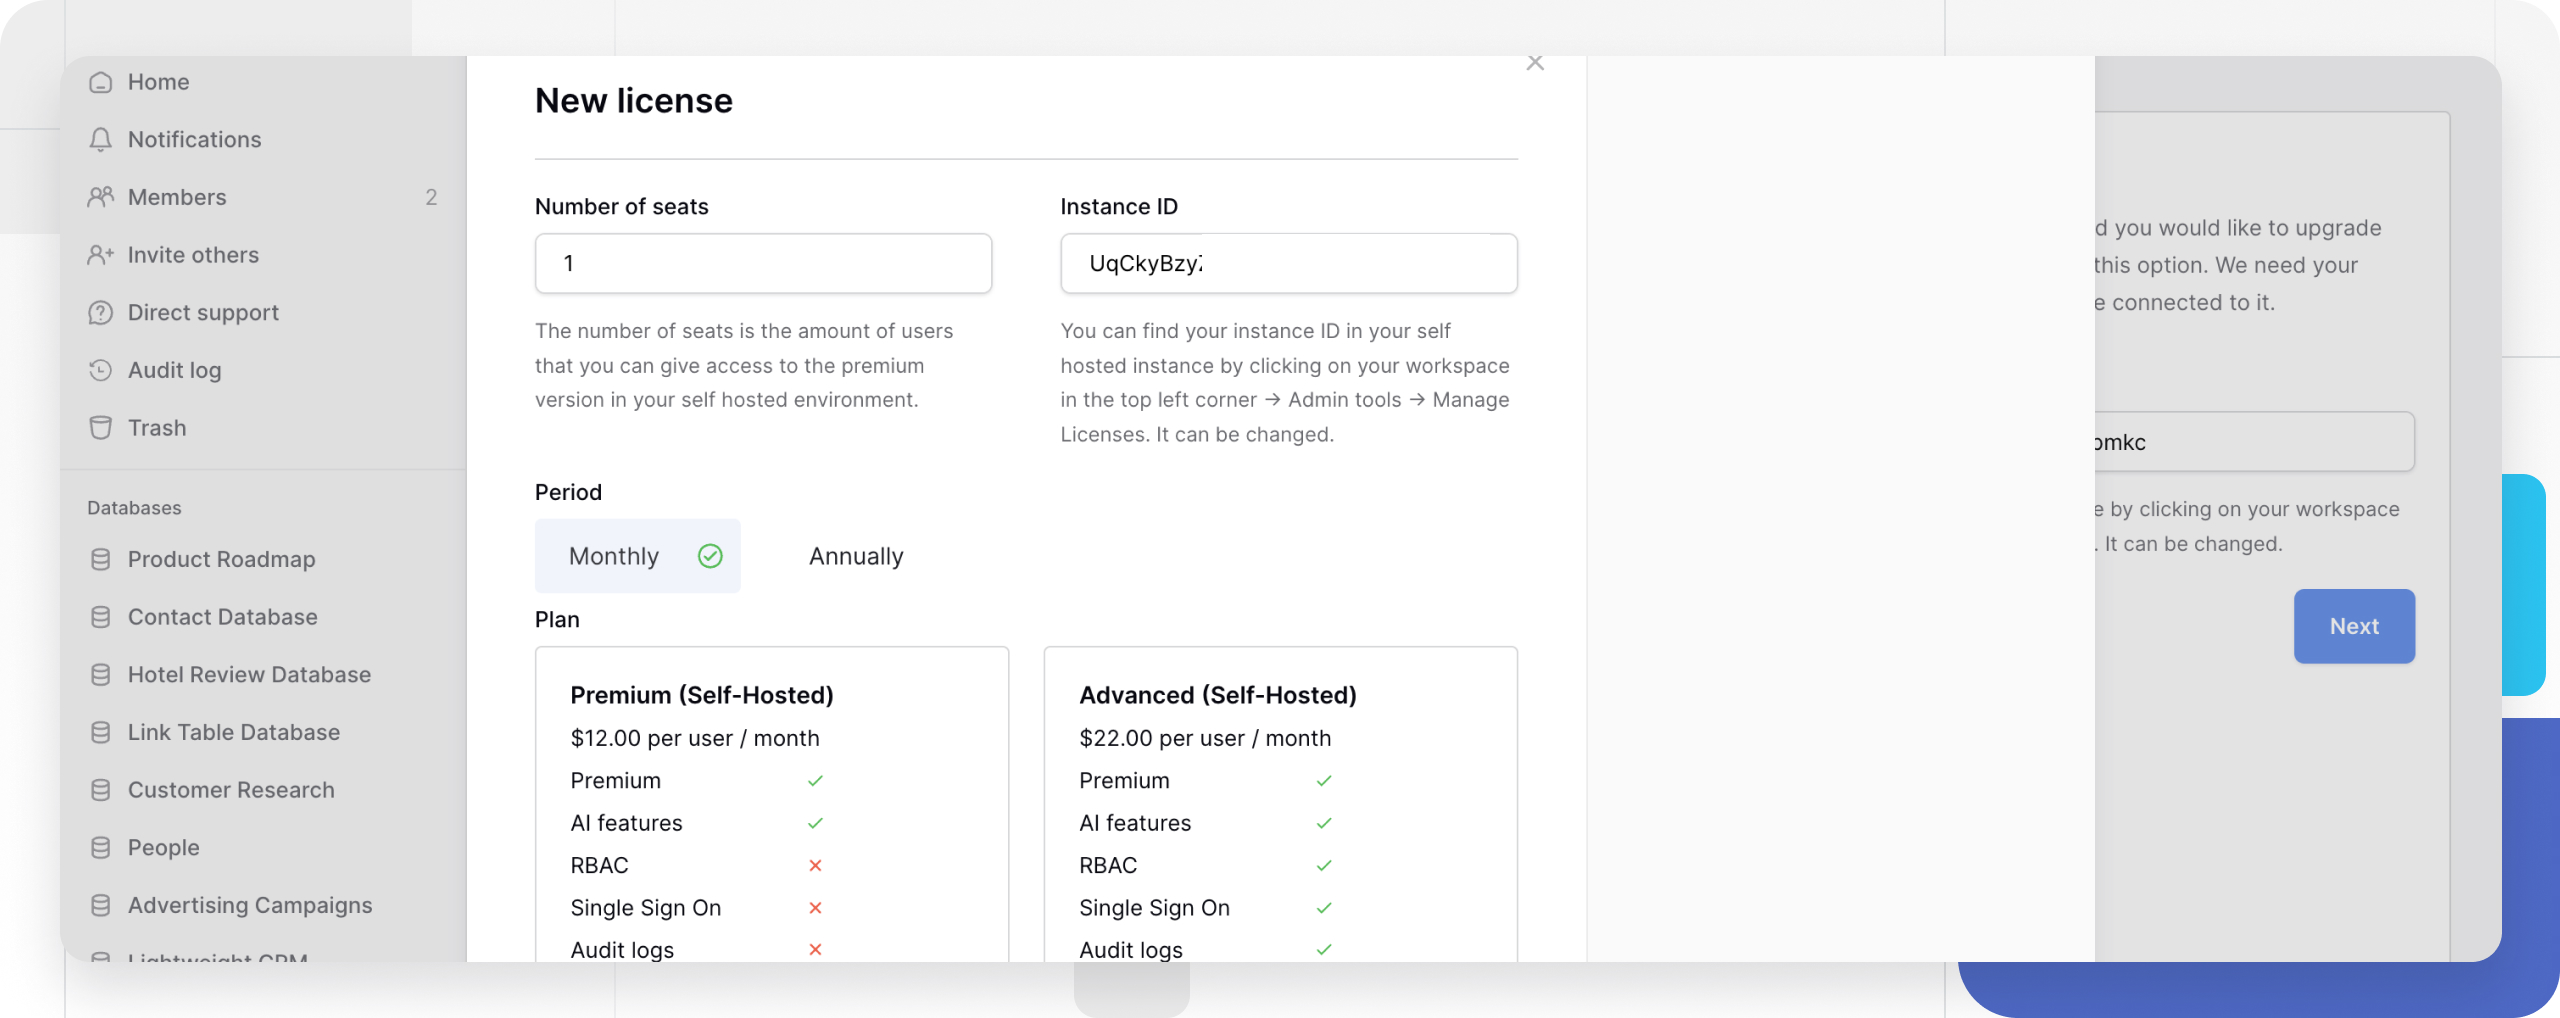
Step 5: Configure subscription
Next, select the number of seats, payment period and payment plan.
When you upgrade to the Advanced plan, start by buying only the number of paid seats you need. Once your license is active, you can then invite free users to join your workspace. If you add everyone during the upgrade, the system won’t separate free users from paid users, and you’ll be billed for all of them.
Subscriptions are priced per seat, and you can choose to be charged monthly or annually. You can choose the number of seats you want to purchase and adjust it at any time.
Then click Subscribe.
Step 6: Complete payment
You will be required to enter your payment card information and authorise payment. The price will be prorated when the number of seat changes. In order to proceed with your payment, we may need you to authenticate with your bank.
No free roles exist in the Premium plan, as there is no role-based permission. Every user added to the Premium plan is a billable user.
Step 7: Download license key
Once your transaction has been completed. You will find your subscription on the overview page.
After you purchase a license, you will be able to download a license key that can be used to register your Baserow instance.
Navigate to Subscriptions → License subscriptions → More details. Click Reveal license key to display your key
Copy and paste the license key in the field.
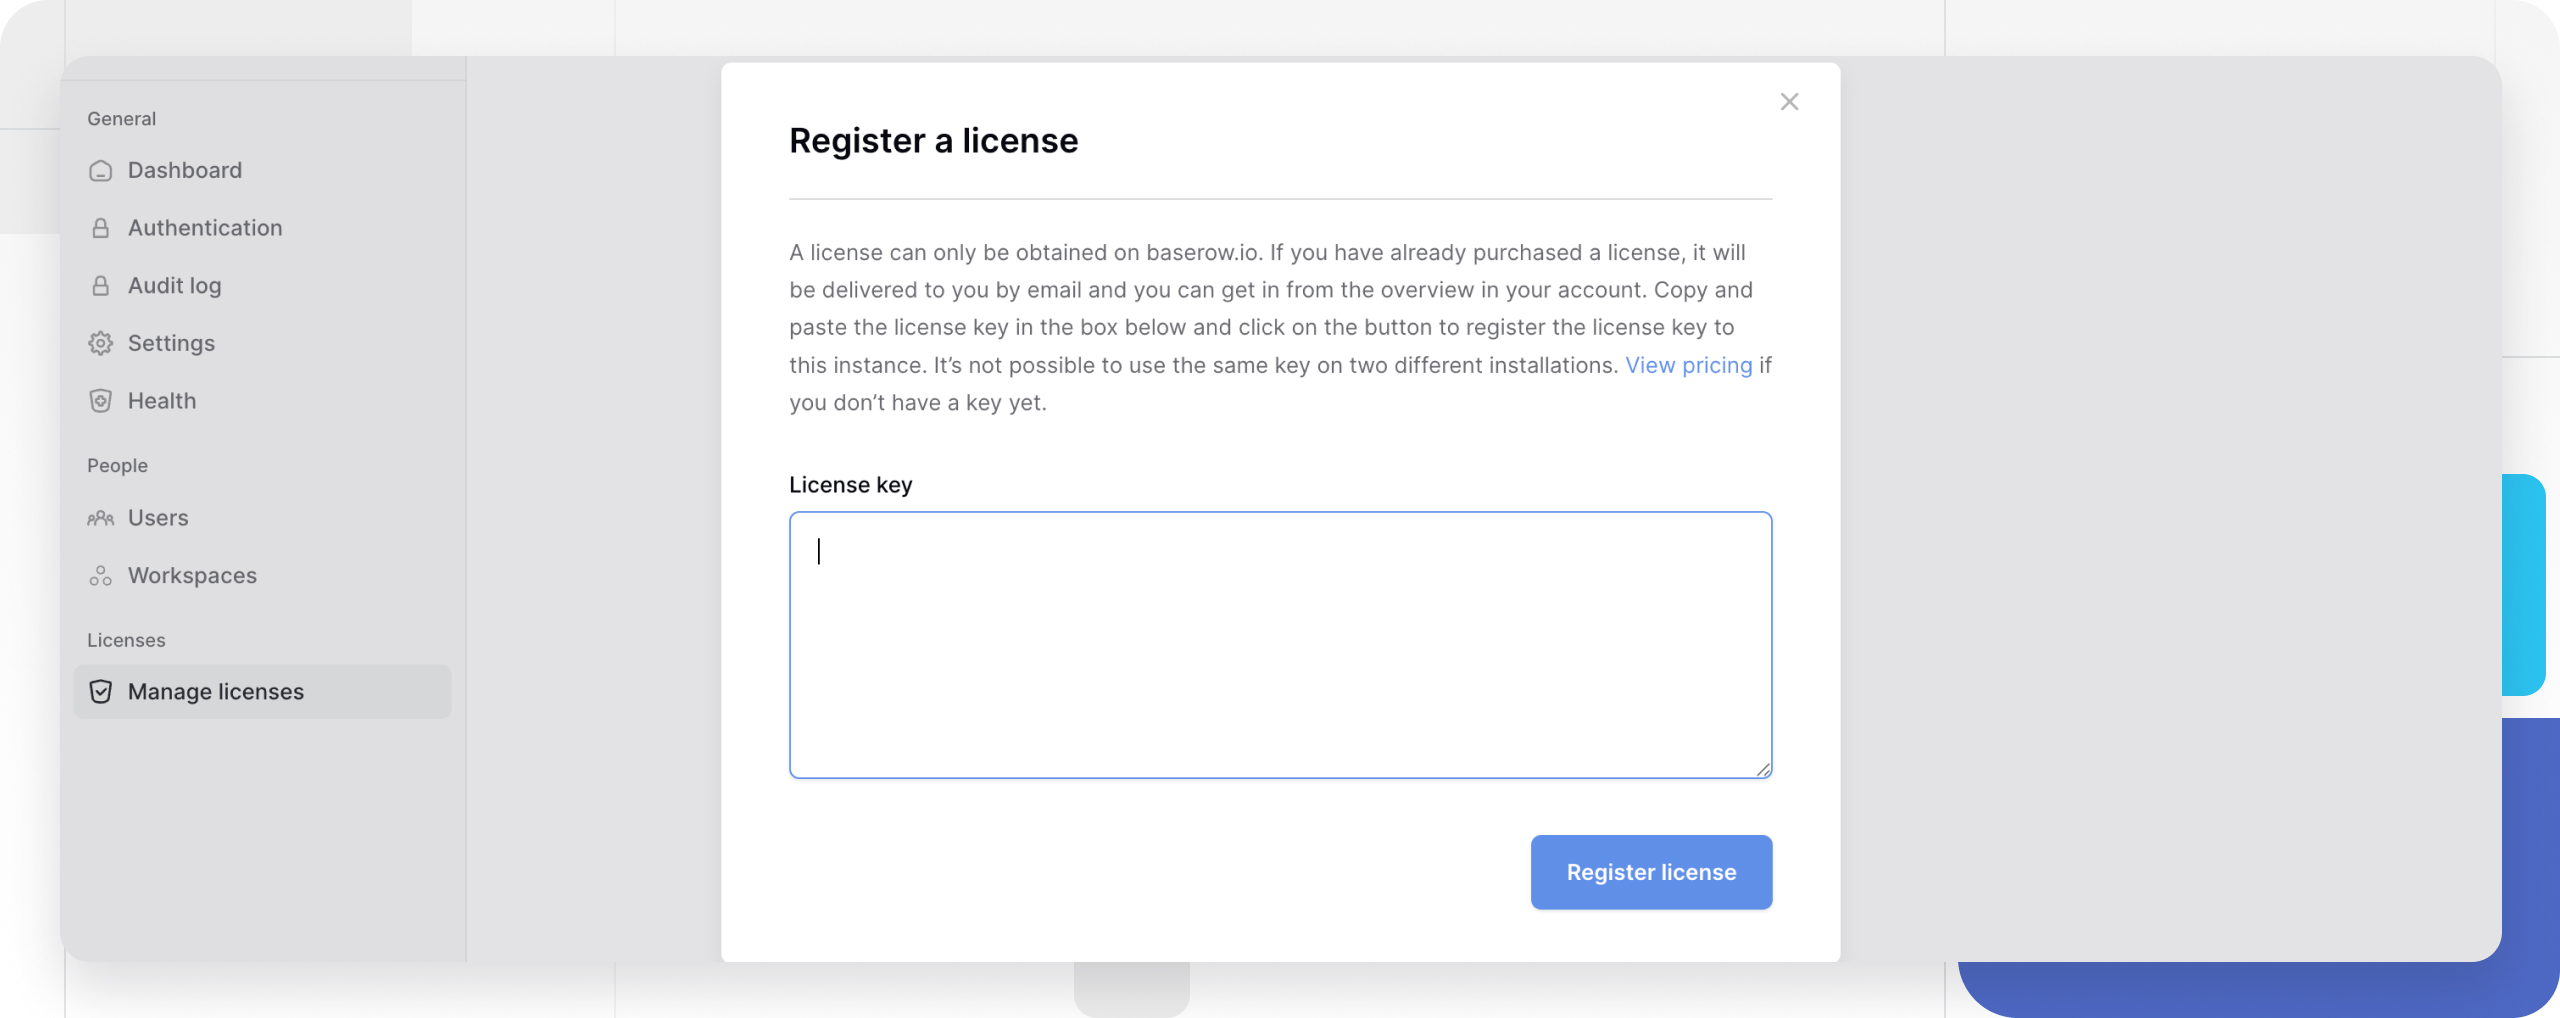
Step 8: Register license with your instance
Register it in your self-hosted instance to activate paid features for selected users. It’s not possible to use the same key on two different installations.
- In your self-hosted instance, click on your workspace in the top left corner -> Admin tools -> Manage licenses.
- Copy and paste your license key into the provided field
- Click Register license
Managing user assignments
When upgrading to the Advanced plan, purchase only the paid seats first. After your license is active, you can invite the free users to the workspace. This is to avoid being charged for both the free and paid users. If you add all users when upgrading, the license tool will not distinguish free and paid roles, and thus will charge all users.
After registering your license, assign paid seats to specific users. Select which registered users can access paid features. Assigned users gain paid access across all workspaces. Non-assigned users continue with free plan limitations.
Keep in mind that the Premium plan works differently. It doesn’t support free roles or role-based permissions. Every person you add under Premium counts as a billable user.
You can modify user assignments anytime through the admin panel, allowing flexible upgraded access management as your team changes.
Learn more: Manage existing subscription
After license installation
Monitor your license status through the admin panel, including expiration dates and seat assignments. Plan license renewals before expiration to avoid service interruption.
Learn more about how to manage an existing license.

Frequently asked questions
Can I use the same license key on multiple installations?
No, each license key works only with the specific instance ID it was purchased for. Multiple installations require separate subscriptions and license keys.
What is the difference between purchasing the Premium and Advanced plans
The Premium plan doesn’t support free roles or role-based permissions. You set the initial seat count when you purchase a subscription, which defines your licensed user capacity.
When you upgrade to the Advanced plan, start by buying only the number of paid seats you need. Once your license is active, you can then invite free users to join your workspace.
What happens when my license expires?
Paid features become unavailable for all assigned users immediately after expiration. Your data remains intact, but paid functionality returns to free plan limitations until you renew.
How do I assign upgraded access to new users?
On the Advanced plan, first purchase the number of paid seats you need. After your license is active, you can invite additional users as free members without being charged. New assignments take effect immediately.
On the Premium plan, there are no free roles. Every user you add is automatically a billable user, since role-based permissions don’t exist.
Where can I find documentation on upgrading my self-hosted Baserow instance?
To upgrade your self-hosted instance to the latest version, please review the developer documentation for migration steps. You must follow the guide specific to your original installation method.
Can I mix free and billable users in the same workspace?
Yes, billable and free users can collaborate in the same workspaces as the license is instance-based. Billable users access paid features while free users work within standard limitations. See this section.
How does billing work when switching plans?
The system calculates the remaining value from your current plan and applies it toward the new plan cost through pro rata calculations, ensuring you receive full value without refunds.
Troubleshooting license installation
License registration fails
Verify your license key is copied correctly without extra spaces or characters. Ensure your instance has internet connectivity to validate the license with Baserow’s servers.
Paid features not appearing
Check that your user account is assigned to a paid seat in Admin → Licenses. License assignments affect individual users, not entire workspaces.
Cannot access the admin panel
Only Instance Admins can register licenses. Contact your system administrator if you need admin access or have them complete the registration process.
Related content
- Enterprise license activation
- Admin panel overview
- Paid features overview
- Purchase self-hosted subscription
Still need help? If you’re looking for something else, please feel free to make recommendations or ask us questions; we’re ready to assist you.
-
Ask the Baserow community for implementation advice
-
Contact support for license and technical assistance
- On this page
- Overview
- Step-by-step license installation
- Managing user assignments
- After license installation
- Frequently asked questions
- Can I use the same license key on multiple installations?
- What is the difference between purchasing the Premium and Advanced plans
- What happens when my license expires?
- How do I assign upgraded access to new users?
- Where can I find documentation on upgrading my self-hosted Baserow instance?
- Can I mix free and billable users in the same workspace?
- How does billing work when switching plans?
- Troubleshooting license installation
- Related content