How to create fields in Baserow
Creating fields in Baserow is the foundation of database design; defining your data structure determines what information you can capture, how you organize records, and what insights you can extract from your tables.
This guide explains how to add new fields to your tables, including field creation methods, adding descriptions, duplicating fields, and best practices for field naming and organization.
For a comprehensive overview of all available field types and their capabilities, see our fields overview guide.
Overview
Fields define the structure of your database by specifying what types of information each column can store. Creating fields is your first step in transforming a blank table into a functional database that captures customer information, tracks projects, manages inventory, or powers any business process.
Well-designed fields with clear names and descriptions improve team collaboration, reduce data entry errors, and make your database intuitive for new users.
Field creation methods
Baserow offers flexible methods for adding fields. Each method supports all 25+ field types, letting you build exactly the data structure your workflow requires.
| Method | Best for | Field configuration |
|---|---|---|
| Add at end | Building new tables from scratch | Configure from scratch |
| Insert between | Adding to established table structure | Configure from scratch |
| In the row detail panel | Dedicated interface for a single row | Configure from scratch |
| Duplicate field | Creating similar fields with same type | Inherits settings, optional data copy |
How to create a field at the end of your table
Add new fields quickly by appending them to the end of your table’s existing field structure. Use this creation method when building a new table from scratch, adding supplementary fields to an established structure, or quick field creation when order doesn’t matter initially.
To create a field:
- Open your table in Grid or Form view
- Scroll to the right until you see the + button after your last visible field
- Click the + button to open the field creation panel
- Select a field type from the dropdown (text, number, date, etc.)
- Enter a field name that clearly describes what data belongs in this field
- Click Create to add the field immediately
The new field appears at the end of your table, and you can begin entering data or configure additional field settings through the field menu.
After creating a field, you can reorder it by dragging the field header to your preferred position.
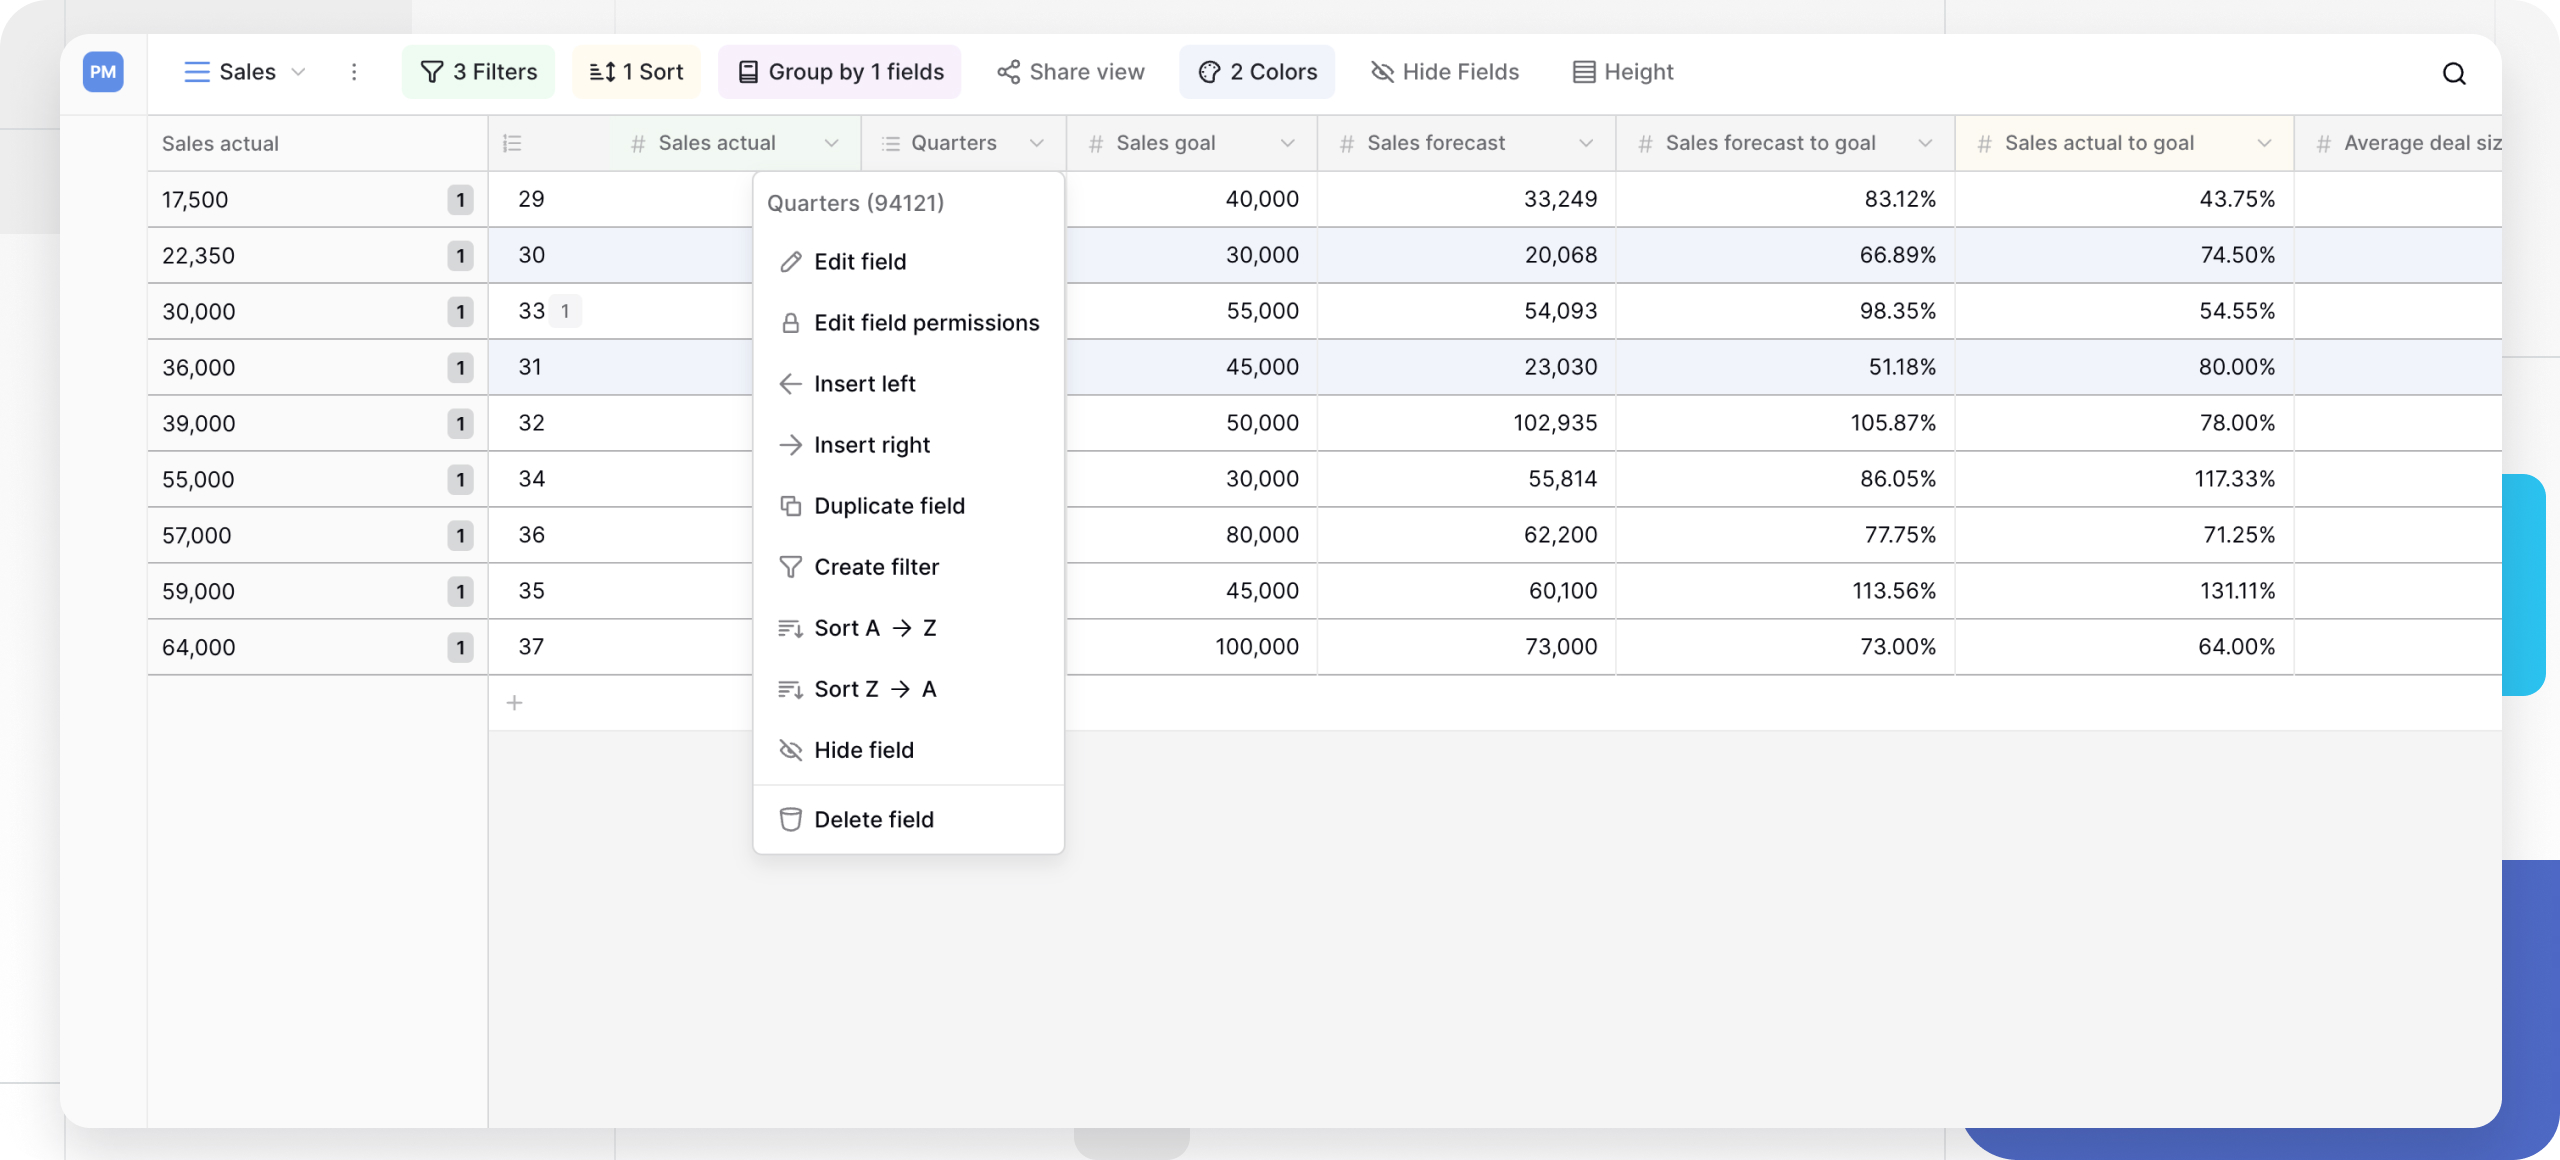
How to insert a field between existing fields
Insert new fields at specific positions in a Grid view to maintain logical field order in established tables. Use this creation method when maintaining logical field grouping in mature tables, positioning related fields together, or following a specific data entry workflow.
To insert a field:
- Locate the field you want to insert next to
- Click the dropdown arrow next to the field name
- Select either ← Insert left or → Insert right from the menu
- Configure your new field type and name in the creation panel
- Click Create to add the field in the specified position
The new field appears immediately in the chosen location, shifting other fields to accommodate it.
You cannot insert fields to the left of the Primary field, which always remains as the first field in your table.
How to duplicate an existing field
Save time by copying configured fields rather than recreating field settings from scratch. Use this creation method when creating multiple similar fields with identical configurations, building survey tables with repeated question types, or standardizing field formats across your database.
To duplicate a field:
- Click the dropdown arrow next to the field you want to duplicate
- Select Duplicate field from the menu
- In the duplication dialog, choose whether to copy the field:
- Without data - Creates empty field with same configuration
- With data - Copies all values from the original field
- Modify the field name if needed
- Click Duplicate to add the duplicated field
The duplicated field inherits all settings from the original, including field type, format options, validations, and descriptions. This is particularly useful when creating multiple similar fields like “Q1 Revenue,” “Q2 Revenue,” “Q3 Revenue.”
Use case: When building a survey table with multiple rating questions, duplicate your first configured rating field to maintain consistent 1-5 scales and display settings across all rating fields.
Add field in row detail panel
While viewing an expanded row, you can create new fields without closing the panel. This allows you to experiment with different field types while maintaining context on the current record.
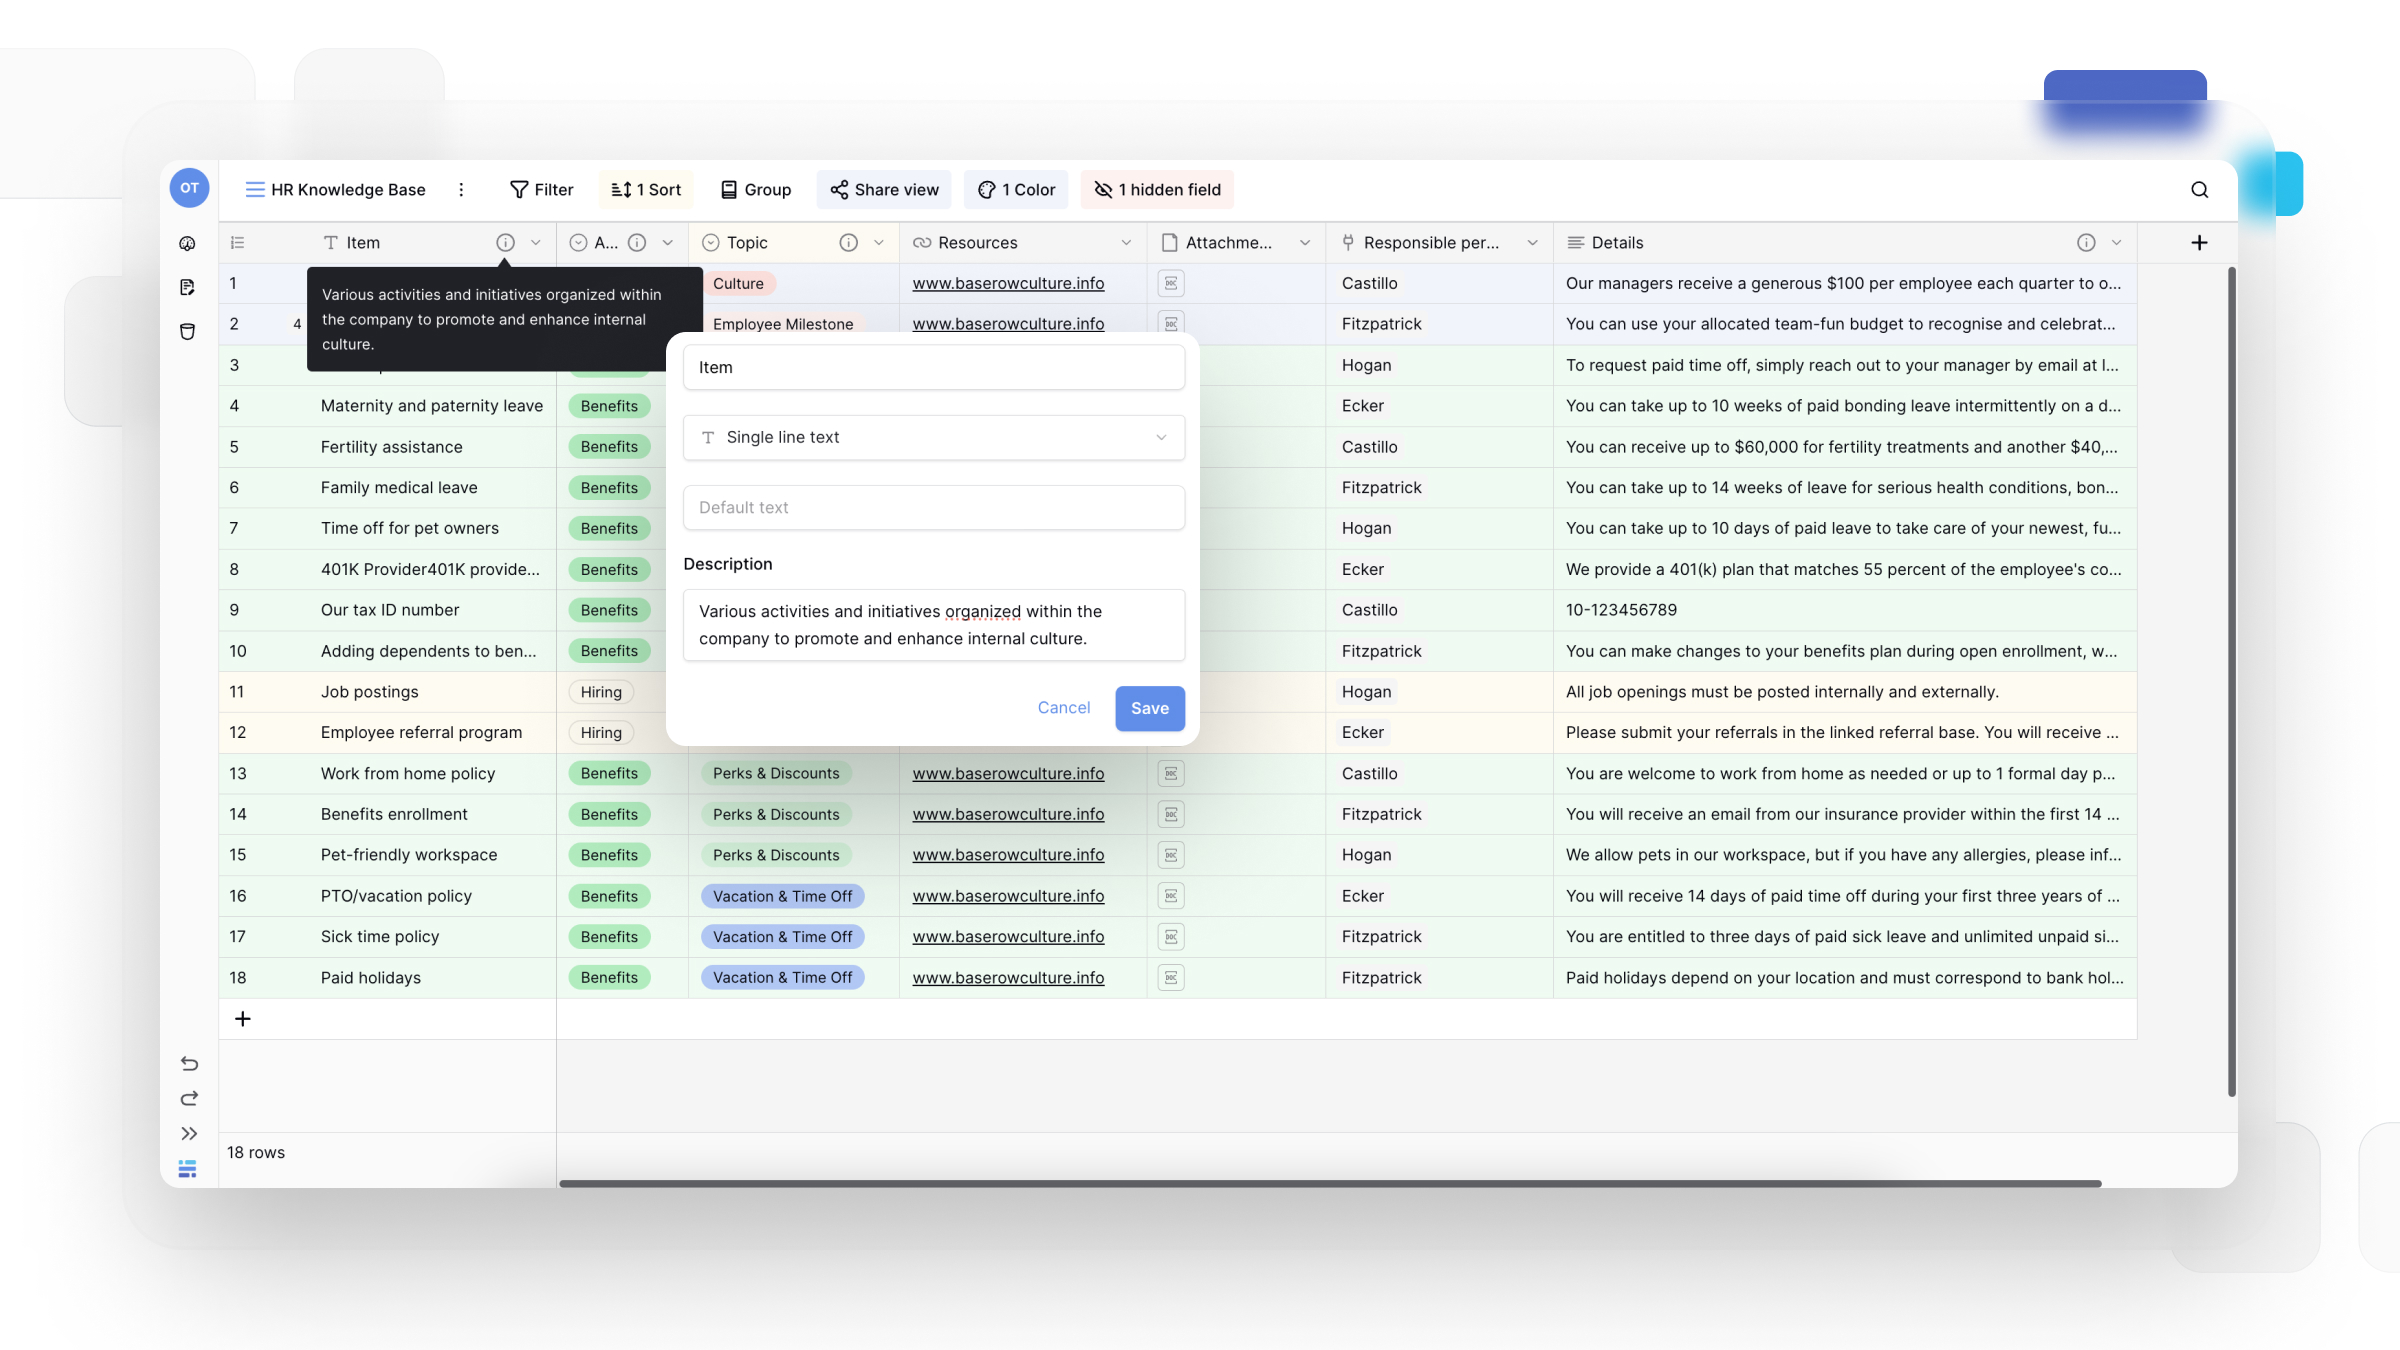
How to add field descriptions
Field descriptions provide context about what data belongs in each field, improving data quality and team collaboration.
To add a description:
- Click on the field name to open the field settings menu
- Click the + Add description button in the settings panel
- Enter a clear, concise description in the text box
- Click Save to store the description
Descriptions appear when users hover over the field name or open the field settings, helping team members understand data requirements without asking questions.
Example of a good field description:
Field name: Project Budget
Description: Enter the total approved budget in USD. Include all costs (labor, materials, overhead). Use whole numbers without currency symbols.
Best practices for field descriptions:
- Specify the data format expected (e.g., “MM/DD/YYYY format”)
- Define units or currency (e.g., “in USD,” “in hours”)
- Clarify required vs. optional fields
- Provide examples for complex fields (e.g., “Example: +1-555-123-4567”)
- Explain business rules or validation (e.g., “Must not exceed approved budget”)
Frequently asked questions
Can I change a field type after creating it?
Yes, click the field dropdown and select “Edit field” to change the field type. Baserow attempts to convert existing data to the new type, but some conversions may result in data loss (e.g., converting text containing letters to a number field). Always review your data after changing field types.
What happens when I duplicate a field with data?
The duplicated field contains an exact copy of all values from the original field at the time of duplication. Changes to either field afterward don’t affect the other; they’re independent copies. This is useful for creating backups before major data transformations.
Can I create fields in views other than Grid View?
Field creation is available directly in Grid and Form View, and row detail modal in other view types. However, once created, fields appear across all view types (Gallery, Kanban, Calendar, etc.) according to each view’s configuration. You can hide fields in specific views without deleting them.
Is there a limit to how many fields I can create?
Baserow doesn’t enforce a strict field limit, but practical performance considerations suggest keeping tables under 200 fields. For better organization and performance, consider splitting very wide tables into related tables connected with link to table fields.
What’s the difference between field names and field descriptions?
Field names are short labels displayed in table headers and must be unique within a table. Field descriptions provide detailed context about data requirements and appear when hovering or clicking the field. Use names for identification and descriptions for guidance.
Can I create computed fields that calculate automatically?
Yes, several field types compute values automatically: Formula fields calculate based on other fields in the same row, Lookup fields pull data from linked tables, Count fields tally linked rows, and Rollup fields aggregate linked data. Create these fields the same way, then configure their computation rules.
Related content
- Fields overview - Learn about all 25+ field types available
- Field configuration options - Customize field behavior and appearance
- Primary field - Understand the special first field in every table
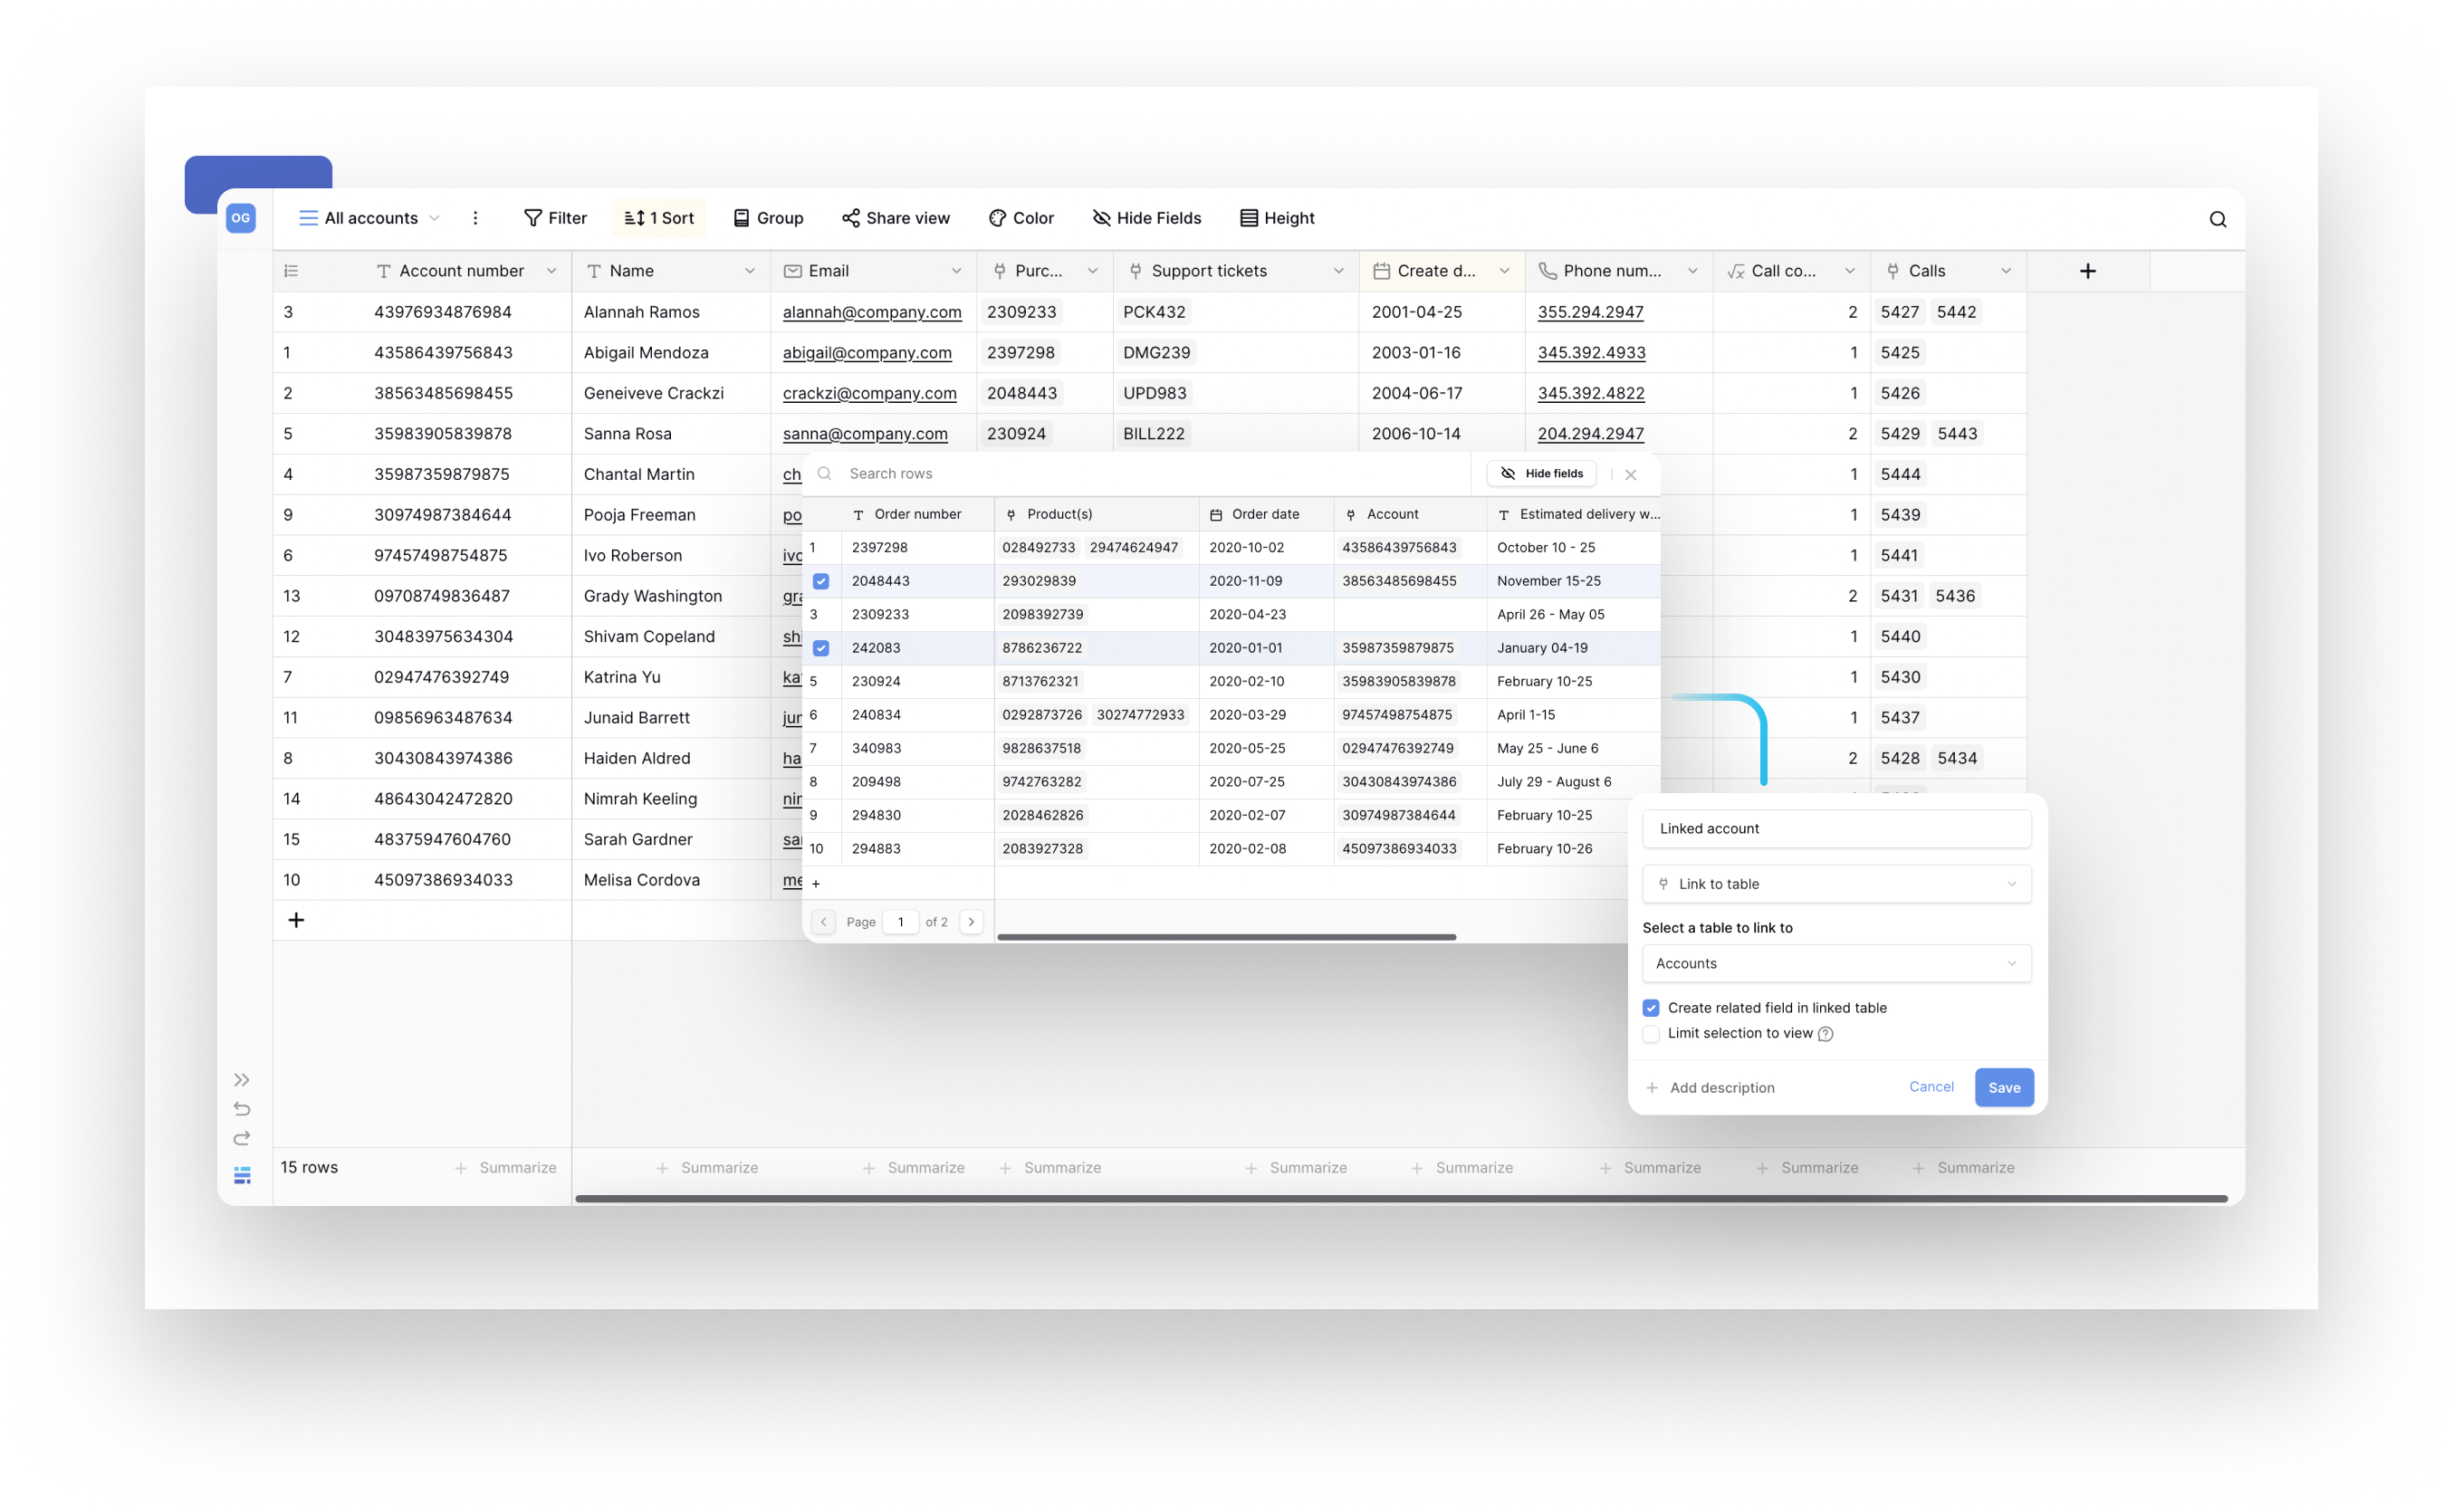
- Link to table field - Create relationships between tables
- Formula fields - Build calculated fields with formulas
- Field customization - Sort, filter, hide, and reorder fields
Still need help? If you’re looking for something else, please feel free to make recommendations or ask us questions; we’re ready to assist you.
-
Contact support for questions about Baserow or help with your account
- On this page
- Overview
- Field creation methods
- How to add field descriptions
- Frequently asked questions
- Can I change a field type after creating it?
- What happens when I duplicate a field with data?
- Can I create fields in views other than Grid View?
- Is there a limit to how many fields I can create?
- What’s the difference between field names and field descriptions?
- Can I create computed fields that calculate automatically?
- Related content