Configure User Sources (Authentication)
A User Source is the security bridge between your application and your database. It defines how users prove who they are (Authentication) and connects their login identity to a specific row in your Baserow table.
This guide covers how to secure your application by allowing users to sign up, log in, and access personalized data.
Overview
To enable logging in, you must configure a User Source. This involves three parts:
- The Table: You need a table in your Baserow database to store user information (e.g., Name, Email, Password).
- The User Source: Configured in the Application settings, this tells Baserow which table to check when someone tries to log in.
- The Login Element: Placed on a page, this is the actual form the user sees (username/password inputs).
You can allow users to authenticate via Email/Password, SAML SSO, or OpenID Connect.
Add a user source
Before configuring specific login methods, you must initialize the user source.
- Open your application in the builder.
- Go to Settings → Users.
- Click + Add user source.
- Select the Integration that connects to the database where your users are stored.
- If you haven’t created an integration yet, click Add new integration.
- Click Create.
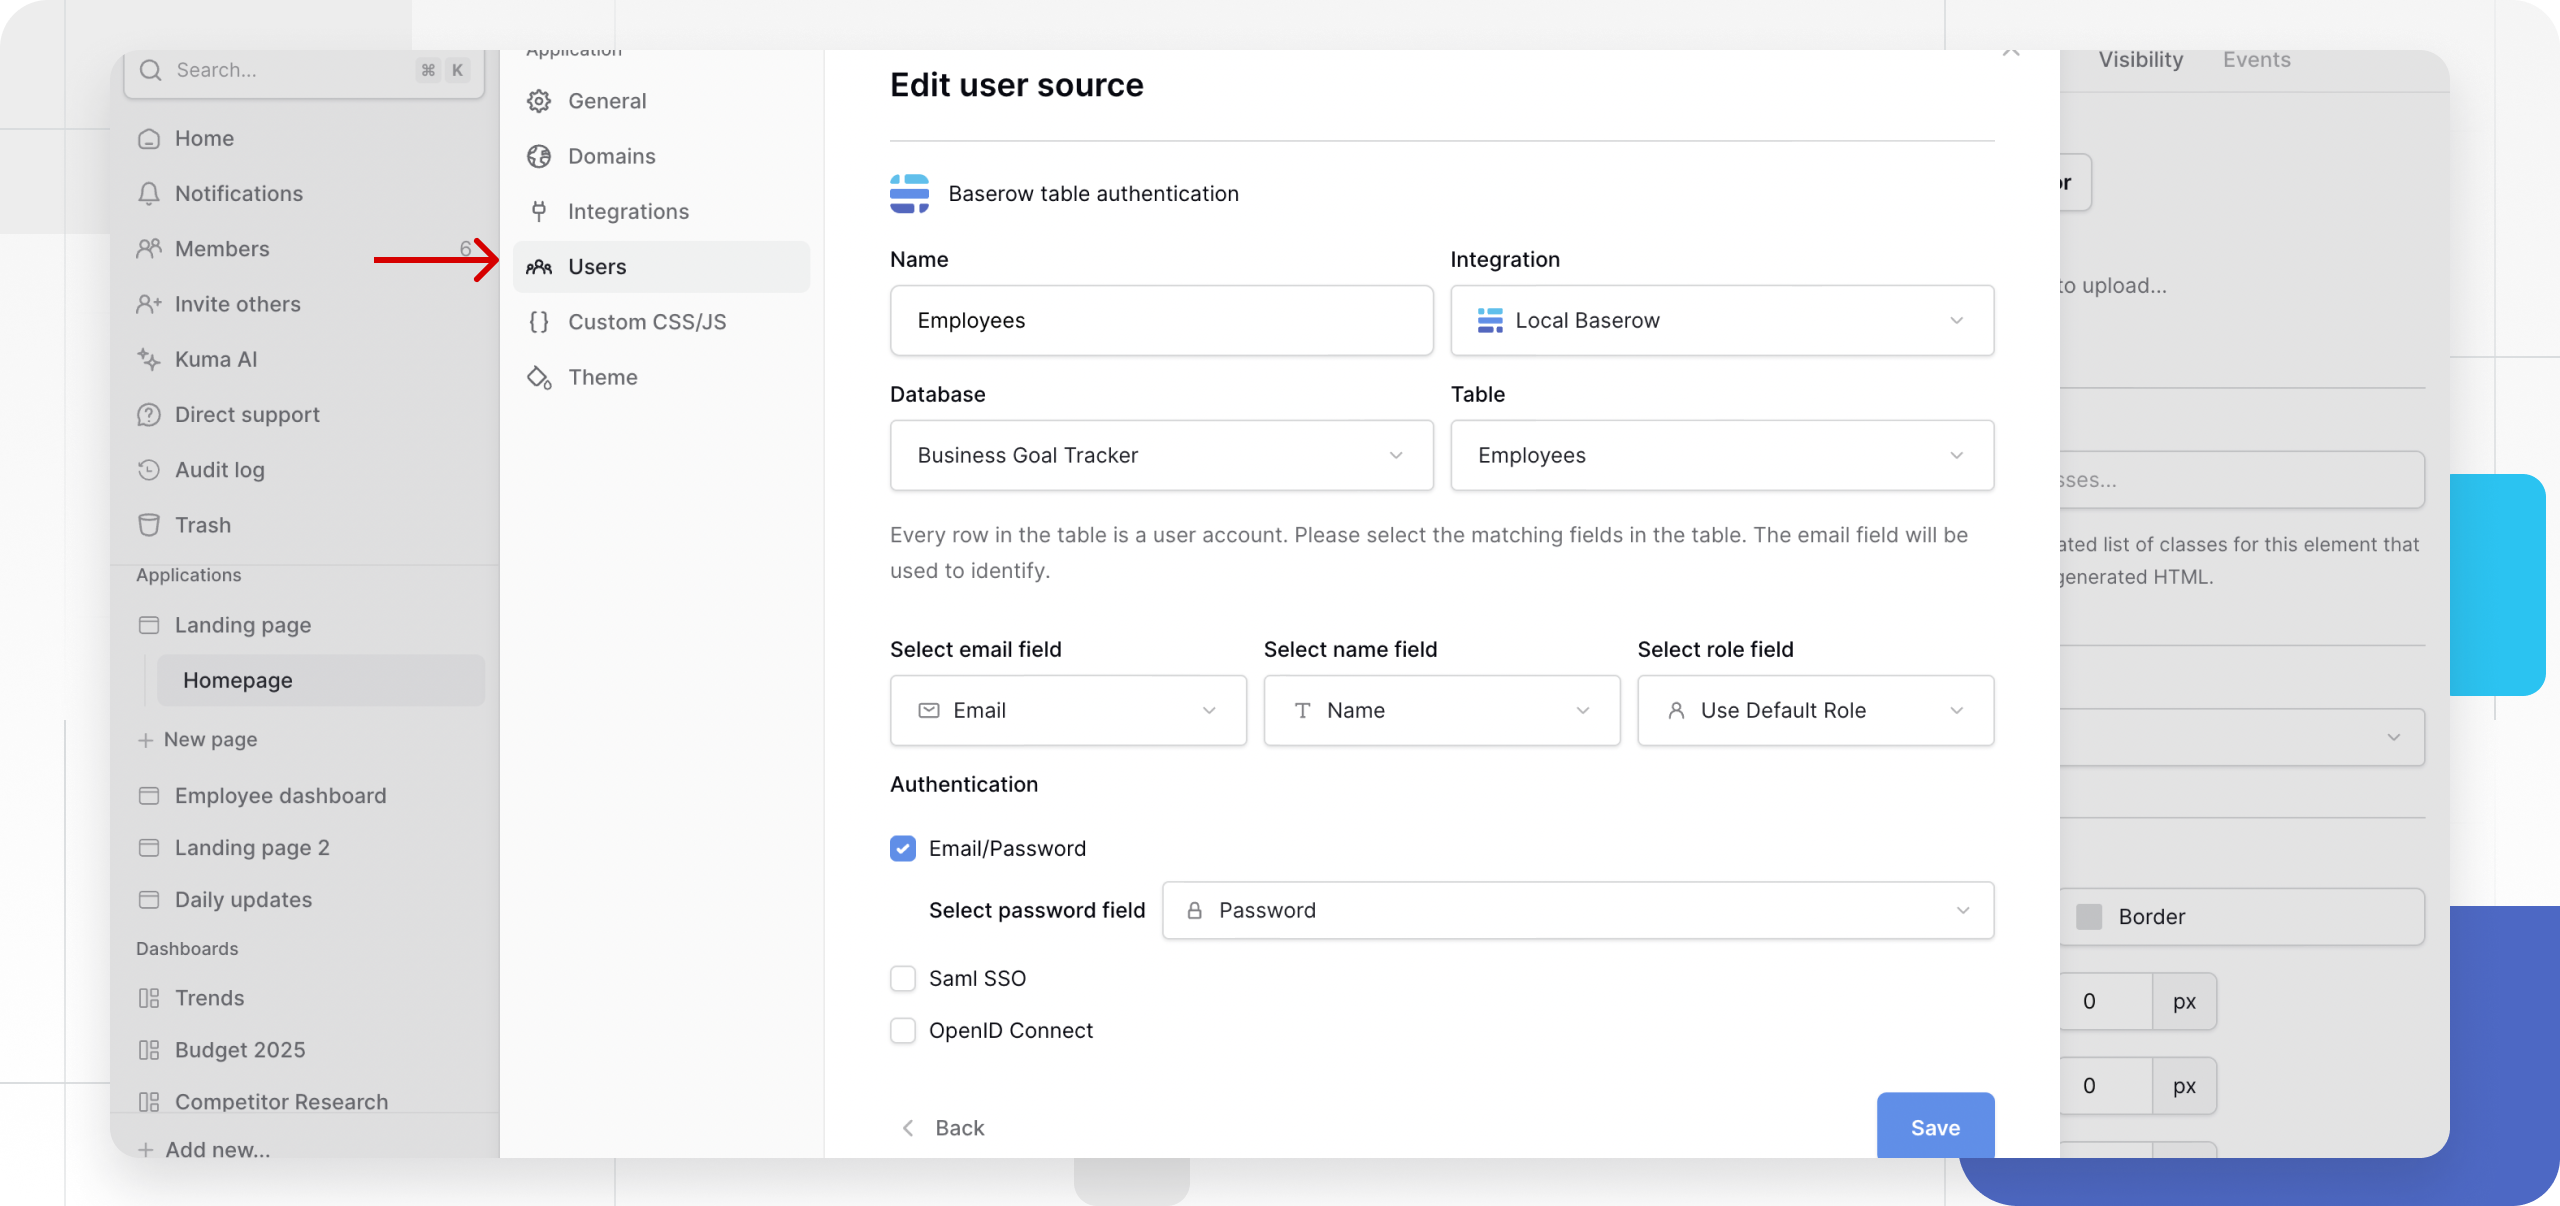
Configure the user source
Once created, you must map the User Source to your data.
- Click the Edit (pencil) icon next to your existing User Source.
- User table: Select the Database and Table where your user records are stored.
- Map fields: You must identify which column represents the unique user.
- Email field: Select the email field type containing user emails.
- Name field
- Role field

Authentication Methods
You can enable one or multiple methods for a single user source.
Method 1: Email/Password
This is the standard method where users log in with credentials stored in your table.
- Check the box for Email/Password.
- Password field: Select the specific column in your table that uses the Password field type.
This is a “write-only” field. Baserow stores these passwords as secure hashes. You cannot see the actual passwords in the table.
Method 2: SAML SSO
Use this to connect enterprise identity providers (like Okta or Azure AD).
- Check the box for SAML SSO.
- Click Add or Edit provider.
- Domain: Enter your SAML domain (e.g.,
okta.com). - Metadata: Paste the XML Identity Provider metadata from your provider.
- Attribute Mapping: Map the fields from your provider to your Baserow table columns:
| Baserow field | Default attribute | Description |
|---|---|---|
user.email |
Used as the username. | |
| First Name | user.first_name |
(Optional) |
| Last Name | user.last_name |
(Optional) |
Note: The Single Sign-On URL and Relay State URL will be generated here. Copy these to share with your Identity Provider.
Learn more about configuring SAML SSO
Method 3: OpenID Connect (OIDC)
Use this for providers like Google, Auth0, or Keycloak.
- Check the box for OpenID Connect.
- Click + Add provider.
- Enter the details provided by your OIDC service: * Provider Name (Custom name) * Base URL * Client ID * Client Secret
- Callback URL: Copy the generated Callback URL and add it to your OIDC provider’s “Allowed Redirect URIs” settings.
Learn more about configuring OpenID Connect
Save and implement
Once you have configured your methods:
- Click Save at the bottom of the Settings panel.
- Go to your application canvas and add a Login Element or a Form Element to allow users to interact with this User Source.
Frequently asked questions (FAQ)
Can I have multiple User Sources?
Yes. You can configure multiple user sources if you have different types of users stored in different tables (e.g., “Customers” vs. “Employees”).
Is the password field secure?
Yes. If you use the specific Password field type in your table, Baserow hashes the data. Even as an admin, you cannot read the user’s password; you can only overwrite it if a reset is needed.
What happens if I delete a user row?
Since the authentication is directly linked to the table row, deleting a row in the database immediately revokes that user’s access to the application.
Related content
Still need help? If you’re looking for something else, please feel free to make recommendations or ask us questions; we’re ready to assist you.
- Ask the Baserow community
- Contact support for questions about Baserow or help with your account