Import data to create a table
Baserow’s import feature converts your existing data into organized tables; bring your spreadsheets to life with database capabilities.
Create Baserow tables by importing CSV, Excel, JSON, XLSX or XML files, or paste data directly from spreadsheets. Convert existing data into structured tables with automatic field detection.
This guide covers creating new tables through import. To add data to existing tables, see Import data into an existing table.
Overview
Importing lets you create fully populated tables from existing data files or spreadsheets. Instead of manually entering data, upload your file and Baserow automatically creates a table with appropriate fields and rows. This is the fastest way to migrate data from spreadsheets, exports, or other platforms into Baserow.
Supported import formats
| Format | Best for | File extension |
|---|---|---|
| Paste data | Quick transfers from spreadsheets | N/A |
| CSV | Simple tabular data from any spreadsheet app | .csv |
| JSON | Structured data exports from APIs or apps | .json |
| XML | Hierarchical data from technical systems | .xml |
| Excel | Import spreadsheets files | .xlsx, .xls, .ods |
All import methods are limited to 5,000 rows per table. For larger datasets, split your file and import in batches, or contact support for enterprise solutions.
Before you import: Preparation checklist
Clean your data:
- Remove empty rows and columns that aren’t needed
- Ensure consistent formatting (dates in one format, numbers without mixed text)
- Check that column headers are unique and descriptive
- Verify special characters display correctly
Format considerations:
- First row should contain column headers (recommended but not required)
- Each column should contain similar types of data (all dates, all numbers, etc.)
- Text fields should not exceed reasonable lengths (very long text may cause issues)
- File size should be under 10MB for best performance
All imported data comes in as text fields initially. After import, you can convert fields to their appropriate types (numbers, dates, select options, etc.). Alternatively, import into an existing table to use pre-configured field types.
How to import data
Method 1: Paste data from spreadsheets
Fastest option for copying data directly from Excel, Google Sheets, or other spreadsheet applications. This method works great for quick data transfers without saving intermediate files.
Step-by-step:
- Click on a database in the sidebar. Click + New table at the bottom of the table list
- Enter a descriptive name for your new table
- Select Paste table data
- Copy cells from your spreadsheet (Ctrl+C or Cmd+C) and paste into the text area
- Check First row is header if your pasted data includes column names
- Review the preview to ensure the data looks correct
- Click Add table
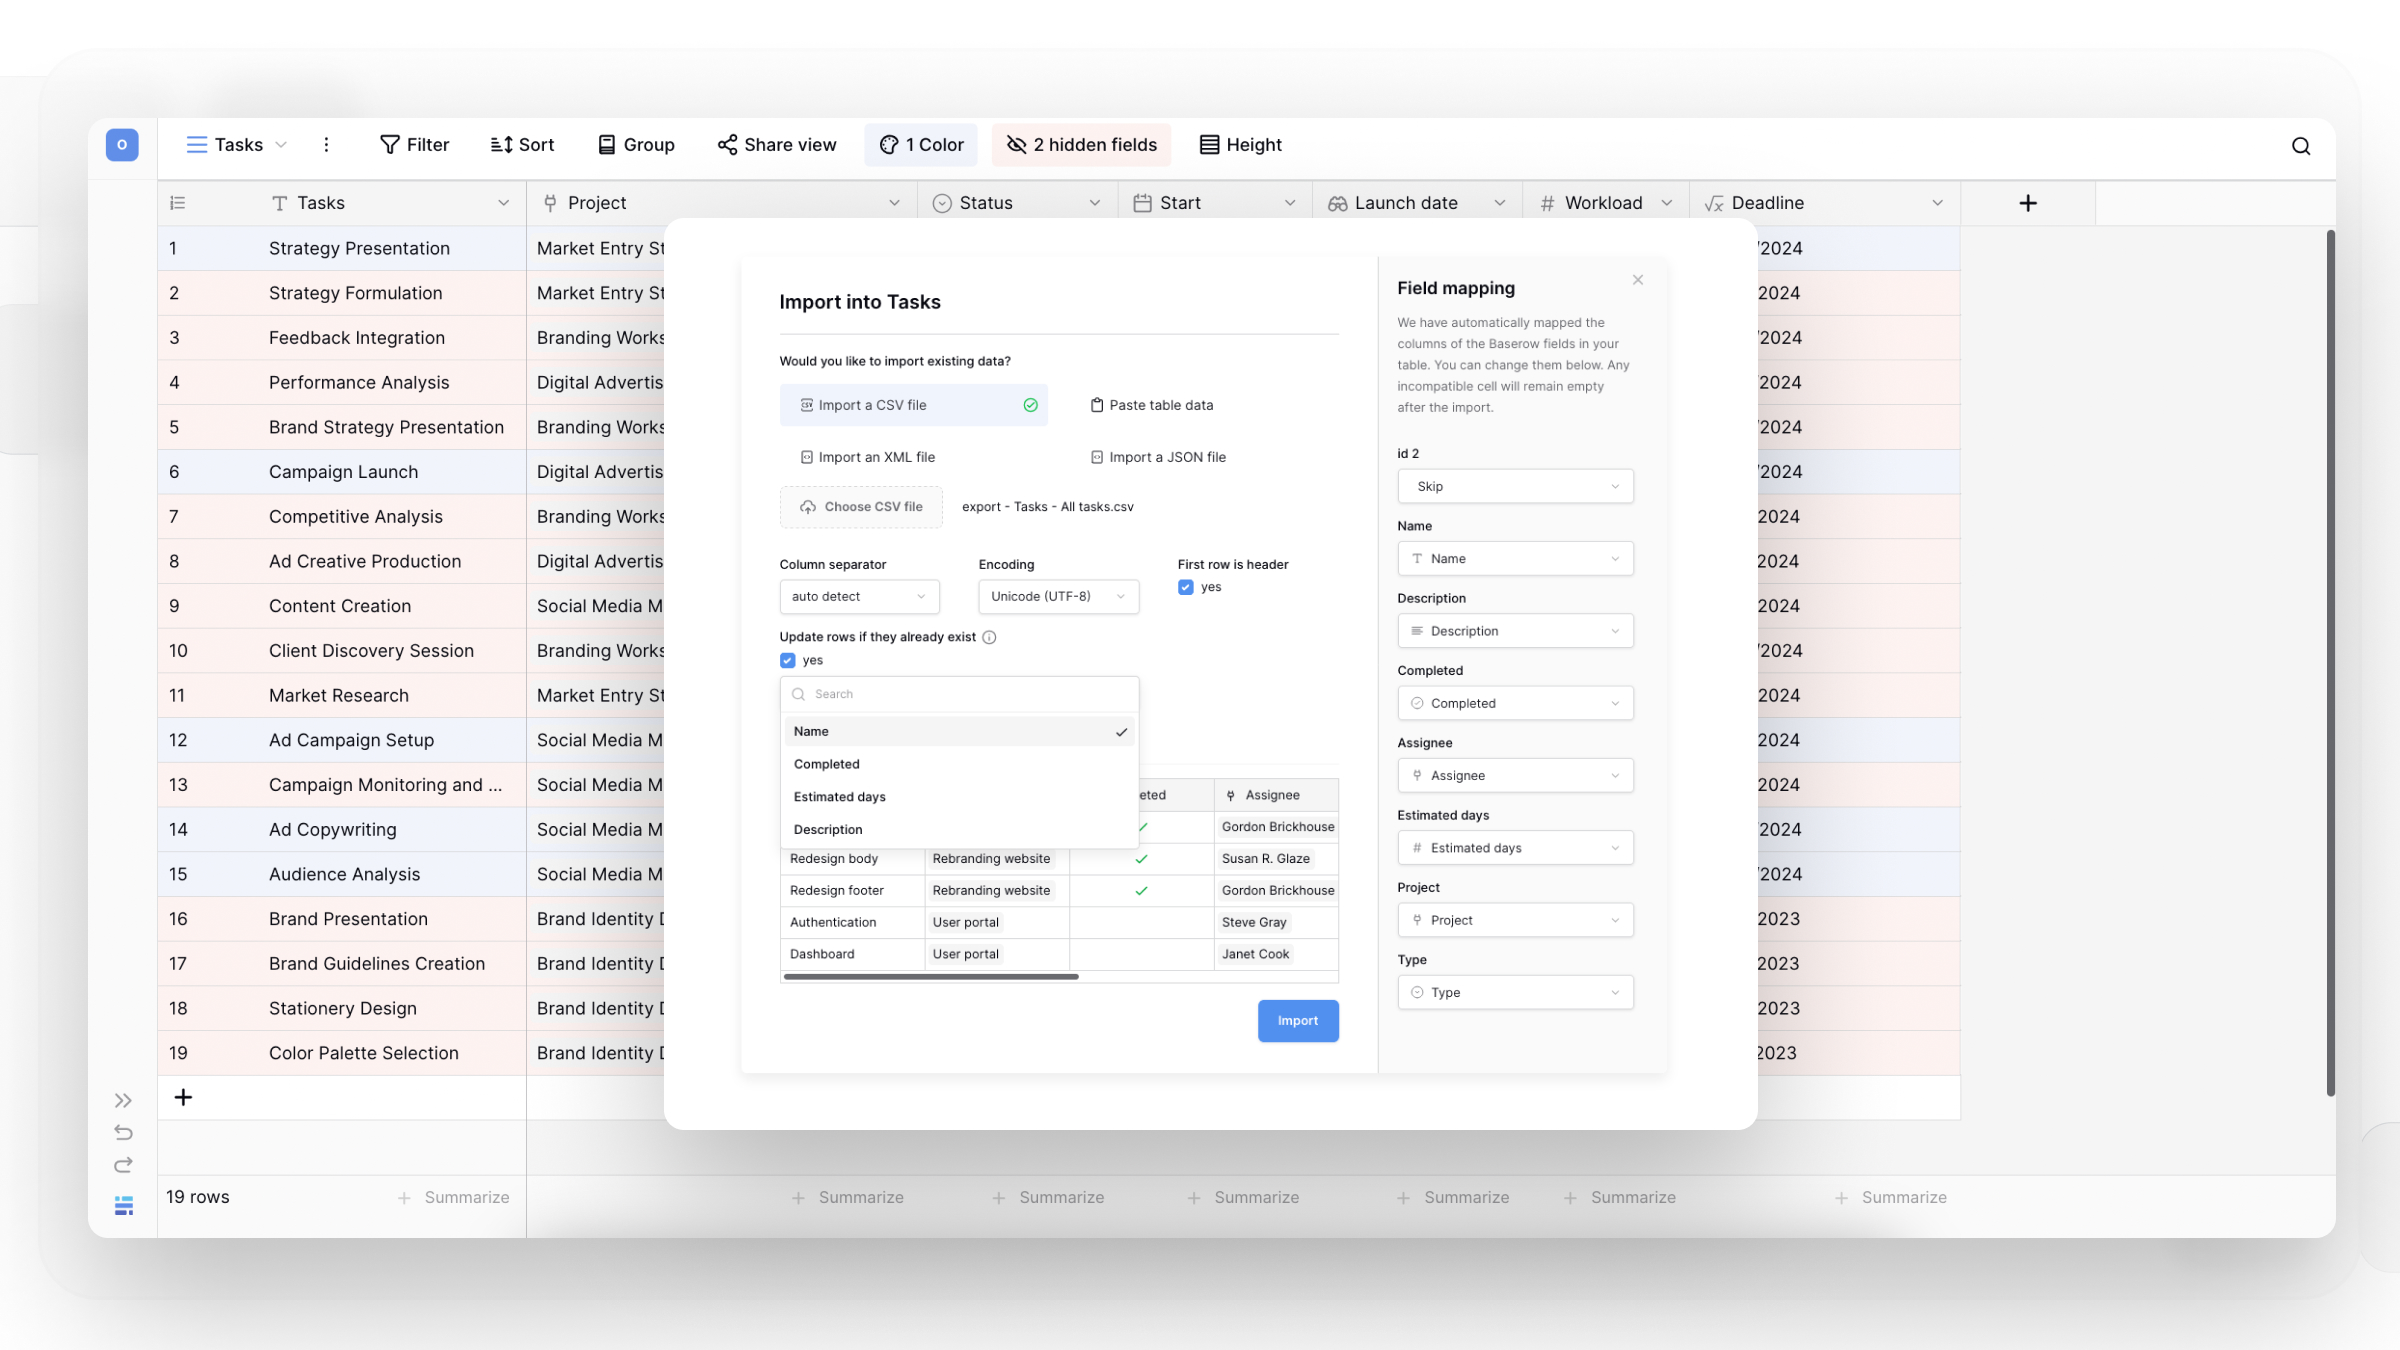
Method 2: Import CSV files
CSV (Comma-Separated Values) is the universal export format supported by all spreadsheet applications.
Step-by-step:
- Click on a database in the sidebar. Click + New table at the bottom of the table list
- Enter a descriptive name for your new table
- Select Import CSV file
- Click Choose CSV file and select your file
- Configure import settings:
- Column separator: Usually comma, but may be semicolon or tab
- Encoding: UTF-8 works for most files
- First row is header: Check if your CSV has column names in row 1
- Review the data preview to verify correct parsing
- Click Add table
Troubleshooting CSV imports:
- If data looks scrambled, try different column separators
- If special characters appear wrong, try a different encoding (UTF-8 vs. Latin-1)
- Ensure your CSV doesn’t have nested commas within quoted fields
Method 3: Import JSON files
JSON files store structured data and are common exports from APIs, databases, and web applications.
Step-by-step:
- Click on a database in the sidebar. Click + New table at the bottom of the table list
- Name your table
- Select Import a JSON file
- Click Choose JSON file and upload
- Select encoding format (usually UTF-8)
- Preview your data structure
- Click Add table
Supported JSON format:
[
  {
    "to": "Tove",
    "from": "Jani",
    "heading": "Reminder",
    "body": "Don't forget me this weekend!"
  },
  {
    "to": "Bram",
    "from": "Nigel",
    "heading": "Reminder",
    "body": "Don't forget the export feature"
  }
]
JSON requirements: File must be an array of objects with consistent keys across all objects. Nested objects are flattened during import.
Method 4: Import XML files
XML files contain hierarchical data often exported from technical systems or enterprise applications.
Step-by-step:
- Click on a database in the sidebar. Click + New table at the bottom of the table list
- Name your table
- Select Import an XML file
- Click Choose XML file and upload
- Review the preview to ensure proper parsing
- Click Add table
Complex nested structures are flattened. For best results, use XML files with simple, tabular structures.
Method 5: Import XLSX files
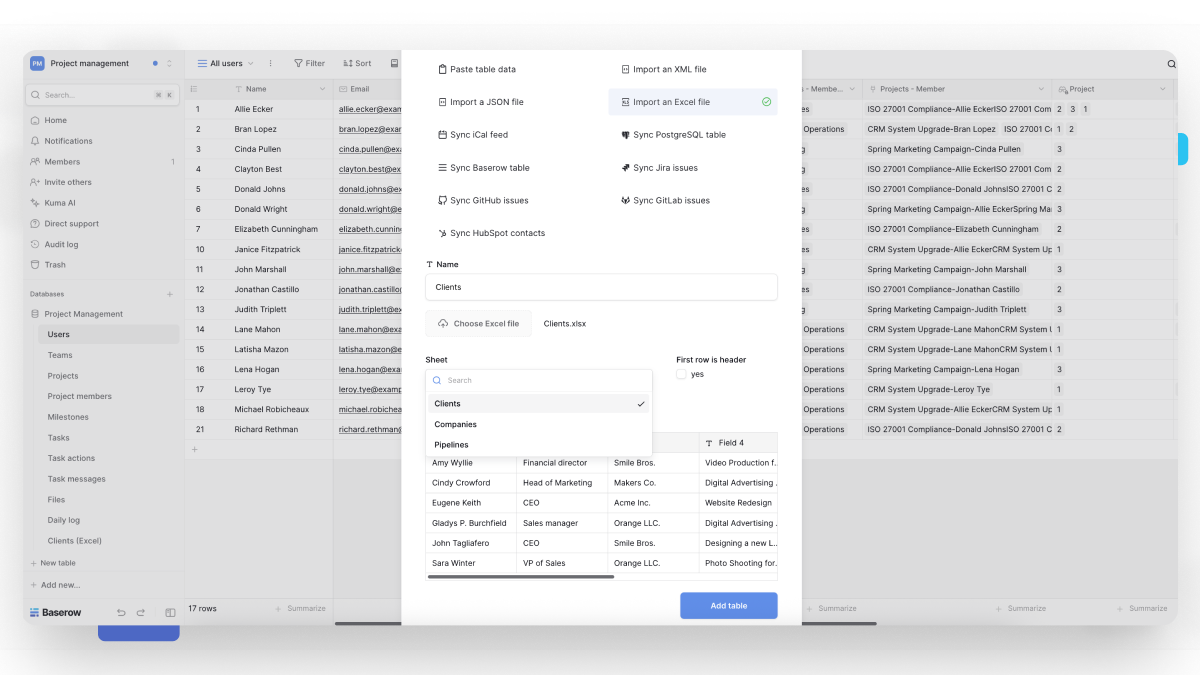
Import existing Excel spreadsheets (.xlsx, .xls, or .ods) directly into a new Baserow table.
To import an Excel file:
- Open your database.
- Click + Add table.
- Select Import an Excel file.
- Enter a table name.
- Click Choose Excel file and select your spreadsheet.
- Click Add table.
Baserow uploads your workbook and displays a preview of the selected worksheet.
If your workbook contains multiple worksheets, choose the sheet you want to import from the Sheet dropdown.
You can also choose whether the first row should be used as column headers.
Before importing, Baserow shows a preview of your data so you can verify you’ve selected the correct worksheet and that your columns are interpreted correctly.
When you’re ready, click Add table to create a new table from the spreadsheet.
After importing: Next steps
Convert field types
All imported data starts as text fields. Convert them to appropriate types for better functionality:
- Text that looks like numbers → Number field
- Text containing dates → Date field
- Repeated values that should be choices → Single select or Multiple select
- URLs → URL field
- Email addresses → Email field
Create relationships
If your imported data references other tables, set up relationships:
- Use Link to table fields to connect related records
- Add Lookup fields to display linked information
- Configure Rollup fields for calculations across relationships
Organize your view
Customize how you work with imported data:
- Filter and sort to focus on specific records
- Create additional views (Kanban, Calendar, Gallery)
- Color-code rows for visual organization
- Set up personal views for individual workflows
Alternatives to importing
Start from scratch: Create blank tables when building custom structures without existing data.
Use templates: Browse templates for pre-built structures that match your use case.
Duplicate existing: Duplicate tables to reuse proven structures with or without data.
Data sync: Set up data sync for automatic updates from external sources.
Troubleshooting common issues
Import job stuck or pending
If import shows “pending” or “running” for extended periods, it could be because of system timeout or file processing issues. Jobs automatically fail and clear after 90-95 minutes. Wait for the timeout, then try again with a smaller file or a different format.
Data appears in the wrong columns
If information doesn’t align with headers correctly, it could be because of incorrect separator detection (CSV) or a malformed file structure. For CSV, manually select the correct column separator. For other formats, check that your source file is properly formatted before export.
Special characters display incorrectly
If accented letters, symbols, or emojis show as gibberish, it could be because of an encoding mismatch between the source file and import settings. Try different encoding options (UTF-8 usually works best). If problems persist, save your source file with UTF-8 encoding before importing.
Import exceeds row limit
If an error message about exceeding 5,000 rows, it could be because the file contains more than the maximum allowed rows. Split your file into multiple smaller files under 5,000 rows each. Import separately and merge if needed, or contact support for enterprise options.
Field types not recognized
If dates, numbers, or other formatted data import as plain text, it could be because all imports default to text fields for safety. This is expected behavior. After import, manually convert fields to appropriate types using the field edit menu. For automatic type detection, import into existing tables with pre-configured fields.
Frequently asked questions
What’s the difference between creating a table via import vs. importing into an existing table?
Creating via import generates a new table from your file with automatic structure detection. All fields start as text type. Importing into an existing table adds data to pre-configured fields with specific types, giving you better control over data validation and formatting. Use creation for new datasets, existing table imports for structured data entry.
Can I import multiple files at once?
No, import one file at a time. Each import creates a separate table. If you need data from multiple files in one table, either combine them before importing or import separately and use Link to table fields to connect them.
Why are my dates and numbers showing as text?
All imported data comes in as text fields to prevent data loss from incorrect type conversions. After import, convert fields to appropriate types (Number, Date, etc.) using the field edit menu. This gives you control over formatting and validation.
How do I import more than 5,000 rows?
Split large files into multiple smaller files under 5,000 rows each. Import them as separate tables, then consolidate if needed. For regular large imports, consider enterprise plans with higher limits or use the Baserow API for programmatic data insertion.
Can I preview my data before finalizing the import?
Yes, all import methods show a preview before creating the table. This lets you verify column separation, encoding, and data structure. If the preview looks wrong, adjust settings (separator, encoding) or cancel and fix your source file.
Related content
Now that you’ve imported your data, explore these features:
Optimize your table:
- Field types overview – Learn about 25+ field types for conversion
- Field customization – Configure properties and validation
- Table configuration – Adjust appearance and behavior
Work with your data:
- Filter and sort – Focus on specific records
- Create views – Visualize data in different ways
- Export tables – Take data back out when needed
Expand functionality:
- Link to table field – Create relationships between tables
- Formula fields – Add calculations and automation
- Import into existing tables – Add more data later
Still need help? If you’re looking for something else, please feel free to make recommendations or ask us questions; we’re ready to assist you.
- Ask the Baserow community
- Contact support for questions about Baserow or help with your account.