Application Builder - Record selector element
The Record Selector is a specialized input element designed to handle relationships. Unlike a simple dropdown menu, it allows users to search, paginate, and select records from a connected Data Source. It is the frontend equivalent of the “Link to Table” field.
This page covers how to select and link rows from related tables, optimized for large datasets.
Overview
The Record Selector enables you to populate a link row field by selecting from rows in another table. This is ideal for scenarios where dynamic data connections are needed, such as assigning roles, linking tasks, or selecting categories from a related dataset.
- Use Case: Best for selecting items from a large database (e.g., assigning a “Customer” to an “Order”).
- Performance: Supports pagination (“Items per page”) to handle thousands of rows without slowing down the app.
- Search: You can configure which fields (e.g., Name, Email) are searchable by the user.
- Styling: Colors, fonts, and borders are managed via Theme Overrides.
Add a record selector
- Open the Elements panel (click the
+icon). - Select Record selector.
- Drag and drop the element onto your canvas (typically inside a Form Container).
Configuration
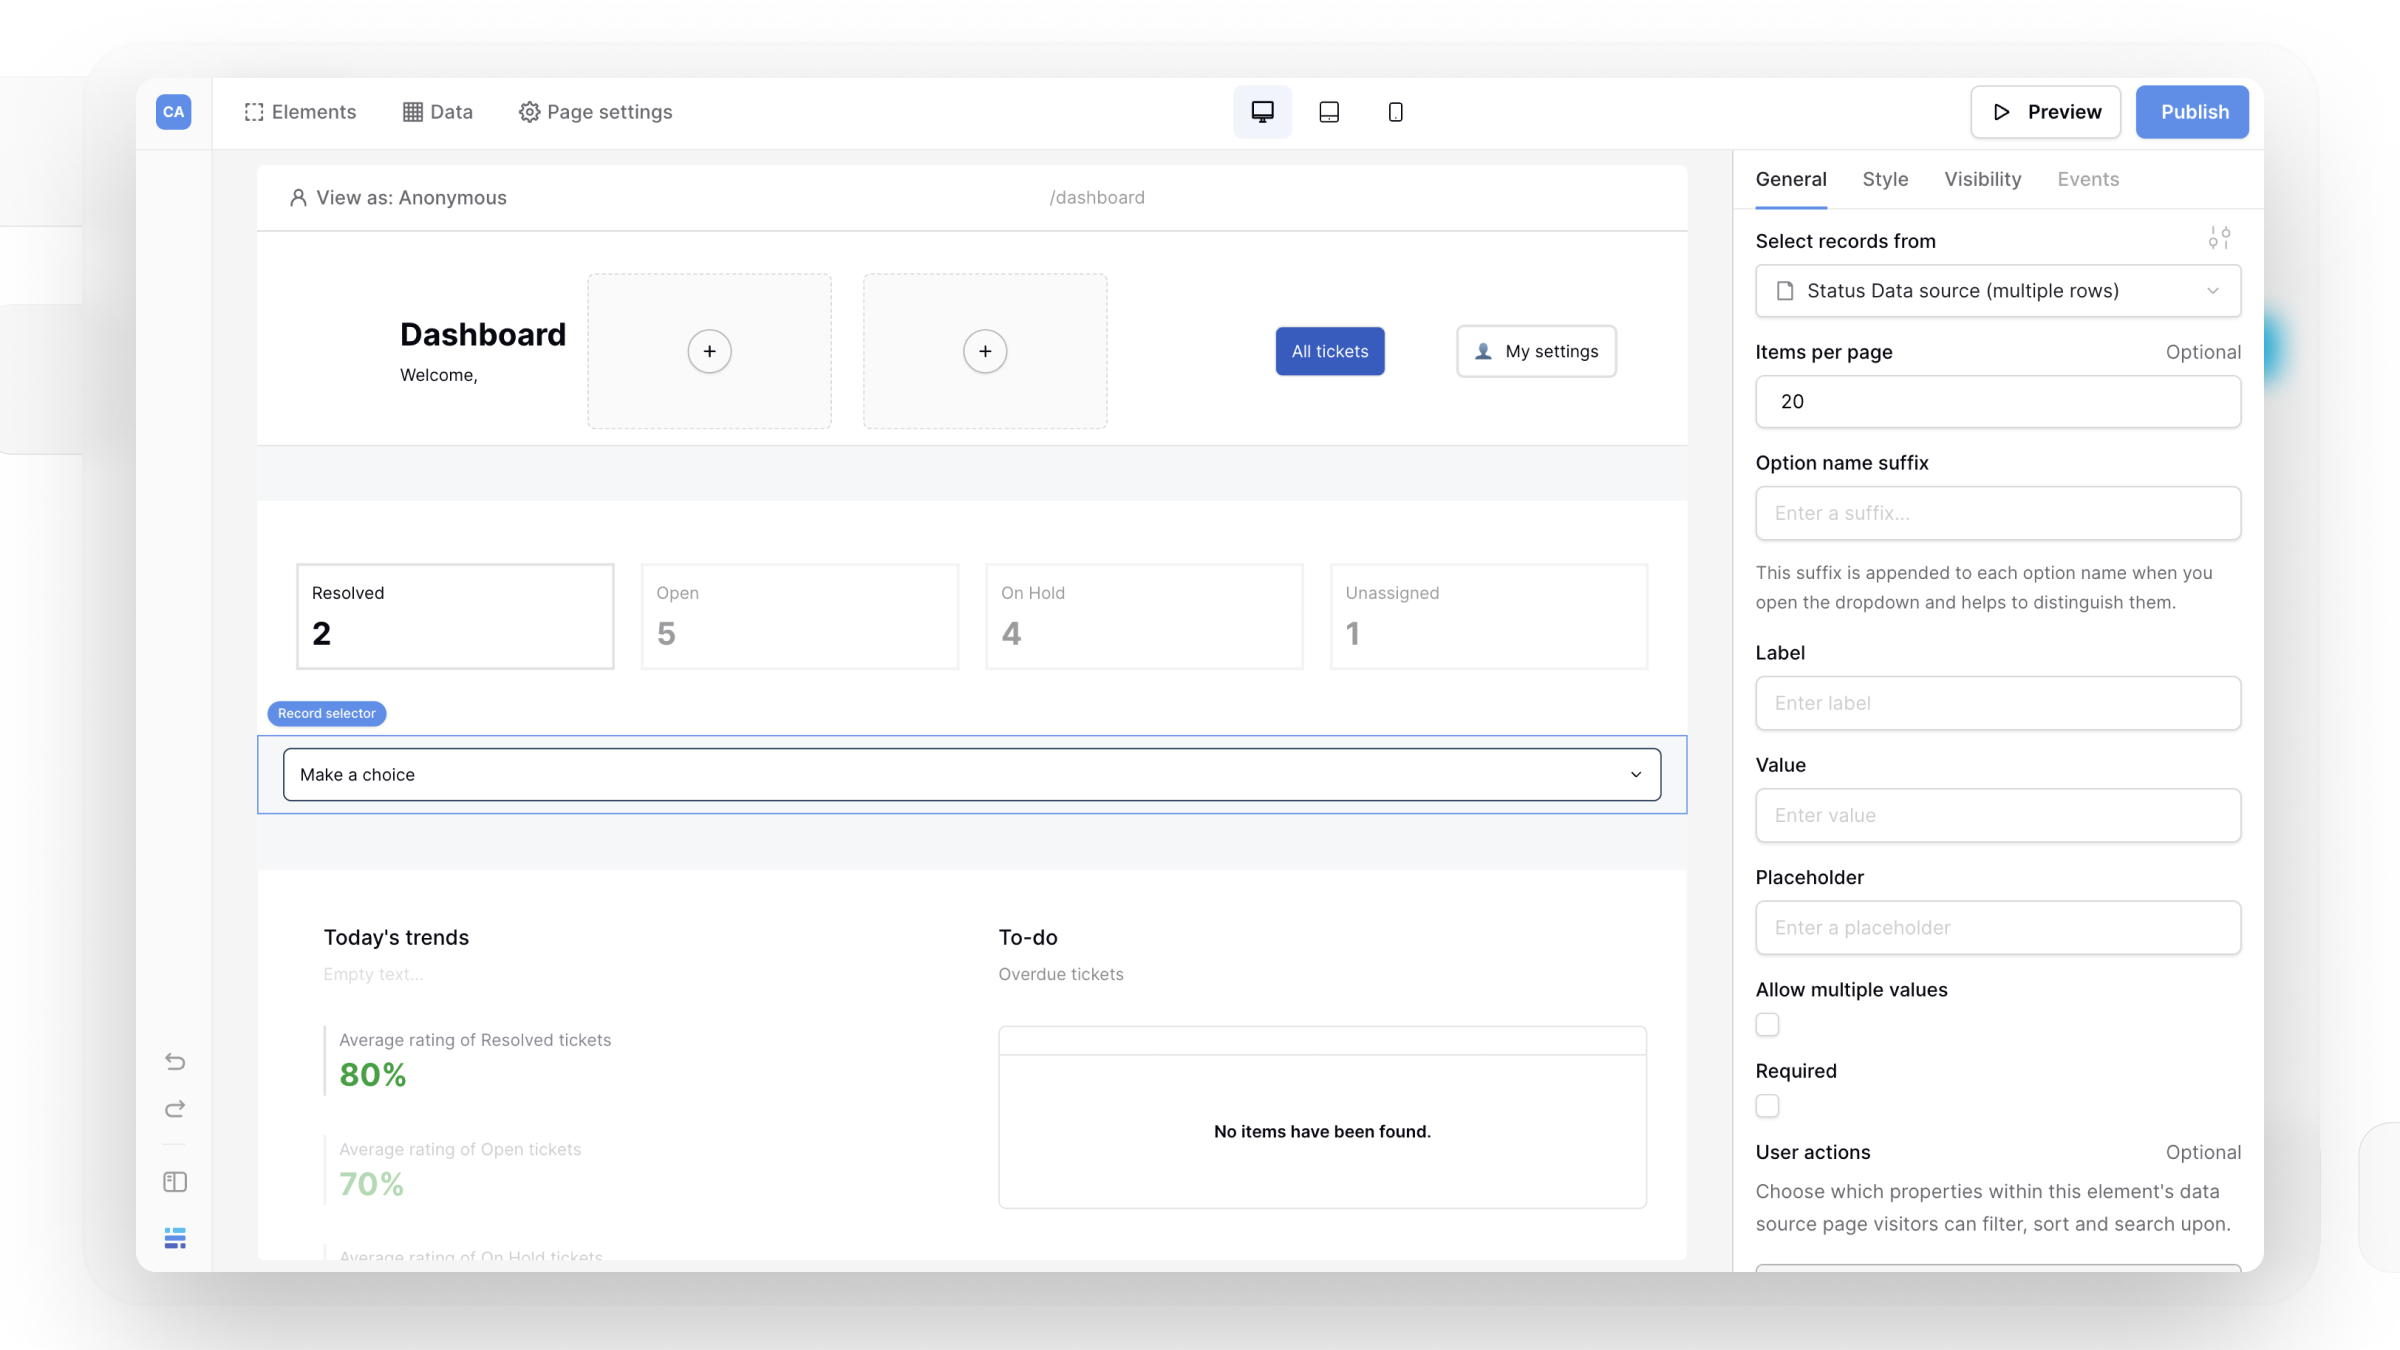
Click the element to open the General properties tab.
1. Data Connection (Source)
To populate the list of options, you must connect a Data Source.
- Select records from: Choose a Data Source (List Rows type) that contains the options.
- Example: If you are building a “Create Order” form, connect this to a “List Customers” data source.
- Items per page: Define how many results appear in the dropdown at once (5–100).
- Note: Users can click “Load More” or use the search bar to find items not currently visible.
2. Content & Logic
- Label: The descriptive text displayed above the field (e.g., “Assign Customer”).
- Placeholder: Hint text displayed when no selection is made (e.g., “Search for a customer…”).
- Value: Automatically select a record when the page loads.
- Dynamic: You can bind this to a page parameter or user profile (e.g., auto-select the current logged-in user).
3. Behavior & Validation
- Allow multiple values: If checked, the user can select multiple records (e.g., tagging multiple “Categories”). If unchecked, it acts as a single-select.
- Required: Prevents form submission until a selection is made.

Search configuration (User Actions)
Because this element connects to your database, you must explicitly define which fields the user can search.
- In the properties panel, look for the User Actions or Search section.
- Check the boxes next to the fields you want to be searchable.
- Example: For a User selector, you might check
NameandEmailso users can find people by either identifier.
- Example: For a User selector, you might check

Styling and Theme Overrides
By default, the selector inherits the input styles from your Global Theme. To customize it (e.g., change the label font or input border), use Theme Overrides.
- In the General tab, look for the Style/Settings icon (slider icon) next to the *Data source section.
- Clicking this opens the specific styling menu.
Styling the Label
- Typography: Font family, weight, size, and color.
- Alignment: Left, Center, or Right align the label text.
Styling the Input Box
- Text: Font size and color of the selected item text.
- Background: Fill color of the selector box.
- Border: Color, width, and radius.
- Padding: Internal spacing.
Frequently asked questions (FAQ)
What is the difference between this and a “Choice” element?
- Record Selector: Connects to a Data Source (Database rows). Supports search, pagination, and dynamic updates. Use this for relationships.
- Choice (Dropdown): Uses a static list of options (Option A, Option B) or simple mapped values. Use this for status fields or simple categories.
Can I filter the options shown?
Yes. You filter the options at the Data Source level. If you want the selector to only show “Active” customers, apply a filter to the connected Data Source (Status = Active). The Record Selector will strictly respect that filter.
How do I save the selection?
The Record Selector only collects the ID(s) of the selected rows. To save this relationship, you must place the element inside a Form or map its value to a Create/Update Row button action.
Related content
Still need help? If you’re looking for something else, please feel free to make recommendations or ask us questions; we’re ready to assist you.
- Ask the Baserow community
- Contact support for questions about Baserow or help with your account.