Share a view publicly
Baserow’s public view sharing lets you share specific table views with anyone, no workspace membership required, while keeping full control over what data is visible.
This guide covers how to create public share links for your Baserow views, control access with passwords, and customize what external stakeholders can see without granting workspace access.
Overview
Public sharing is ideal when external collaborators need read-only access to specific data. For example, share project status with clients, showcase portfolio items to prospects, or collect form submissions from the public. Recipients see only what you choose to display through filters, hidden fields, and view configurations.
Shared views update in real-time as your data changes. You can share Grid, Gallery, Form, Kanban, Timeline, and Calendar views, each maintaining its original formatting and features.
How public sharing works
Anyone with a shared view link can access the view without logging in. You control visibility through:
- View type selection – Choose which view (Grid, Form, Gallery, etc.) to share
- Field visibility – Hide sensitive columns before sharing
- Filters and sorting – Pre-configure how data appears
- Password protection – Restrict access to specific recipients
- Link generation – Create new URLs to revoke old access
Shared views are read-only by default. Form views accept submissions but don’t allow editing existing data.
Share a view step-by-step
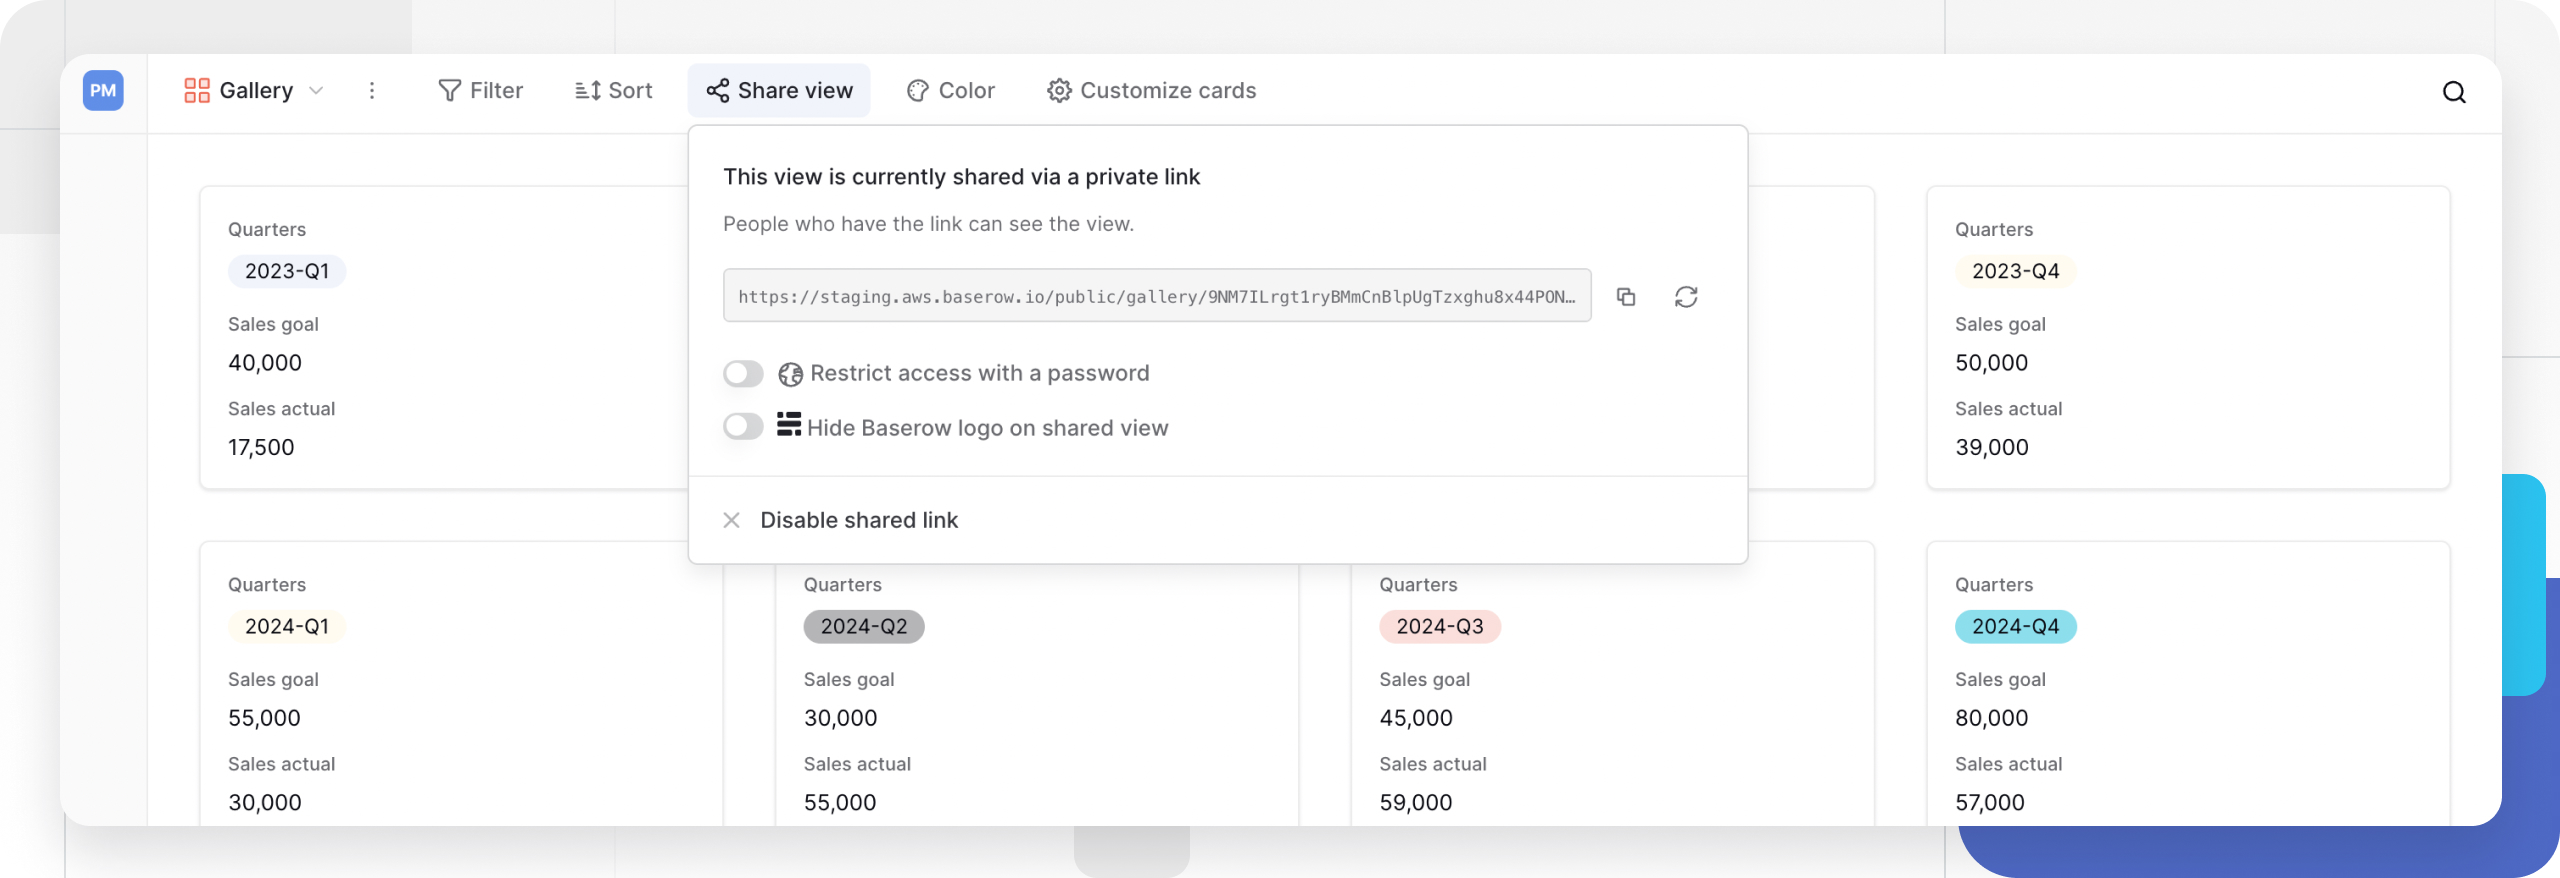
Create a shareable link
- Open the view you want to share
- Click the Share view button in the top toolbar
- Toggle Create a private link to generate a URL
- Copy the link using the Copy link icon

Secure your shared link
After creating a link, you can add security options:
| Option | Purpose | Details |
|---|---|---|
| Restrict access with a password | Require authentication | Toggle on password restriction to require authentication before viewing the form. Minimum 8 characters, stored encrypted |
| Generate new URL | Revoke old access | Click the refresh icon to create a new URL. The old link stops working or accepting form submissions immediately |
| Disable shared link | Stop all access | Can be re-enabled anytime |

Control what viewers see
Hide sensitive fields
Hidden fields don’t appear in shared views, even when rows are expanded. To hide fields:
- Use the Hide fields option in your view configuration
- Select which columns to hide from external viewers
- Share the view; hidden fields remain invisible
Learn more about field visibility options.
Apply filters and sorting
Viewers can see and use any filters or sorting you’ve configured. They can also add their own temporary filters without affecting your original view. Pre-configured filters help focus viewers on relevant data only.
Field summaries in Grid views
When you share a Grid view with field summaries enabled (totals, averages, counts), those calculations appear at the bottom of the shared view. This provides quick insights without requiring viewers to calculate manually.

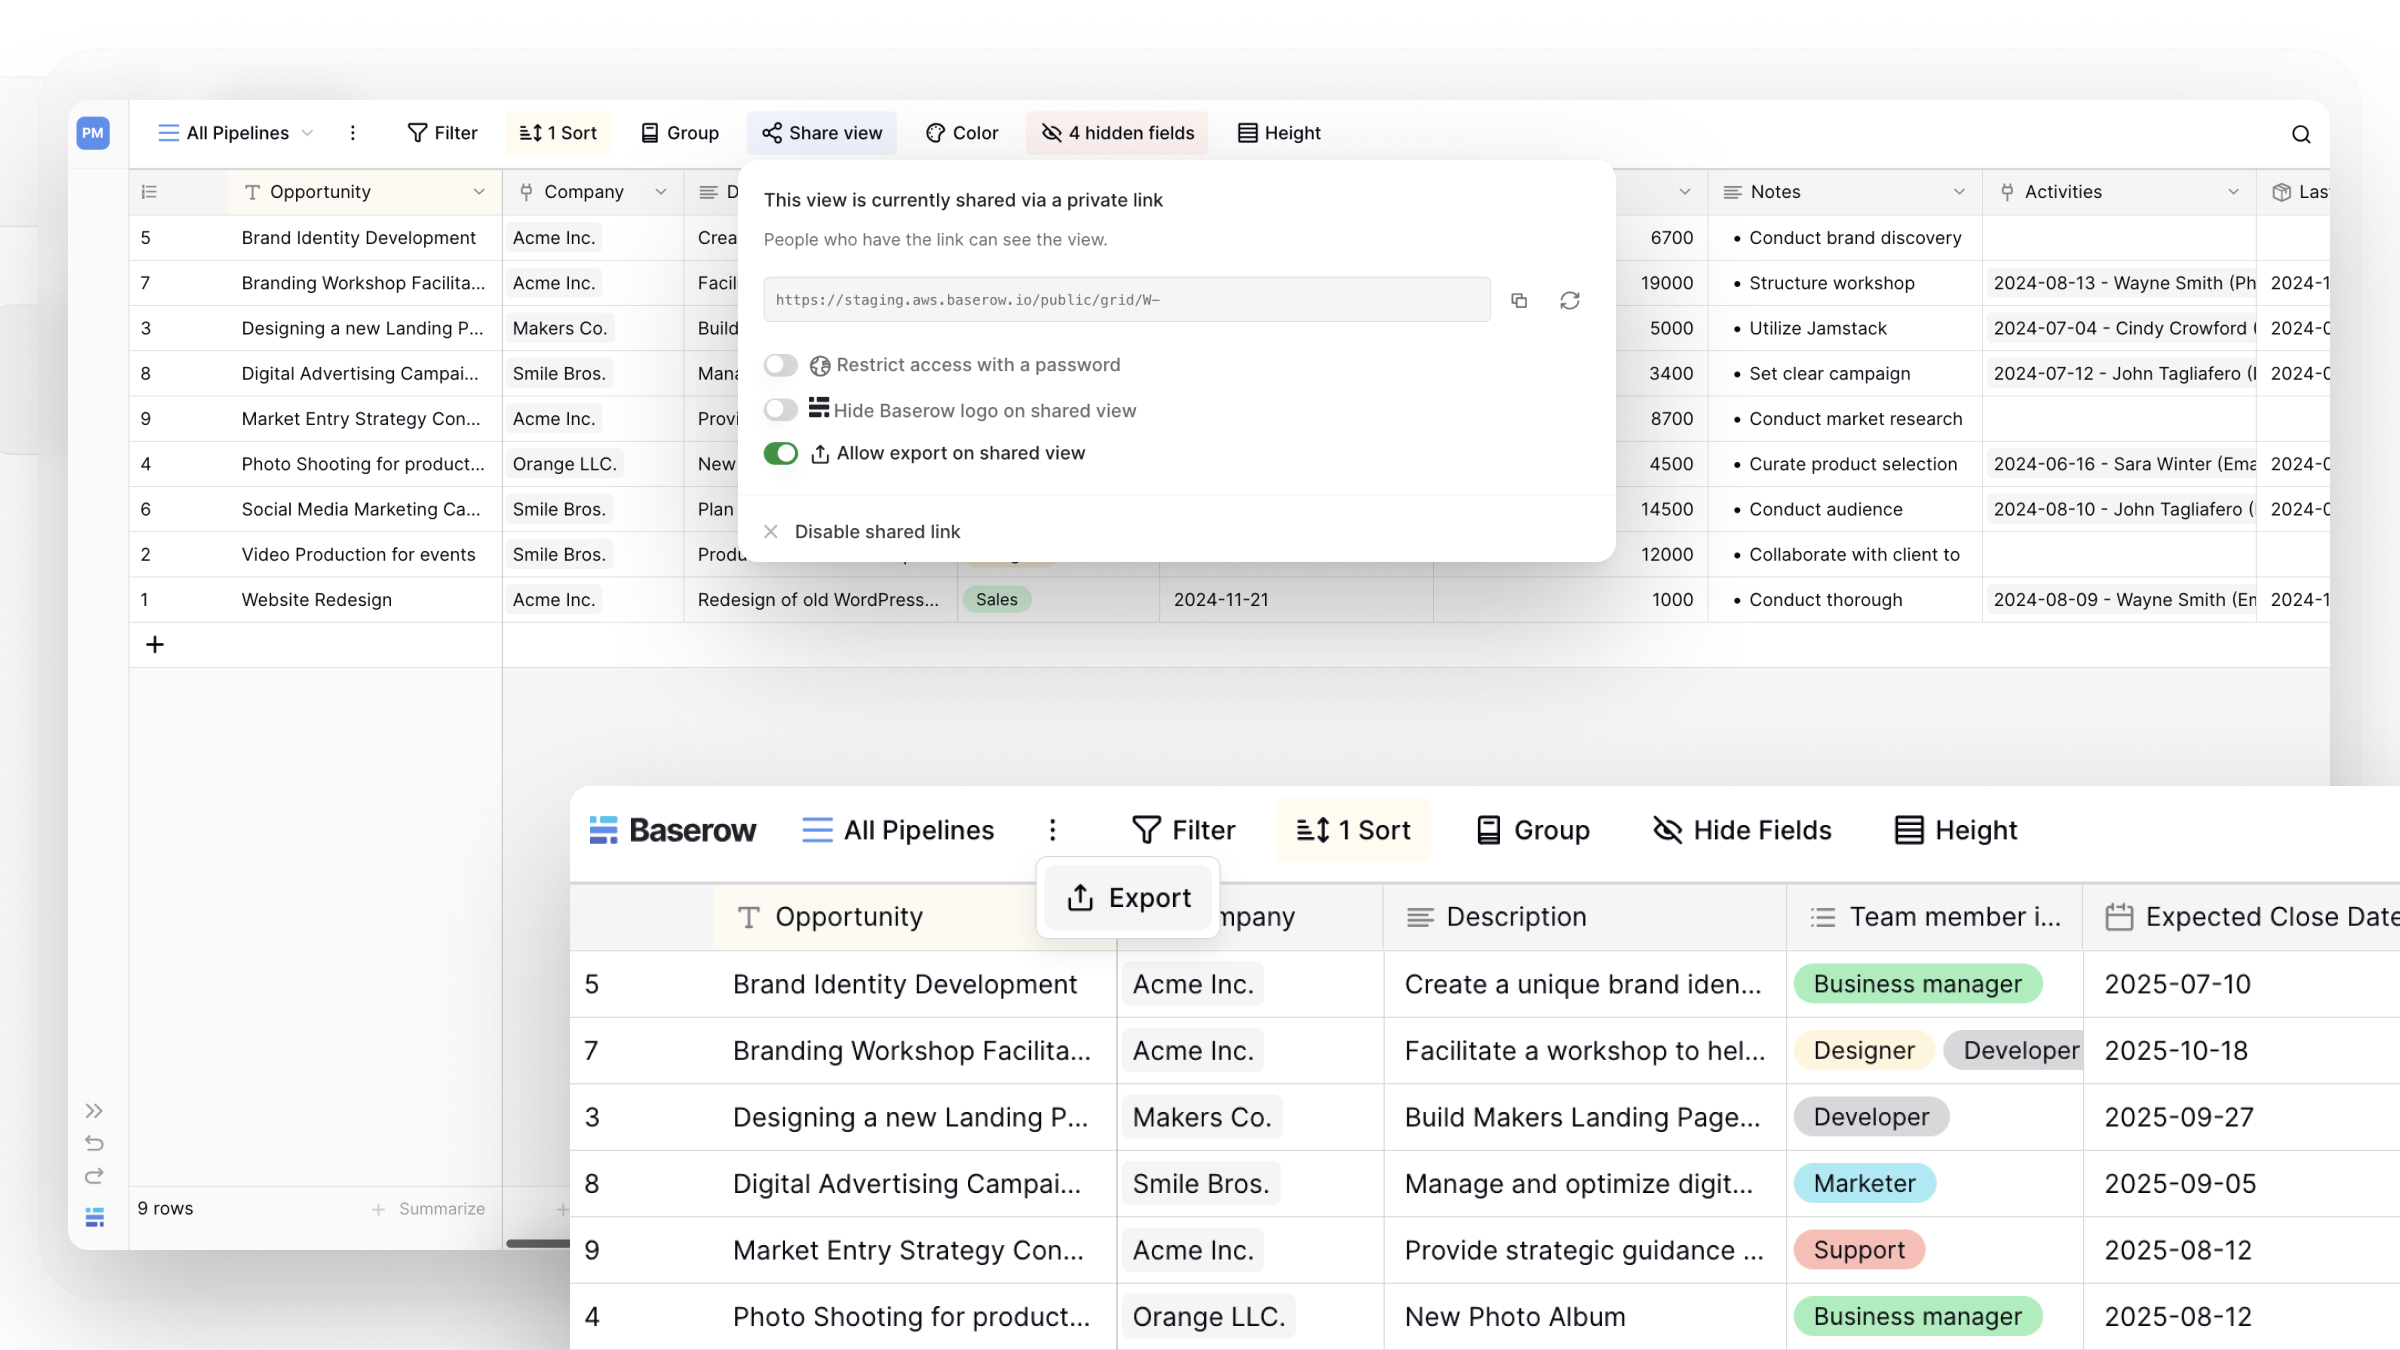
Allow export from a shared view
When sharing a Grid view, you will see an additional toggle in the Share view dialog: “Allow export on shared view”.
By default, this option is turned off. When you enable it, an “Export” option appears on the public view page. This allows anyone with the link to export the data from that view.
This is ideal for sharing reports or datasets with external partners who need to work with the data themselves. The export will respect all your active filters and hidden fields; public viewers can only download the exact data you’ve chosen to display.

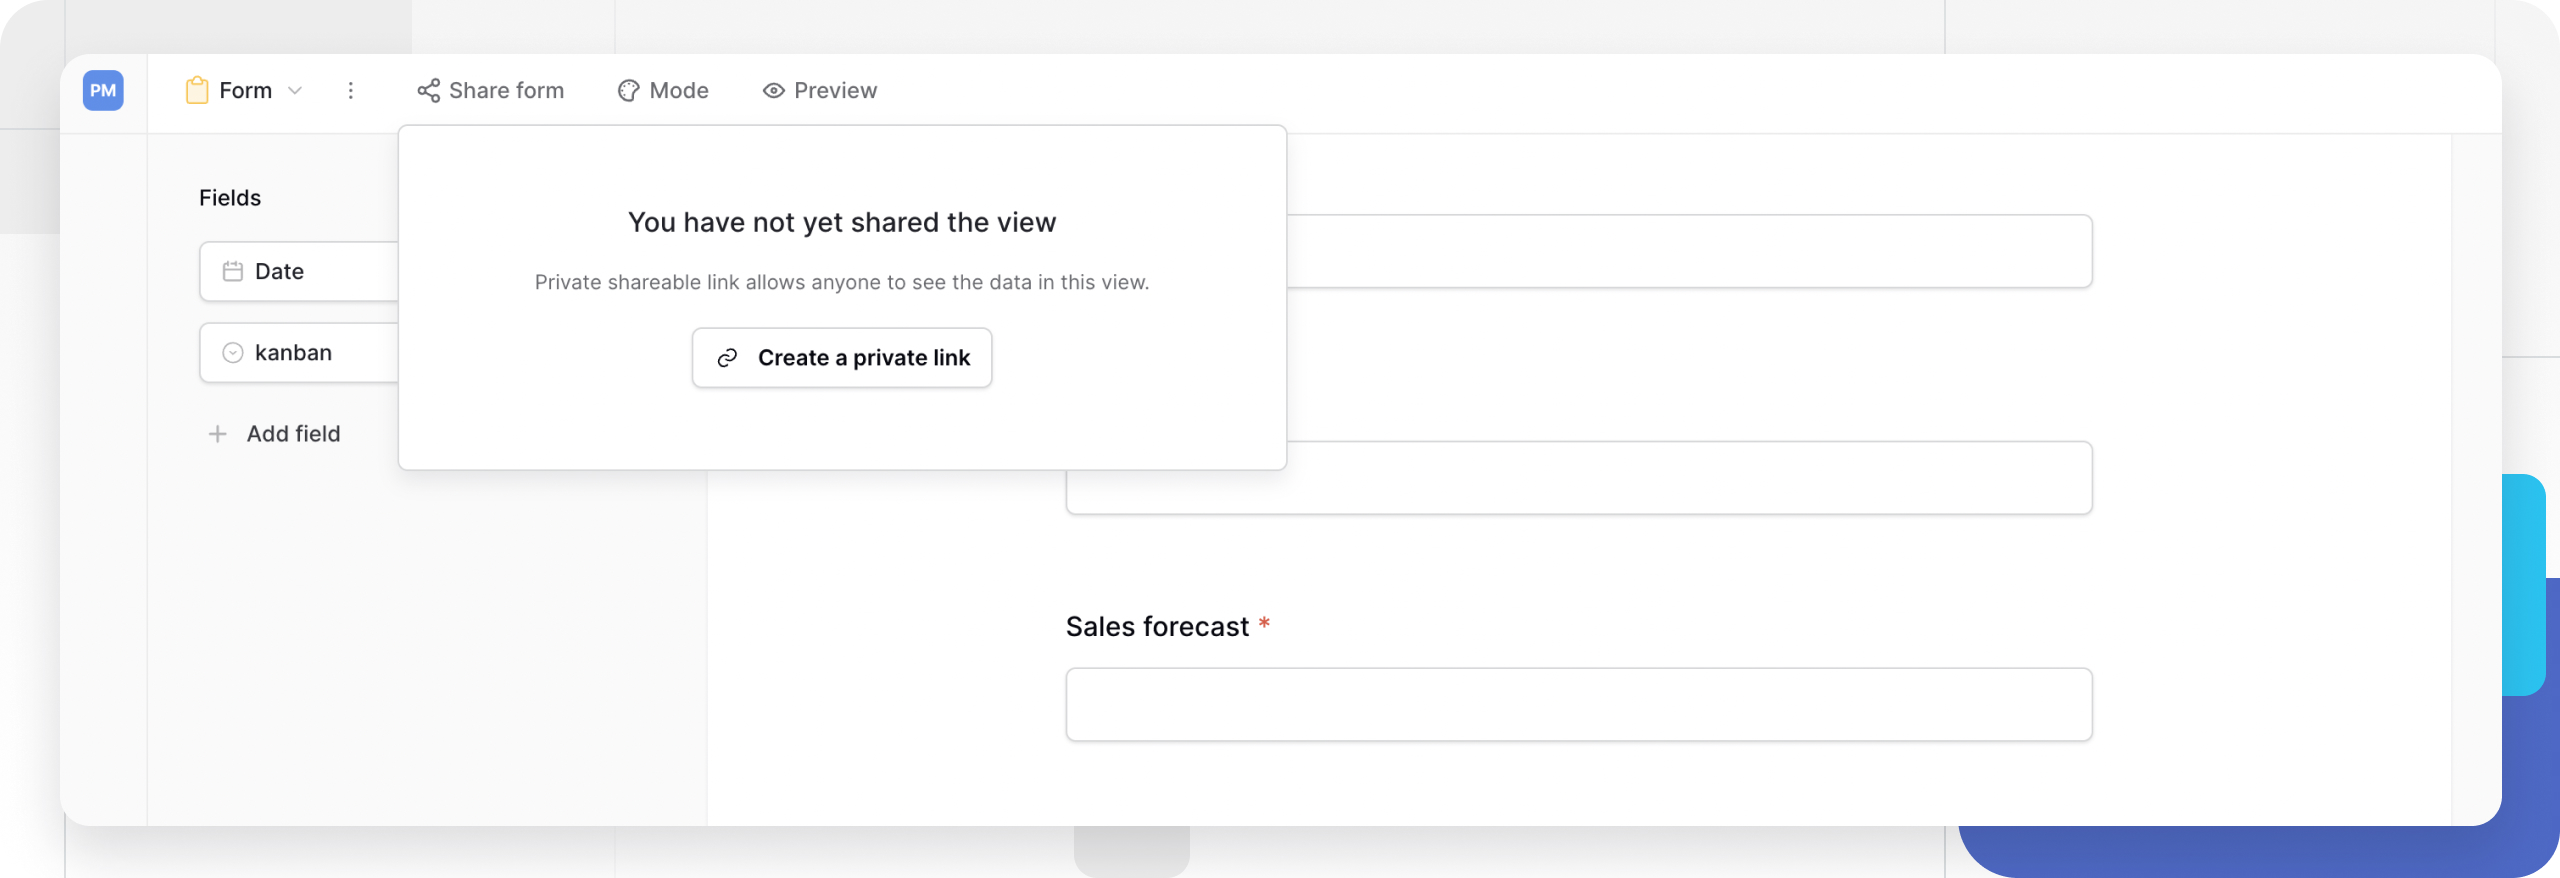
Share forms for data collection
Forms work differently from other views; they accept new submissions from anyone with the link.
To set up form sharing,
- Create and configure your form view
- Click Share form in the top toolbar
- Copy the generated URL to distribute
To manage form access, click the refresh icon to create a new URL and stop accepting submissions via the old link immediately, toggle on password restriction to require authentication before viewing the form, and click Disable shared link to stop accepting new submissions without deleting the form itself.
Embed views
You can embed any publicly shared view using an iframe:
<iframe src="YOUR_SHARED_VIEW_URL" frameborder="0" width="100%" height="400"></iframe>
Replace YOUR_SHARED_VIEW_URL with the actual link from the Share view dialog. This works for all view types, including forms, galleries, and calendars.
Remove Baserow branding
Paid subscribers can hide the Baserow logo from shared views for a white-label experience. Learn more about subscription options.
Frequently asked questions
Can viewers edit data in shared views?
No. All shared views are read-only except for Form views, which accept new submissions but don’t allow editing existing rows.
Do changes to my view affect shared links?
Yes. Changes to field visibility, filters, and sorting apply immediately to shared views. Viewers see your updates in real-time.
What happens when I generate a new URL?
The old link stops working immediately for all recipients. You’ll need to share the new URL with anyone who needs access.
Can I password-protect existing shared links?
Yes. Add password protection at any time through the Share view dialog. Existing recipients will need the password on their next visit.
Do shared views count against my row limits?
No. Shared views don’t consume additional resources or count against storage limits. Only the underlying table data counts toward your plan limits.
Related content
- Create custom views
- View configuration options
- Grid view guide
- Form view guide
- Field visibility settings
Still need help? If you’re looking for something else, please feel free to make recommendations or ask us questions; we’re ready to assist you.
-
Contact support for questions about Baserow or help with your account
