Row configuration options
Row configuration in Baserow gives you flexible control over how your data appears and behaves, from adjusting visual density to managing bulk operations on hundreds of records.
This guide explains how to customize, organize, and manage rows in Baserow tables, including reordering, height adjustments, selection methods, and editing capabilities.
Overview
Row configuration options determine how you interact with and display data in your Baserow tables. These settings affect the visual appearance of your rows, how you select and manipulate data, and how efficiently you can perform bulk operations.
Baserow offers three main categories of row configuration: visual customization (height and display), data management (editing, reordering, deleting), and selection tools (single, multi-select, and bulk operations). Understanding these options helps you optimize your workspace for different types of data and workflows.
For foundational concepts about rows, see the rows overview guide.
Row configuration capabilities
| Configuration type | Options available | Use case |
|---|---|---|
| Row height | Small, Medium, Large | Adjust for multi-line text or compact viewing |
| Row ordering | Drag and drop | Manual organization (when sorting is disabled) |
| Row selection | Single, range (Shift), non-adjacent (Ctrl/Cmd) | Bulk operations up to 200 rows |
| Row editing | Inline, row detail panel, bulk paste | Quick updates or comprehensive editing |
| Row deletion | Individual or bulk delete | Data cleanup with trash recovery period |
How to adjust row height
Row height configuration improves readability for different content types. Baserow offers three height options to accommodate various data displays:
- Small (default) - Compact view for tables with short text
- Medium - Balanced view for mixed content
- Large - Expanded view for multi-line text or detailed content
To change row height:
- Open your table in Grid View
- Click the Height button in the top bar
- Select your desired size (Small, Medium, or Large)
The height adjustment applies immediately to all rows in the current view. Learn more about enlarging rows for detailed content viewing.

How to reorder rows
Manual row reordering lets you organize records in custom sequences that make sense for your workflow.
To reorder rows:
- Locate the row you want to move
- Click and hold the drag handle
⠿on the left side of the row - Drag the row to its new position
- Release to drop the row in place
Row reordering only works when manual sorting is disabled. If your view has active sorts, remove them first to enable drag-and-drop reordering. Learn about sorting in Grid View for more details.

How to select rows
Row selection enables bulk operations like editing, deleting, or copying multiple records simultaneously.
Single row selection
Click the row number on the left side to select an entire row.
Range selection
- Click the first row number
- Hold Shift and click the last row number
- All rows between are selected
Non-adjacent selection
- Click the first row number
- Hold Ctrl (Windows) or Cmd (Mac)
- Click additional row numbers to add them to your selection
Multi-row drag selection
Click and drag your mouse across multiple row numbers to select them quickly.
Selection limit: Baserow limits selections to 200 rows at once due to lazy loading, which loads rows progressively as you scroll. This design allows efficient handling of tables containing millions of rows without downloading everything upfront.

How to edit rows
Baserow provides multiple methods for editing row data depending on your needs:
Inline editing
Click directly into any cell to edit its value. Changes save automatically when you press Enter or move to another cell.
Row detail panel
Click the enlarge icon on any row to open a comprehensive view showing all fields for that record. This panel is ideal for editing multiple fields in a single row.
Bulk editing with paste
Copy data from spreadsheets or other sources and paste it directly into your table using Ctrl/Cmd + V. Baserow maps the pasted data to your selected cells automatically. See pasting data into cells for detailed instructions.
Edit existing rows via form
Edit row link field type lets you connect a row to a form view. Each row gets its own secure URL. When someone opens the link, they see a pre-filled form, they update the values, and the row is updated on submit.
How to copy rows
Copying rows in Baserow allows you to quickly duplicate or share data between tables, projects, or collaborators. Depending on your needs, you can copy a single row’s URL for quick reference or copy multiple rows with or without headers for use in spreadsheets or other tools.
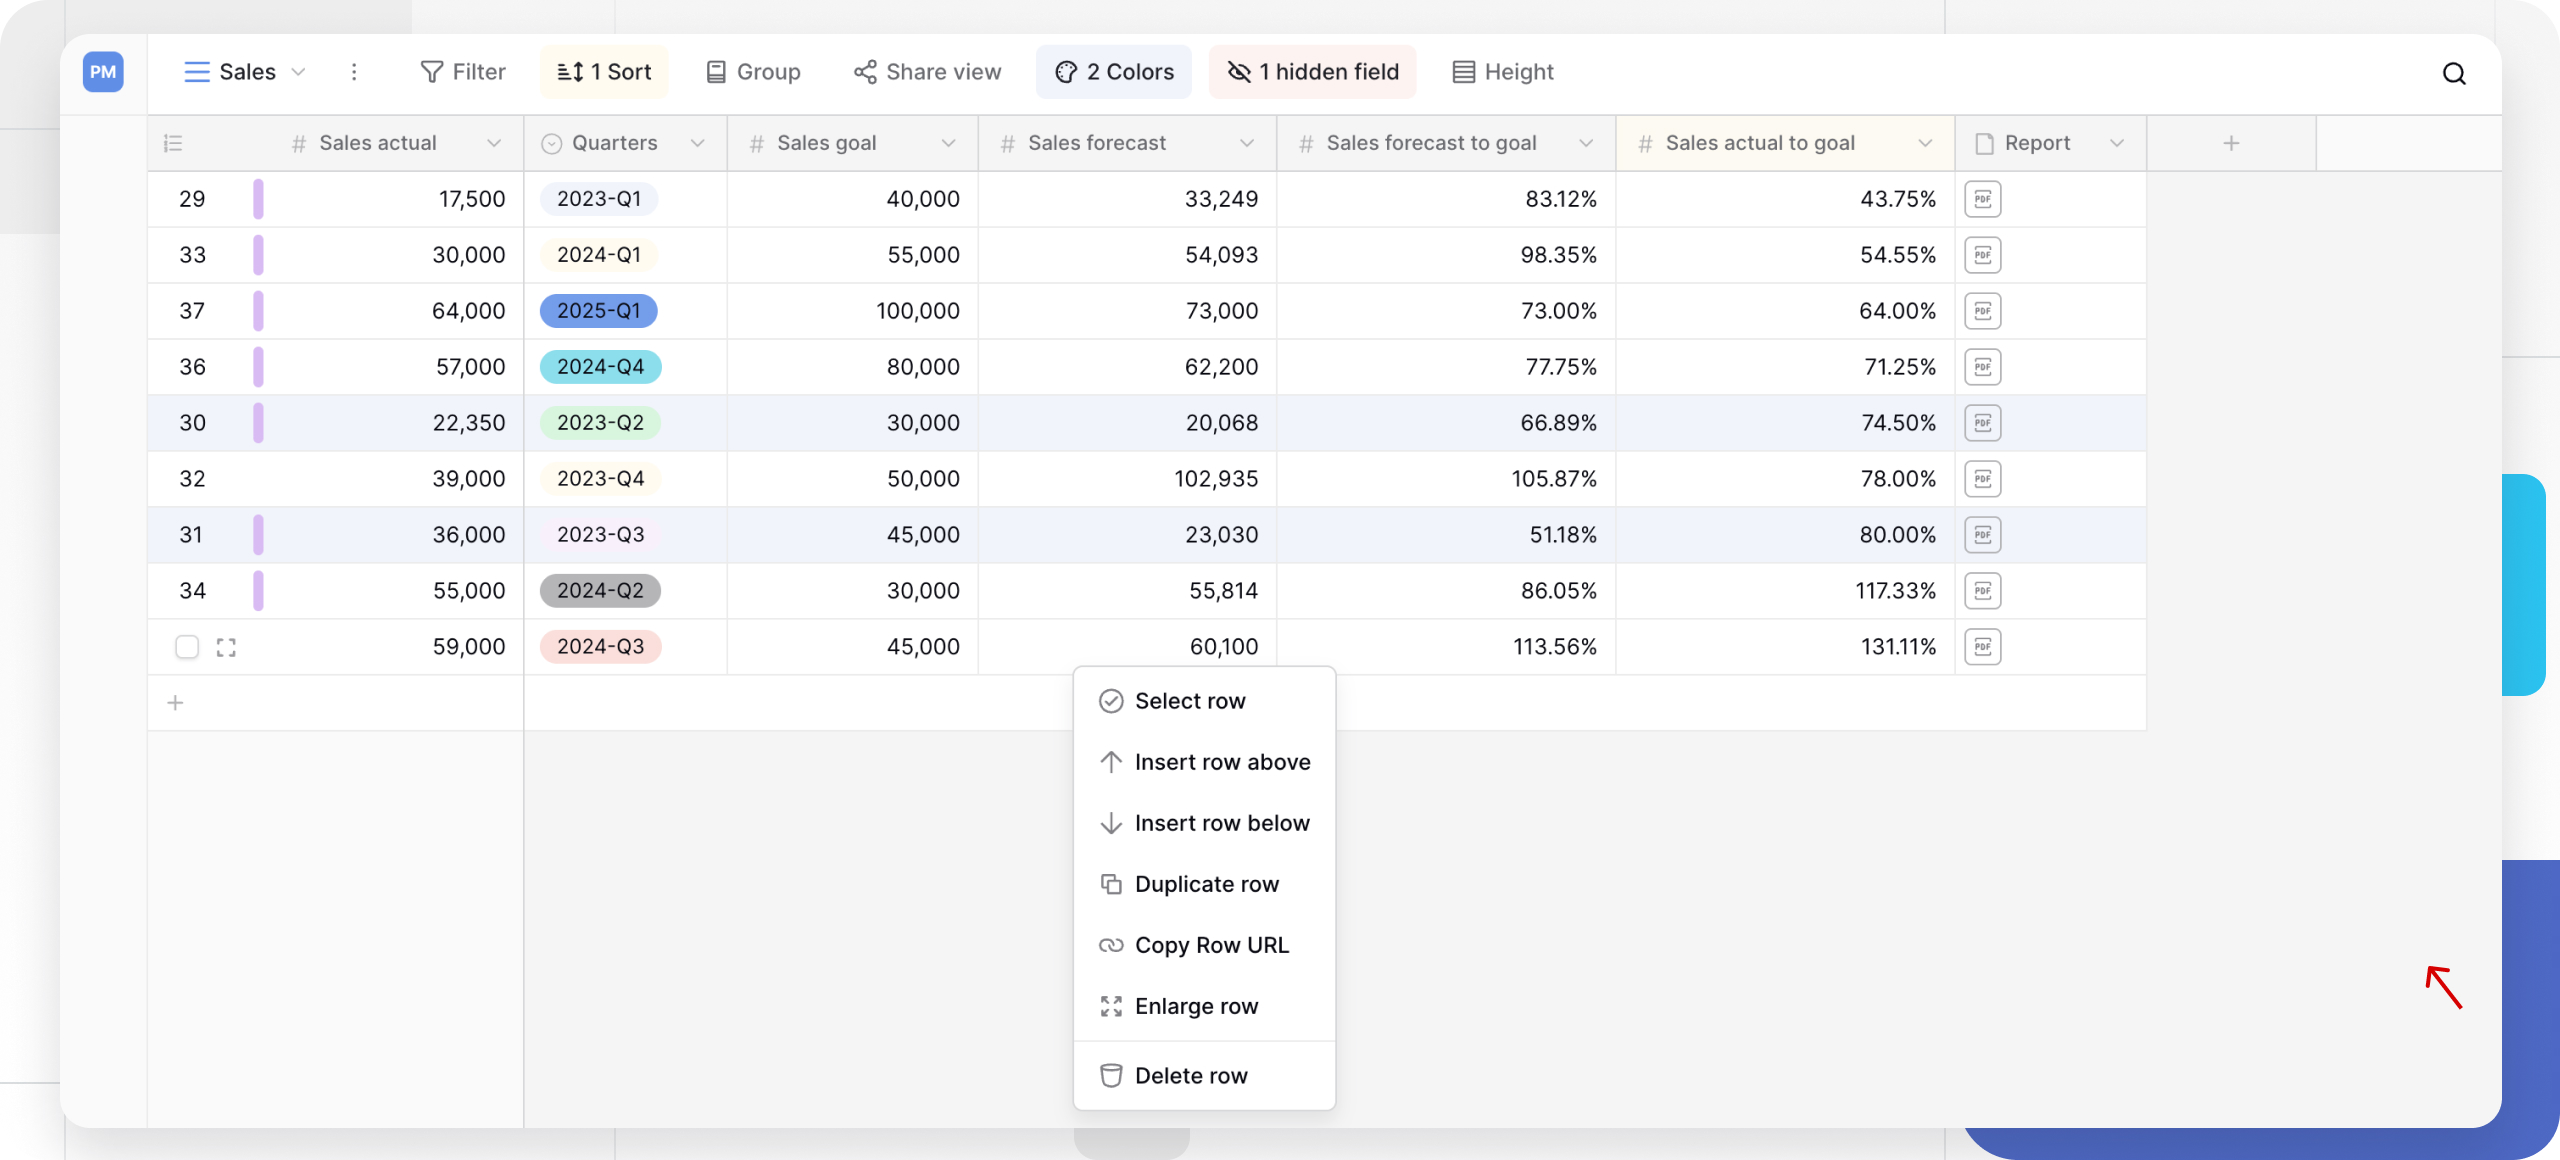
Copy row URL
- Navigate to the row you want to copy
- Right-click the row to open the context menu
- Select Copy row URL
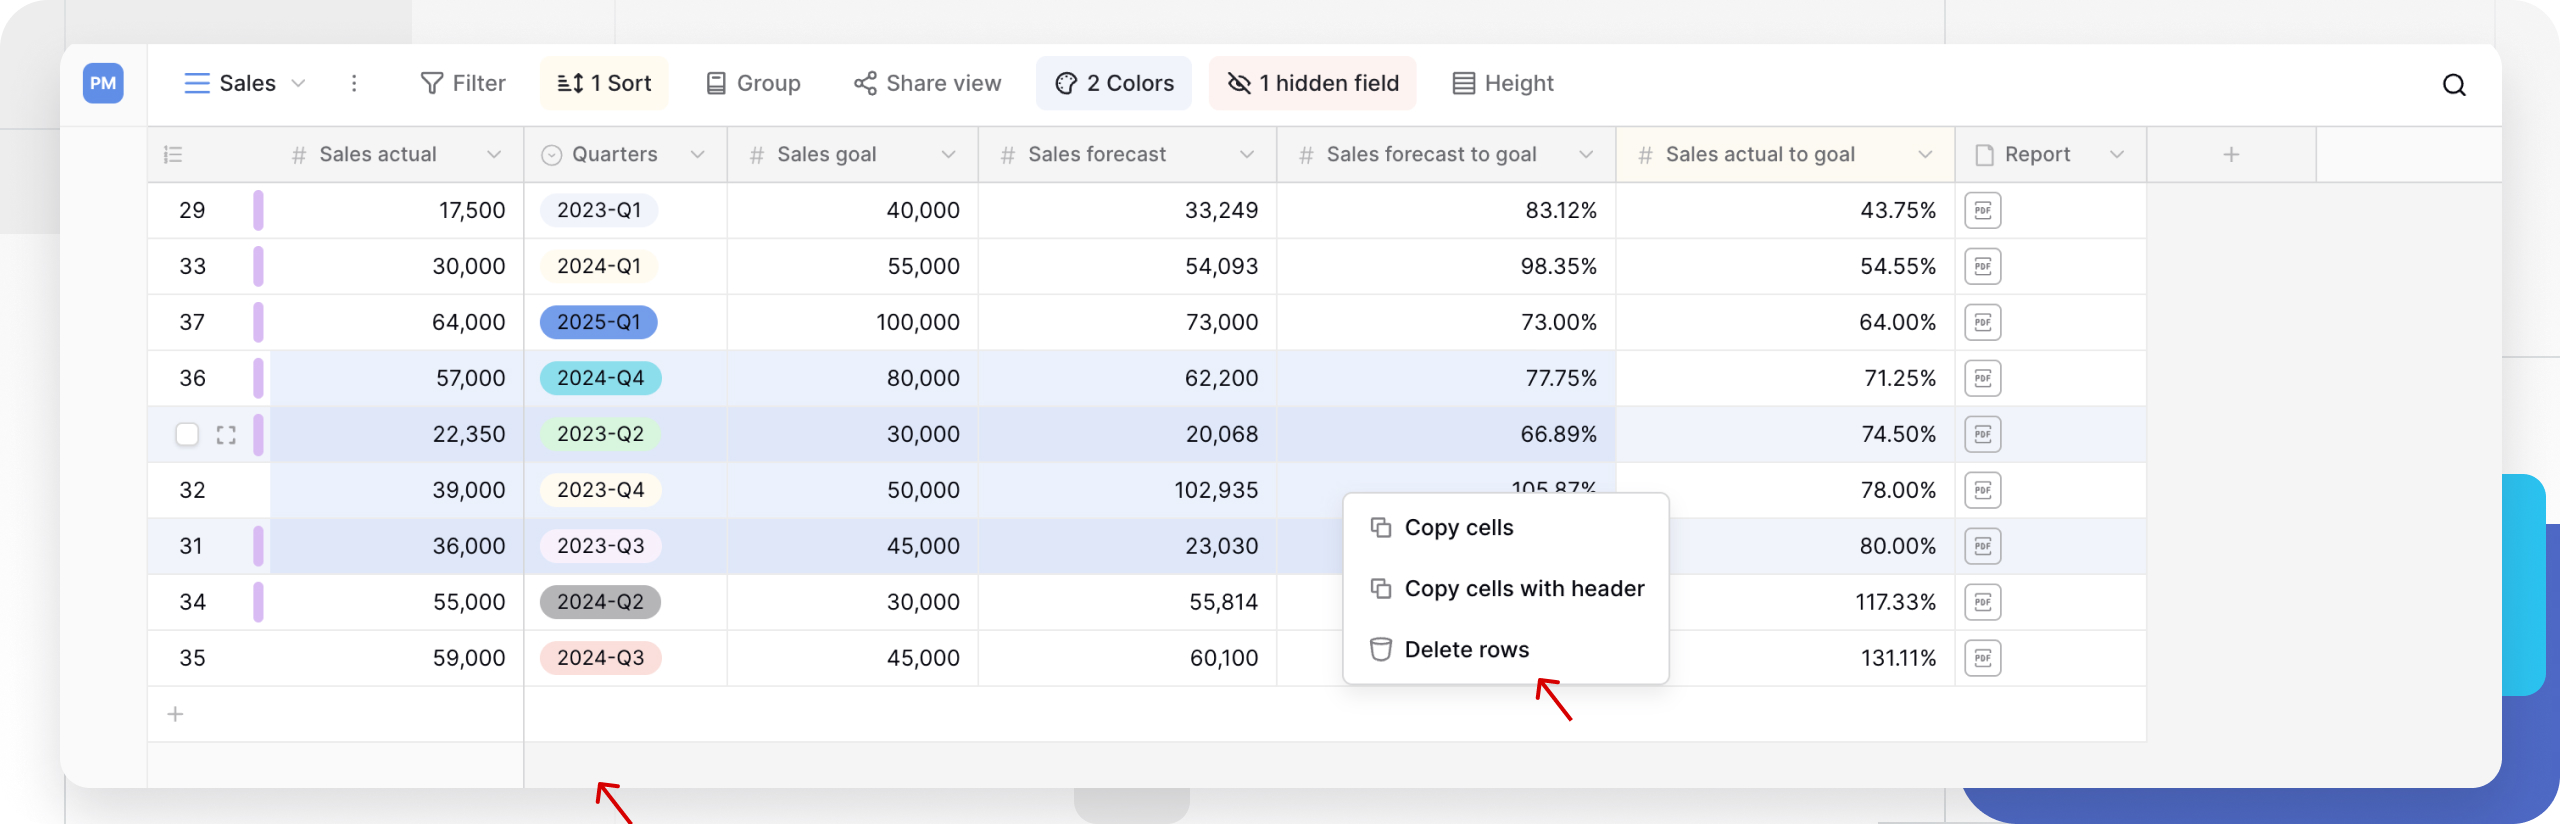
Copy multiple rows
- Select multiple rows using any selection method
- Click the Copy cells or Copy cells with header
When you paste the copied content into a spreadsheet application like Excel or Google Sheets, each value will appear in its corresponding cell. If you include headers, they’ll appear in the first row, making it easier to map or import your data elsewhere.
How to delete rows
Delete individual rows or multiple rows at once. Deleted rows move to trash with a grace period for recovery.
Delete a single row
- Navigate to the row you want to delete
- Right-click the row to open the context menu
- Select Delete row
Delete multiple rows
- Select multiple rows using any selection method
- Press the Delete key, or right-click and choose Delete rows
Once the trash grace period expires, deletion becomes permanent. Recover deleted rows from the trash before the period ends.
Frequently asked questions
Why can’t I reorder rows in my table?
Row reordering is disabled when your view has active sorting applied. To enable drag-and-drop reordering, remove all sorts from your Grid View by clicking the sort button and clearing any active sort rules.
How many rows can I select at once?
You can select up to 200 rows at a time. This limit exists because Baserow uses lazy loading to handle large tables efficiently, loading rows as you scroll rather than loading entire tables into memory.
Do row height changes affect all views?
No, row height settings are view-specific. You can set different row heights for different views of the same table, allowing you to optimize each view for its specific purpose.
Can I recover deleted rows?
Yes, deleted rows move to trash with a grace period for recovery. Access the trash to restore rows before the grace period expires. After expiration, deletion is permanent, and rows cannot be recovered.
What’s the fastest way to edit multiple rows with the same value?
Select multiple cells in a column, type your new value, and press Ctrl/Cmd + Enter to apply the value to all selected cells simultaneously. This works for any field type that supports bulk editing.
Related content
- Rows overview - Learn fundamental row concepts
- Create a row - Add new records to your tables
- Paste data into cells - Import data from spreadsheets
- Row coloring - Apply conditional formatting to rows
- Row commenting and mentions - Collaborate on specific records
- Keyboard shortcuts - Speed up row operations
Still need help? If you’re looking for something else, please feel free to make recommendations or ask us questions; we’re ready to assist you.
-
Contact support for questions about Baserow or help with your account