Configure generic OpenID Connect (OIDC) SSO
This guide explains how to configure Single Sign-On (SSO) using the generic OpenID Connect (OIDC) protocol. Use this guide if your Identity Provider is not listed in the dedicated SSO menu but supports the OIDC standard (e.g., Keycloak, Auth0, Salesforce).
SSO is available on the Baserow Advanced Enterprise plan. You must have a valid license activated to configure these settings.
Overview
OpenID Connect (OIDC) allows you to connect almost any modern identity provider to Baserow.
To set this up, you need to register Baserow as a “Client” application in your Identity Provider (IdP) and then paste the credentials (Client ID, Secret, and Base URL) back into Baserow.
Prerequisites
- Baserow: You must be an Instance Admin on a self-hosted plan.
- Identity Provider: You must have administrative access to create clients/applications in your IdP.
Phase 1: Create application in Identity Provider
Since every IdP is different, you will need to consult your provider’s documentation. However, the general steps are always the same:
- Create a “Client” or “Application”: Look for options like “OIDC Client,” “Web Application,” or “Confidential Client.”
- Locate the Callback URL: You will need to tell your provider where to send users after they log in.
- Go to Baserow Admin tools -> Authentication -> + Add Provider -> OpenID Connect.
- Copy the Callback URL displayed in the modal (e.g.,
https://your-baserow.com/api/sso/oauth2/callback). - Paste this into the Redirect URI or Callback URL field in your IdP.
- Generate Credentials: Once created, your IdP will provide you with:
- Client ID
- Client Secret
- Issuer URL / Base URL
Phase 2: Configure Baserow
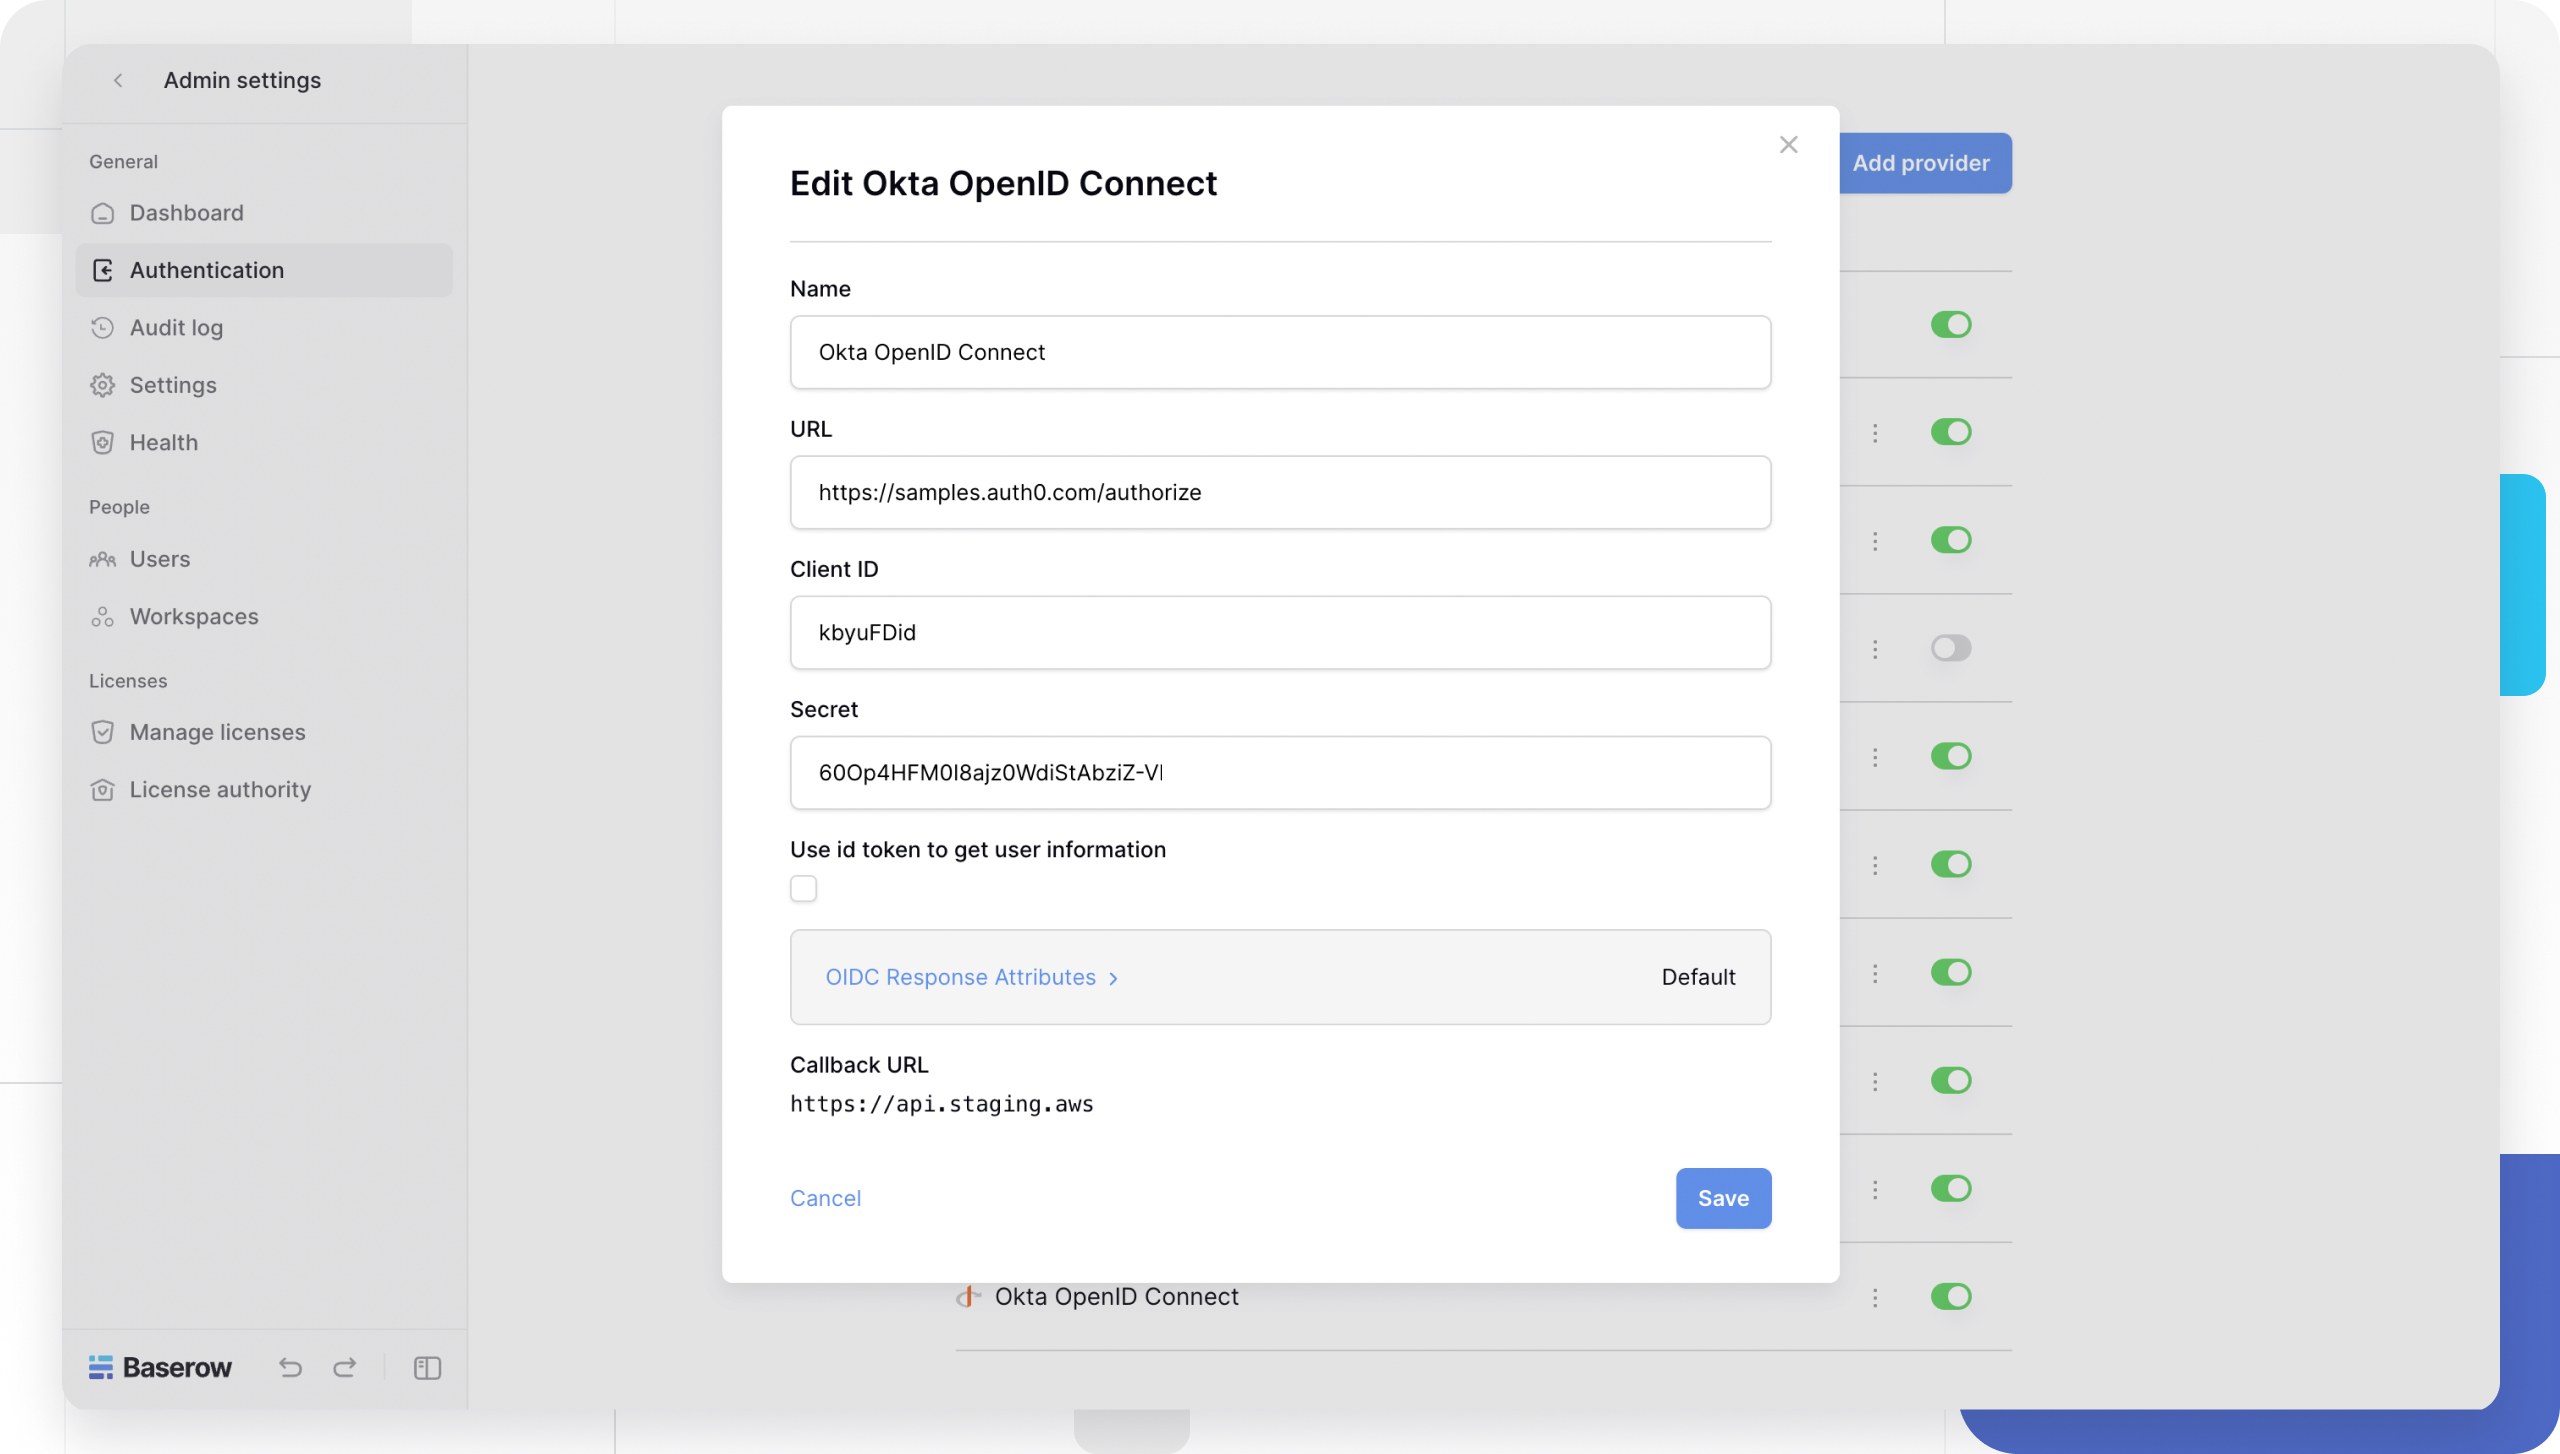
- Return to the Baserow Add OpenID Connect Provider modal.
- Name: Enter a display name (e.g., “Company Login”). This text will appear on the login button.
- Client ID: Paste the ID from your IdP.
- Secret: Paste the Secret from your IdP.
- Base URL: Paste the URL of your IdP (See formatting rules below).
- Click Save.
Base URL formatting
Baserow automatically appends /.well-known/openid-configuration to the URL you provide to discover the endpoints. Do not include this suffix yourself.
| If your Discovery URL is… | You must enter… |
|---|---|
https://idp.example.com/.well-known/openid-configuration |
https://idp.example.com |
https://login.microsoftonline.com/{tenant}/v2.0/.well-known... |
https://login.microsoftonline.com/{tenant}/v2.0 |
https://auth0.com/realms/myrealm/.well-known... |
https://auth0.com/realms/myrealm |
Troubleshooting & common issues
“Discovery Endpoint” or “404” Errors
This almost always means the Base URL is incorrect.
- Check: Did you paste the full
.well-knownpath? (Remove it). - Check: Does your URL end with a trailing slash
/? (Try removing it). - Test: You should be able to paste
[Your Base URL]/.well-known/openid-configurationinto a browser and see a JSON response. If not, the URL is wrong.
“PKCE Required” or “Code Exchange” Errors
Some providers (like Azure AD) enforce PKCE (Proof Key for Code Exchange) for security. Baserow’s current OIDC implementation may not support strict PKCE enforcement for all providers.
- Solution: If you are connecting Azure AD, please use our SAML Integration Guide instead.
Frequently Asked Questions (FAQ)
What is the difference between OAuth 2 and OpenID Connect?
OIDC is a layer on top of OAuth 2 specifically designed for authentication (logging in), whereas OAuth 2 is designed for authorization (accessing APIs). Baserow uses OIDC to verify who the user is.
Can I map Roles or Groups via OIDC?
Not currently. Baserow supports Just-In-Time (JIT) provisioning, meaning the account is created immediately upon login. However, we do not currently read OIDC “Claims” (like groups or roles) to assign permissions in Baserow. You must manually assign roles after the user joins.
Related content
Still need help? If you’re looking for something else, please feel free to make recommendations or ask us questions; we’re ready to assist you.
-
Contact support for questions about Baserow or help with your account.