View configuration options
View configuration options let you customize how data appears and which operations are available. Each view type offers different configuration options based on its purpose.
This guide covers where to find view configuration options in Baserow and how to customize views through the toolbar and view menu.
Understanding view configuration
View configuration happens in two places: the toolbar at the top of your view and the view menu (⋮) next to the view name. The toolbar provides quick access to data manipulation options, while the view menu contains view management operations.
Changes you make to the view configuration are saved automatically and persist when you return to the view. Collaborative views share configurations with all workspace members, while personal views keep your settings private.
View toolbar options
The toolbar at the top of each view provides quick access to data organization features. Available options vary by view type:
| Feature | Grid | Gallery | Kanban | Calendar | Timeline | Form |
|---|---|---|---|---|---|---|
| Filter | ✓ | ✓ | ✓ | ✓ | ✓ | – |
| Sort | ✓ | ✓ | – | – | ✓ | – |
| Group | ✓ | – | – | – | – | – |
| Hide fields | ✓ | – | – | – | – | – |
| Row height | ✓ | – | – | – | – | – |
| Share view | ✓ | ✓ | ✓ | ✓ | ✓ | ✓ |
| Row colors | ✓ | ✓ | ✓ | ✓ | – | – |
| Customize cards | – | ✓ | ✓ | – | – | – |
| Stacked by | – | – | ✓ | – | – | – |
| Displayed by | – | – | – | ✓ | – | – |
| Labels | – | – | – | ✓ | – | – |
| Change mode | – | – | – | – | – | ✓ |
| Preview | – | – | – | – | – | ✓ |
Data organization features
These toolbar options control how data displays in your view:
Filters - Show only records matching specific conditions. Available in most view types for focusing on relevant data.
Sort - Order records by field values in ascending or descending order. Changes display order without modifying data.
Group - Organize records into collapsible sections based on field values. Available in grid view only.
Hide fields - Control which columns appear in your view. Each view can show different fields.
Row height - Adjust row size in grid view (short, medium, tall, extra tall) to show more or less content.
Row colors - Apply conditional formatting to highlight records based on field values.
View-specific features
Customize cards (Gallery, Kanban) - Choose which fields display on cards and how they’re arranged.
Stacked by (Kanban) - Select which single select field determines the kanban columns.
Displayed by (Calendar) - Choose which date field determines when records appear on the calendar.
Labels (Calendar) - Select which field values appear as event labels on the calendar.
Change mode (Form) - Switch between standard form and survey mode.
Preview (Form) - See how your form appears to respondents before sharing.
Sharing and collaboration
Share view - Generate public links or embed codes to share views with people outside your workspace. Control whether viewers can edit, comment, or only view data.
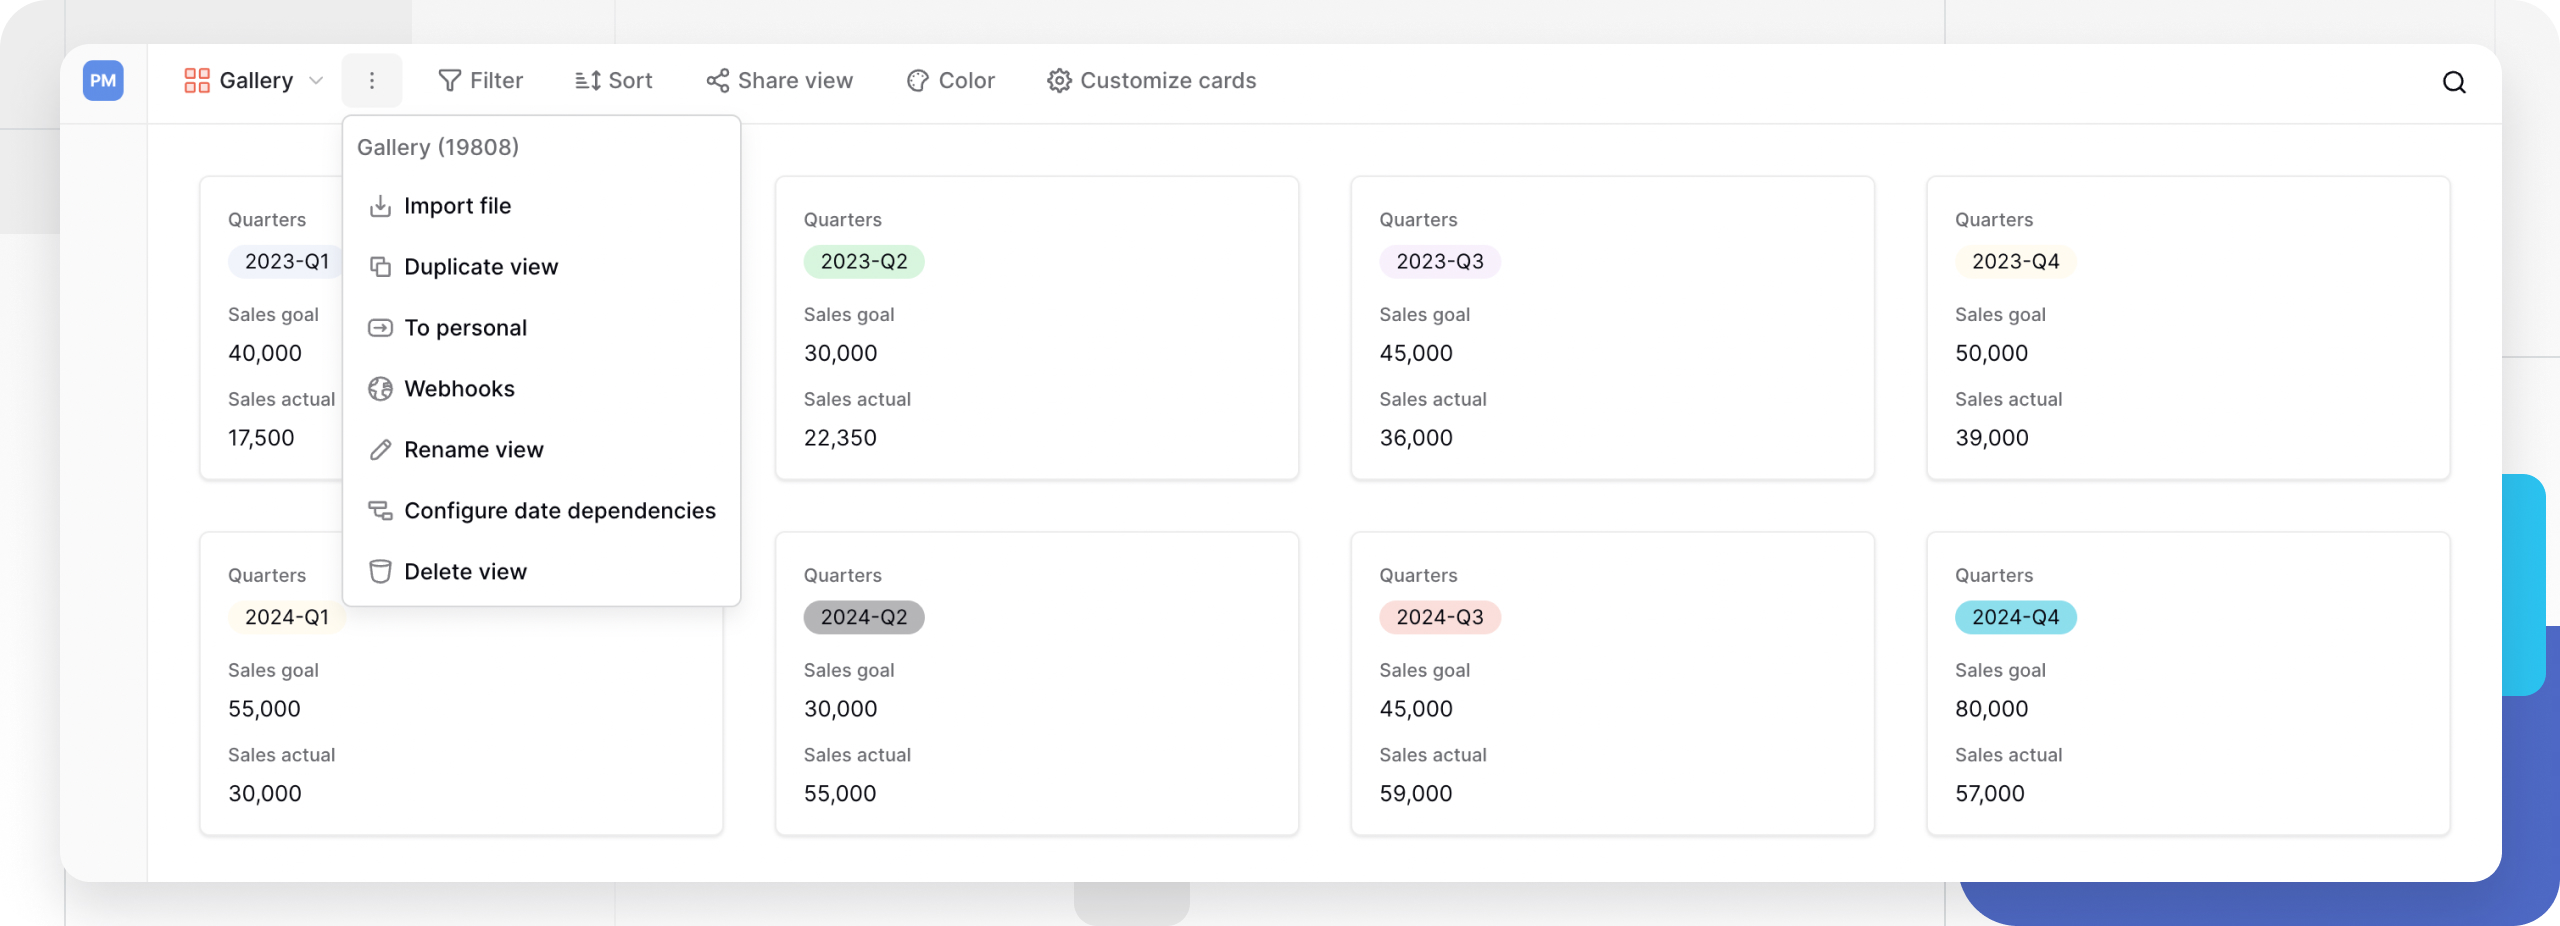
View menu operations
Click the three-dot menu (⋮) next to any view name to access view management operations:
Rename a view
- Click the ⋮ next to the view name
- Select Rename view
- Enter the new name
- Press Enter or click outside to save

Clear, descriptive names help team members identify views quickly. Use names like “Active Projects - Marketing” instead of “View 2.”
Delete a view
- Click the ⋮ next to the view name
- Select Delete view
- Confirm the deletion

Important: You cannot delete the last collaborative view in a table. Every table must have at least one collaborative view accessible to all workspace members.
Duplicate a view
Duplicating copies all view settings, including filters, sorts, field visibility, and formatting. Use this to create variations of existing views or test new configurations safely.
Click the ⋮ next to the view name -> Select Duplicate view
Learn more: Create and duplicate views
Convert between collaborative and personal
- Click the ⋮ next to the view name
- Select Change to personal view or Change to collaborative view
- Confirm the conversion
Converting a collaborative view to personal makes it visible only to you. Converting a personal view to a collaborative view shares it with all workspace members.
Learn more: Collaborative views | Personal views
Export a view (Grid view only)
- Click the ⋮ next to the view name
- Select Export view
- Choose your format (CSV, JSON, or XML)
- Configure export options
- Click Export
Only currently visible and filtered records are exported. Use filters before exporting to create custom data reports.
Learn more: Export a view
Import file
- Click the ⋮ next to the view name
- Select Import file
- Choose your file (CSV, JSON, or XML)
- Map fields or create new ones
- Confirm the import
Imported data adds new rows to the table and appears in all views according to their filter settings.
Learn more: Import data into tables
Configure webhooks
- Click the ⋮ next to the view name
- Select Webhooks
- Create or manage webhook configurations
Webhooks notify external systems when records are created, updated, or deleted in your table.
Learn more: Webhooks
Configure date dependency
Available when using date and duration fields with dependency enabled. Configure which date fields depend on others for automatic date calculations.
Learn more: Date dependency
Organize views
Change view order by dragging views in the view dropdown. The first view in the list becomes the default view that loads when opening the table.

In collaborative views, reordering affects all workspace members. The view order determines which view loads by default and helps organize views logically.
View memory
Baserow remembers your last used view for each table. When you return to a table, it opens with the view you used most recently, making your workflow more efficient.

This automatic memory works across:
- Different tables in the same database
- Multiple browser tabs
- Sessions after closing and reopening Baserow
Frequently asked questions
Which configuration options affect other users?
In collaborative views, all configuration changes affect everyone who accesses the view. In personal views, your configurations remain private. Data changes (adding, editing, deleting records) always sync across all views regardless of type.
Can I reset a view to default settings?
Not directly, but you can remove individual configurations: clear all filters, remove sorts, show all hidden fields, and remove row colors. Alternatively, create a fresh view and delete the configured one.
Why can’t I see certain toolbar options?
Toolbar options vary by view type and your permissions. Some features like “Hide fields” only appear in grid view, while “Customize cards” appears only in gallery and kanban views. Check your workspace role if options seem missing.
Do my view configurations slow down Baserow?
No. View configurations don’t impact performance significantly. Complex filters on very large tables (10,000+ rows) might take slightly longer to calculate, but this is typically imperceptible.
Can I copy view configurations to other tables?
Not directly. You can duplicate views within the same table, but configurations don’t transfer between tables. You’ll need to manually recreate filters, sorts, and other settings in the new table’s views.
Related content
View basics
- Views overview - Understanding view concepts
- Create custom views - Step-by-step view creation
- Collaborative views - Shared team views
- Personal views - Private individual views
Configuration features
- Filters in Baserow - Filter records by conditions
- Advanced filtering - Complex filter logic
- Group rows - Organize with grouping
- Row coloring - Conditional formatting
- Field customization - Field visibility and order
- Row configuration - Row height and display
View types
- Grid view - Spreadsheet interface
- Gallery view - Visual card display
- Form view - Data collection
- Kanban view - Project boards
- Calendar view - Event scheduling
- Timeline view - Project timelines
Advanced features
- Share a view publicly - External sharing
- Export a view - Download data
- Import data - Add records
- Webhooks - External system notifications
Still need help? If you’re looking for something else, please feel free to make recommendations or ask us questions; we’re ready to assist you.
-
Contact support for questions about Baserow or help with your account