Enable and manage Single Sign-On (SSO)
This guide explains how to configure Single Sign-On (SSO) connections within the Baserow Admin Panel, allowing you to connect identity providers like Okta, Google, Azure AD, and more.
SSO is available on the Baserow Advanced and Enterprise plans. You must have a valid license activated to configure these settings. Visit the pricing page.
Overview
Baserow SSO allows Instance Admins to connect external Identity Providers (IdP), enabling users to log in with their corporate credentials instead of creating unique Baserow accounts.
To manage these settings, you must be an Instance Admin. Navigate to Admin Tools > General -> Authentication.
There are two primary ways to connect an Identity Provider:
- SAML: Uses XML metadata (Common for Okta, OneLogin, Azure).
- OAuth 2: Uses Client ID and Secret (Common for Google, Facebook, GitHub).
To view the list of providers, visit this page
Option 1: Add a SAML provider
Use this method for enterprise-grade identity providers like Okta, OneLogin, or Azure AD.
- Open authentication settings: Go to Admin > Authentication.
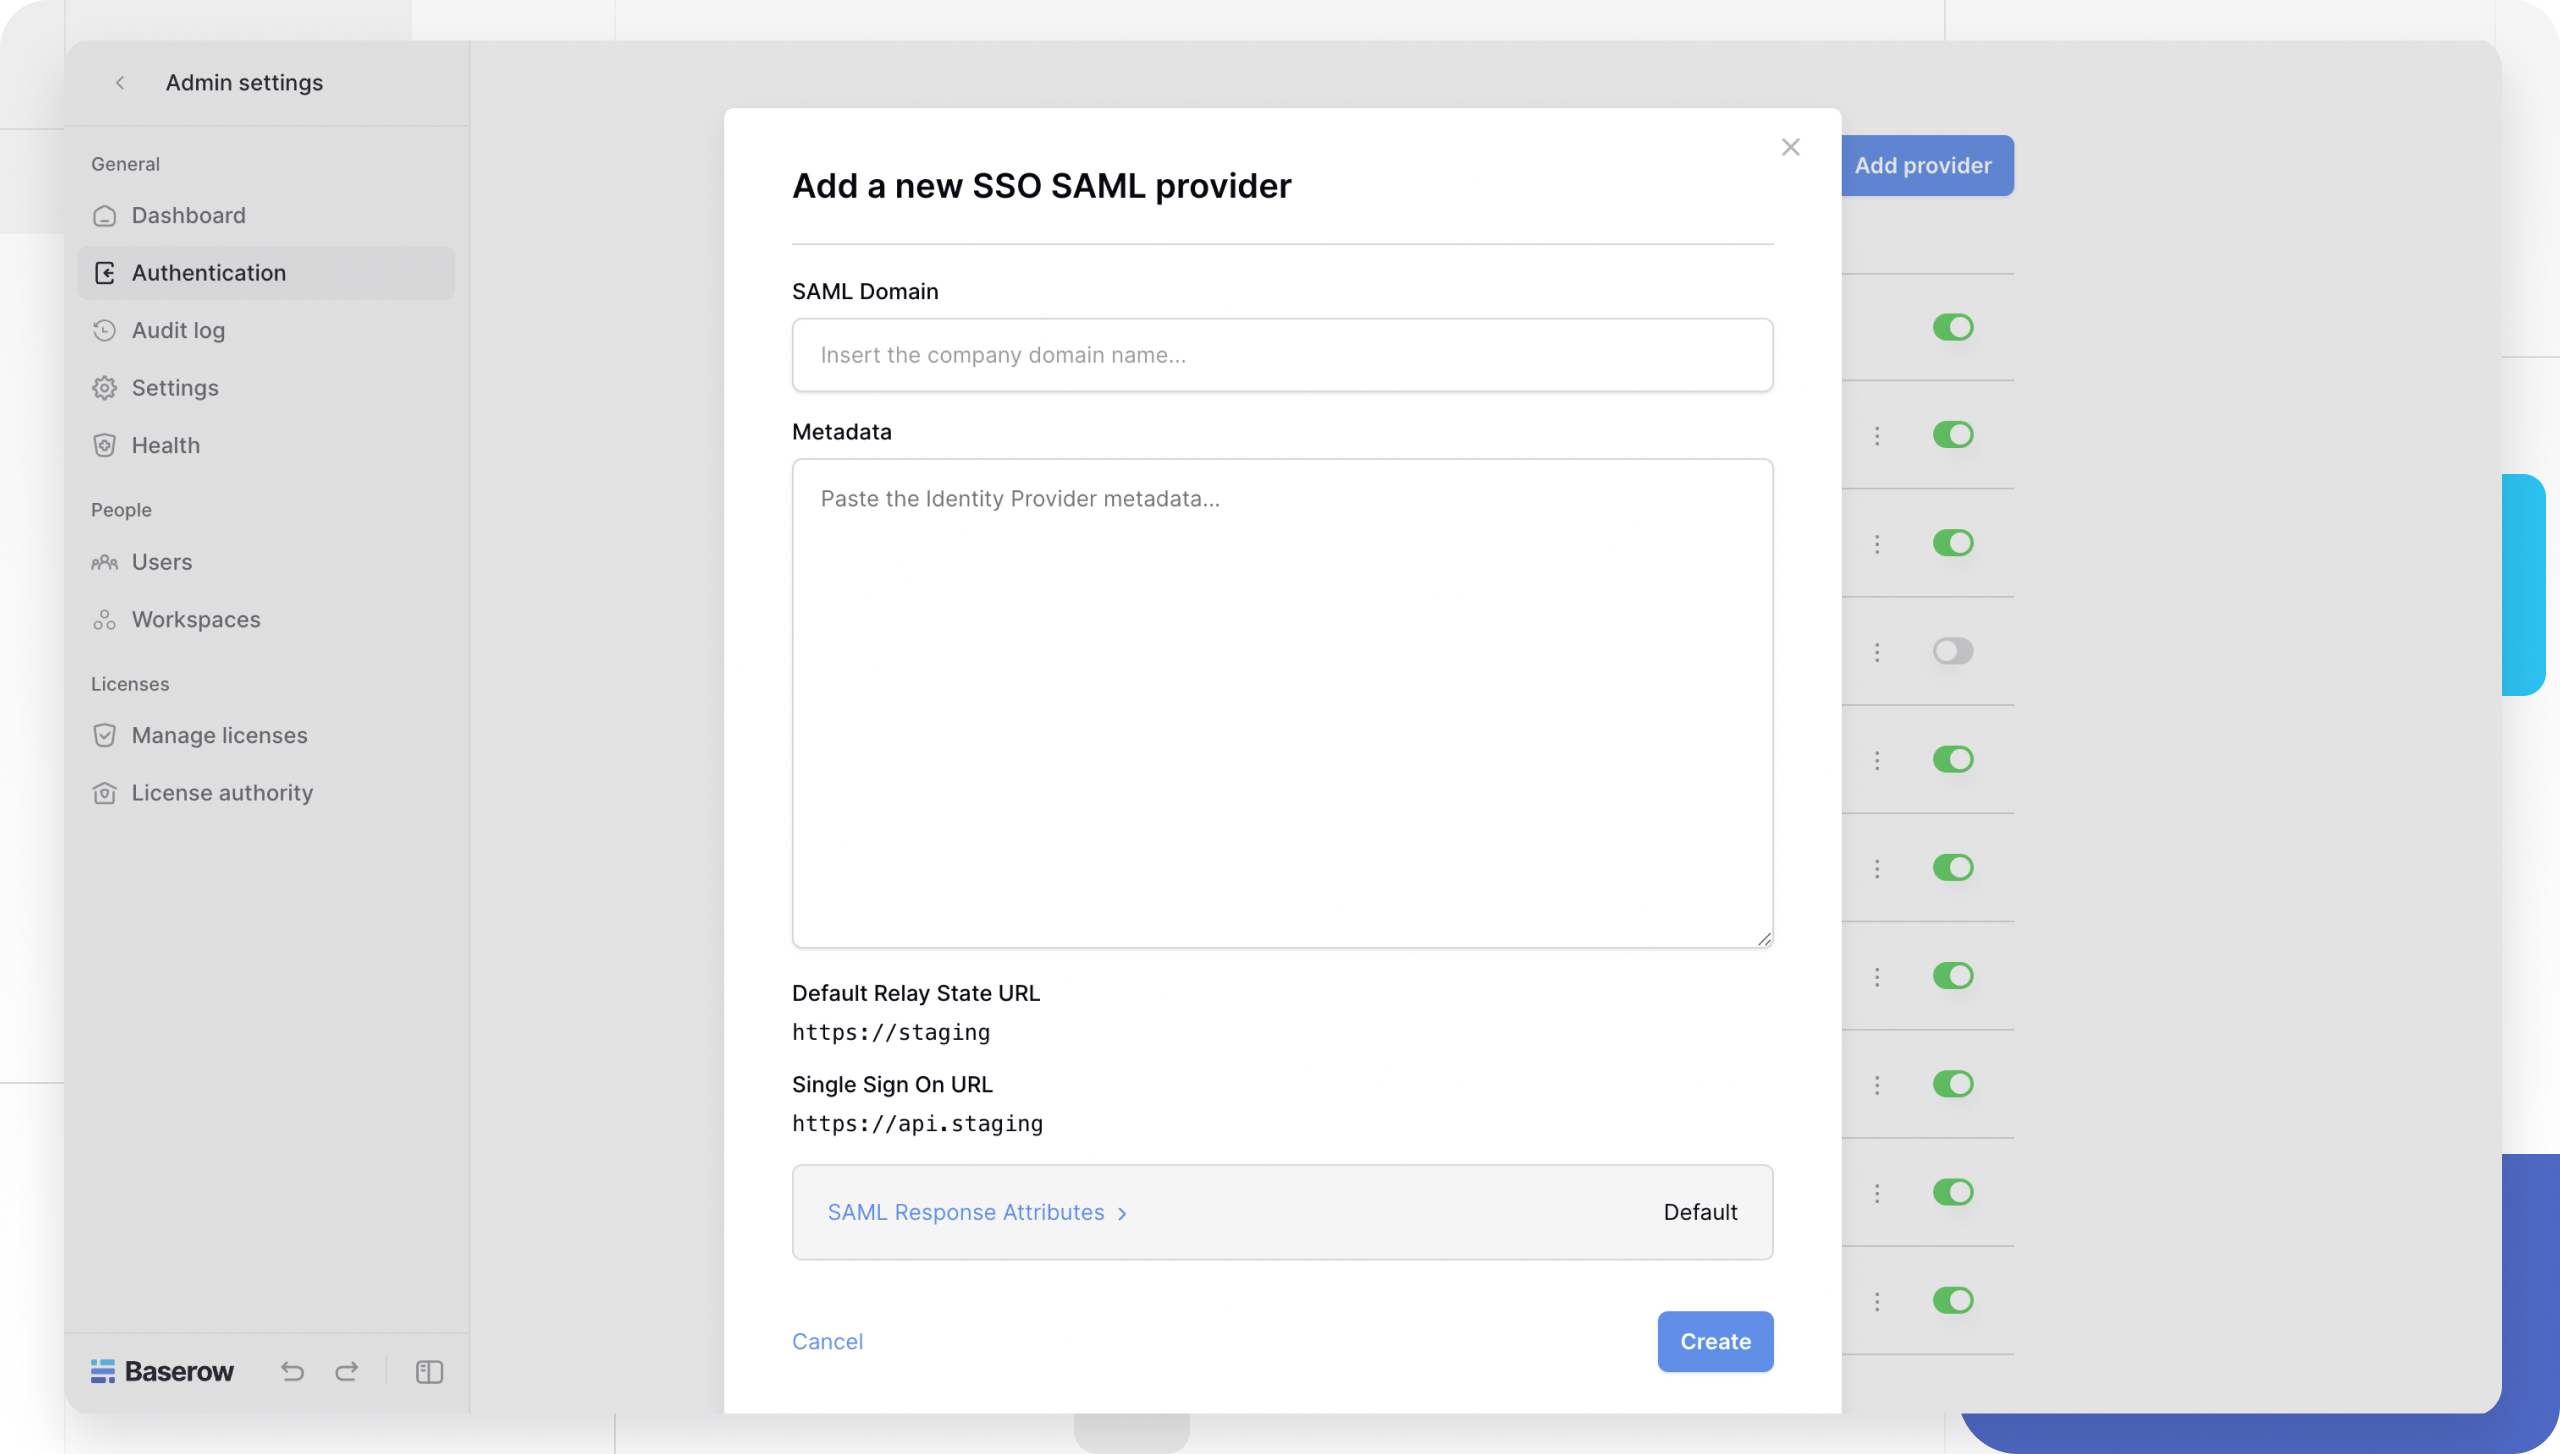
- Add provider: Click the + Add provider button and select SSO SAML Provider.
- Copy Baserow URLs: The modal will display two critical URLs. Copy these, as you will need to paste them into your Identity Provider’s configuration page:
Single Sign On URL(ACS URL)Default Relay State URL
- Configure your IdP: Log in to your Identity Provider (e.g., Okta) and create a new SAML application using the URLs you just copied. (See specific guides depending on the provider below).
- Get metadata: Your Identity Provider will generate an XML Metadata file or string. Copy this to your clipboard.
- Finalize in Baserow: Paste the XML data into the Metadata field in the Baserow modal and click Create.
Specific setup guides:
Option 2: Add an OAuth 2.0 provider
Use this method for social logins or delegated authentication providers like Google Workspace or GitHub.
- Open authentication settings: Go to Admin > Authentication.
- Add provider: Click the + Add provider button and select your specific provider (e.g., Google, Facebook) or OpenID Connect for generic connections.
- Copy Callback URL: The modal will display a Callback URL (Redirect URI). Copy this value.
- Configure your provider: Go to your provider’s developer console (e.g., Google Cloud Console), create an OAuth App, and paste the Baserow Callback URL into their “Authorized Redirect URIs” field.
- Get credentials: The provider will generate a Client ID and Client Secret.
- Finalize in Baserow: Paste the Client ID and Secret into the Baserow modal.
- Note: If using generic OpenID Connect, you must also provide the Base URL of the provider.
- Create: Click Save to activate the provider.
Specific setup guides:
Managing authentication providers
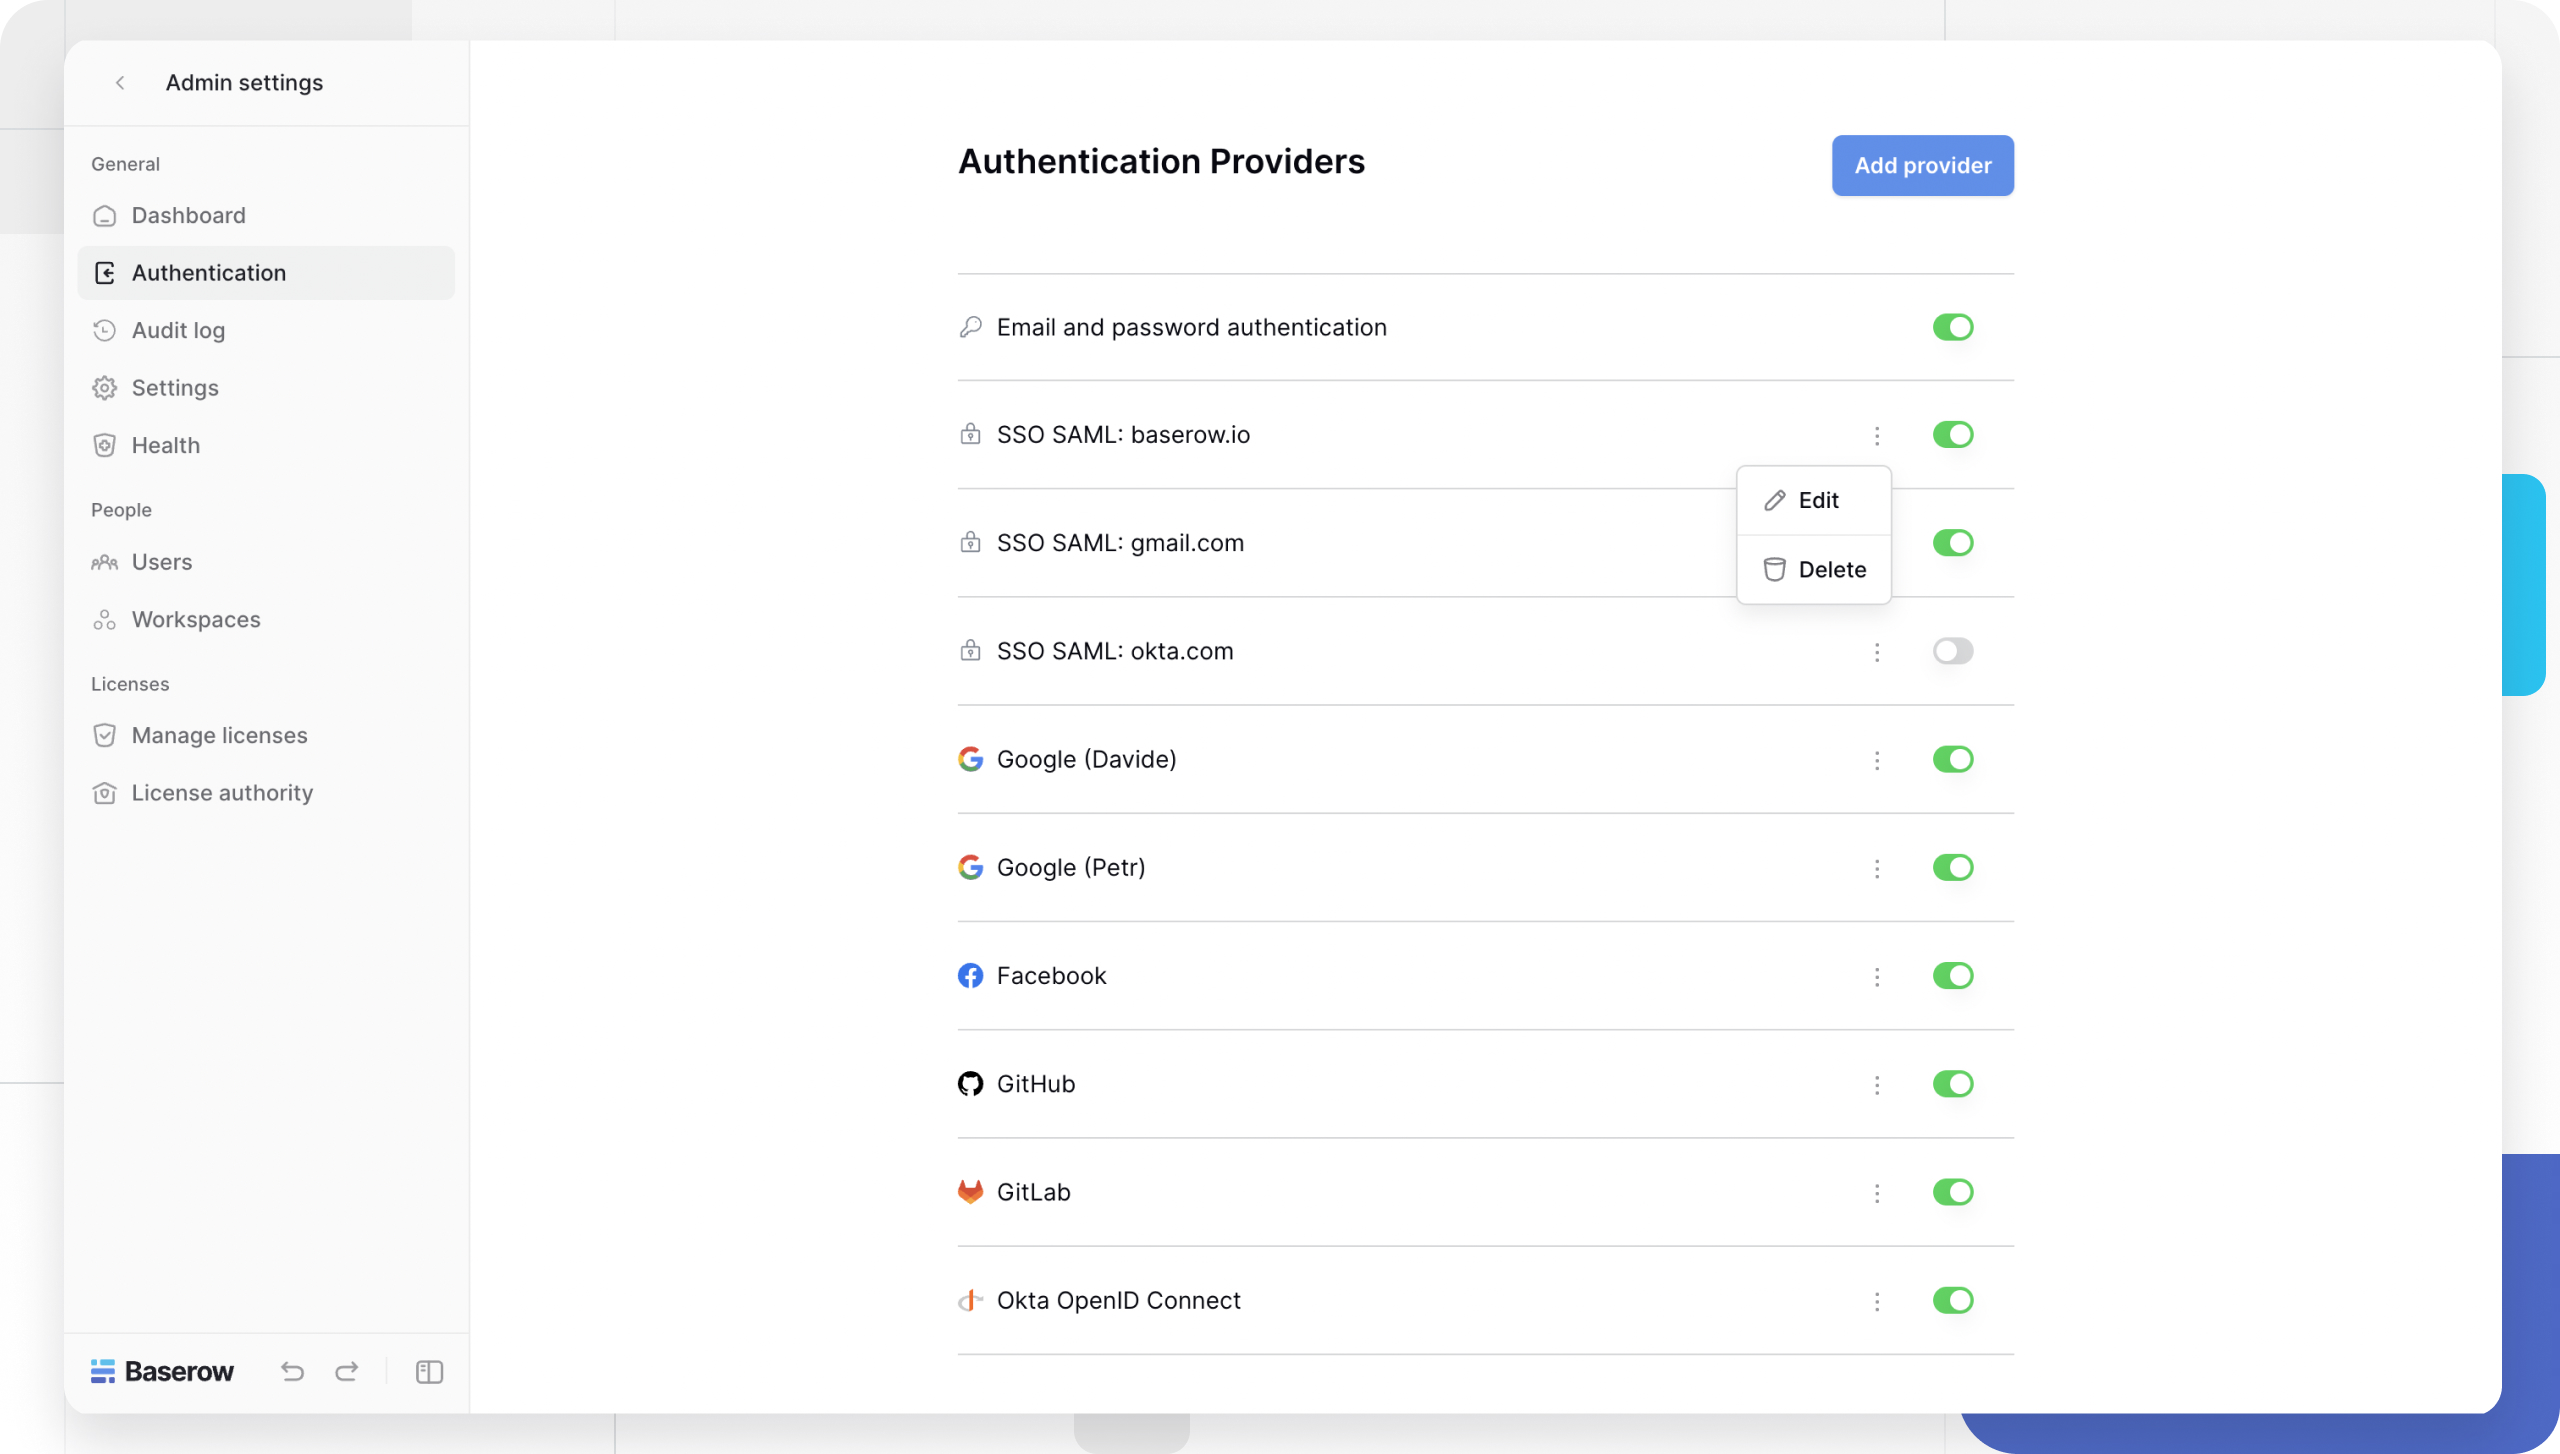
Once configured, you can manage how users interact with these login methods.
Editing or deleting
To modify an existing connection (e.g., to rotate a Client Secret):
- Navigate to the provider list.
- Click the three-dot icon (⋮) next to the provider.
- Select Edit to change settings or Delete to remove the connection entirely.
Disabling password login
For strict security, you may want to force users to log in only via SSO.
- Locate the Email and Password provider in the list.
- Toggle the switch to Disabled.
Learn more: Email/Password authentication
⚠️ Warning: Do not disable Email/Password authentication unless you have fully verified that your SSO provider is working correctly. If SSO fails and password login is disabled, you may lock yourself out of the instance.
Troubleshooting & Common Issues
Error: “Please use the provider that you originally signed up with”
This error occurs if a user already has a Baserow account (created via Email/Password) and tries to log in via Okta SSO later. For security reasons, Baserow does not automatically merge these identities by default.
Solutions:
- Delete and re-add (Recommended): Delete the user from the Baserow Users page. When they log in via Okta, a new account will be created automatically with the correct SSO link.
This option should only be considered if data loss is acceptable and after ensuring all data is backed up elsewhere.
- Enable Multiple Auth Methods (Advanced): An admin can set the environment variable
BASEROW_ALLOW_MULTIPLE_SSO_PROVIDERS_FOR_SAME_ACCOUNT=trueon the server. This allows merging but increases security risk. - Maintain consistent authentication method: Users can continue logging in with the authentication method they signed up with. This avoids changing Baserow’s default behavior and maintains existing security measures.
For optimal security, we recommend maintaining consistent authentication methods unless necessary. If enabling multiple login methods is essential, implement additional security measures to mitigate potential risks.
Learn more: SSO configuration
Frequently Asked Questions (FAQ)
What is the “Relay State”?
The Relay State is a URL parameter that tells the Identity Provider where to send the user after they successfully log in. In Baserow, this ensures the user is redirected back to the dashboard or the specific page they were trying to access.
Can I have multiple SSO providers?
Yes. You can add multiple providers (e.g., both GitHub and Google). All active providers will appear as buttons on the login page.
What happens if I lock myself out?
If you disable “Email and Password” login and your SSO provider stops working, you will lose access to the Admin Panel. To recover access, you must use the Baserow server command line (CLI) to manually re-enable password authentication.
Does Baserow support SCIM?
Baserow currently supports JIT (Just-In-Time) provisioning, meaning user accounts are created automatically the first time they log in via SSO. Full SCIM (User syncing/deprovisioning) is not currently supported via the Admin Panel.
Related content
Still need help? If you’re looking for something else, please feel free to make recommendations or ask us questions; we’re ready to assist you.
-
Contact support for questions about Baserow or help with your account.