Manage pages in Application Builder
Pages are the core building blocks of your application’s frontend. Each page acts like a screen or a view, similar to how tables organize data in a database. You can create multiple pages to handle different jobs, sort information, or serve different user roles.
This guide covers how to create, organize, and test the individual screens that make up your Baserow application.
Overview
- Navigation: All pages are listed and managed in the left sidebar of the Application Builder.
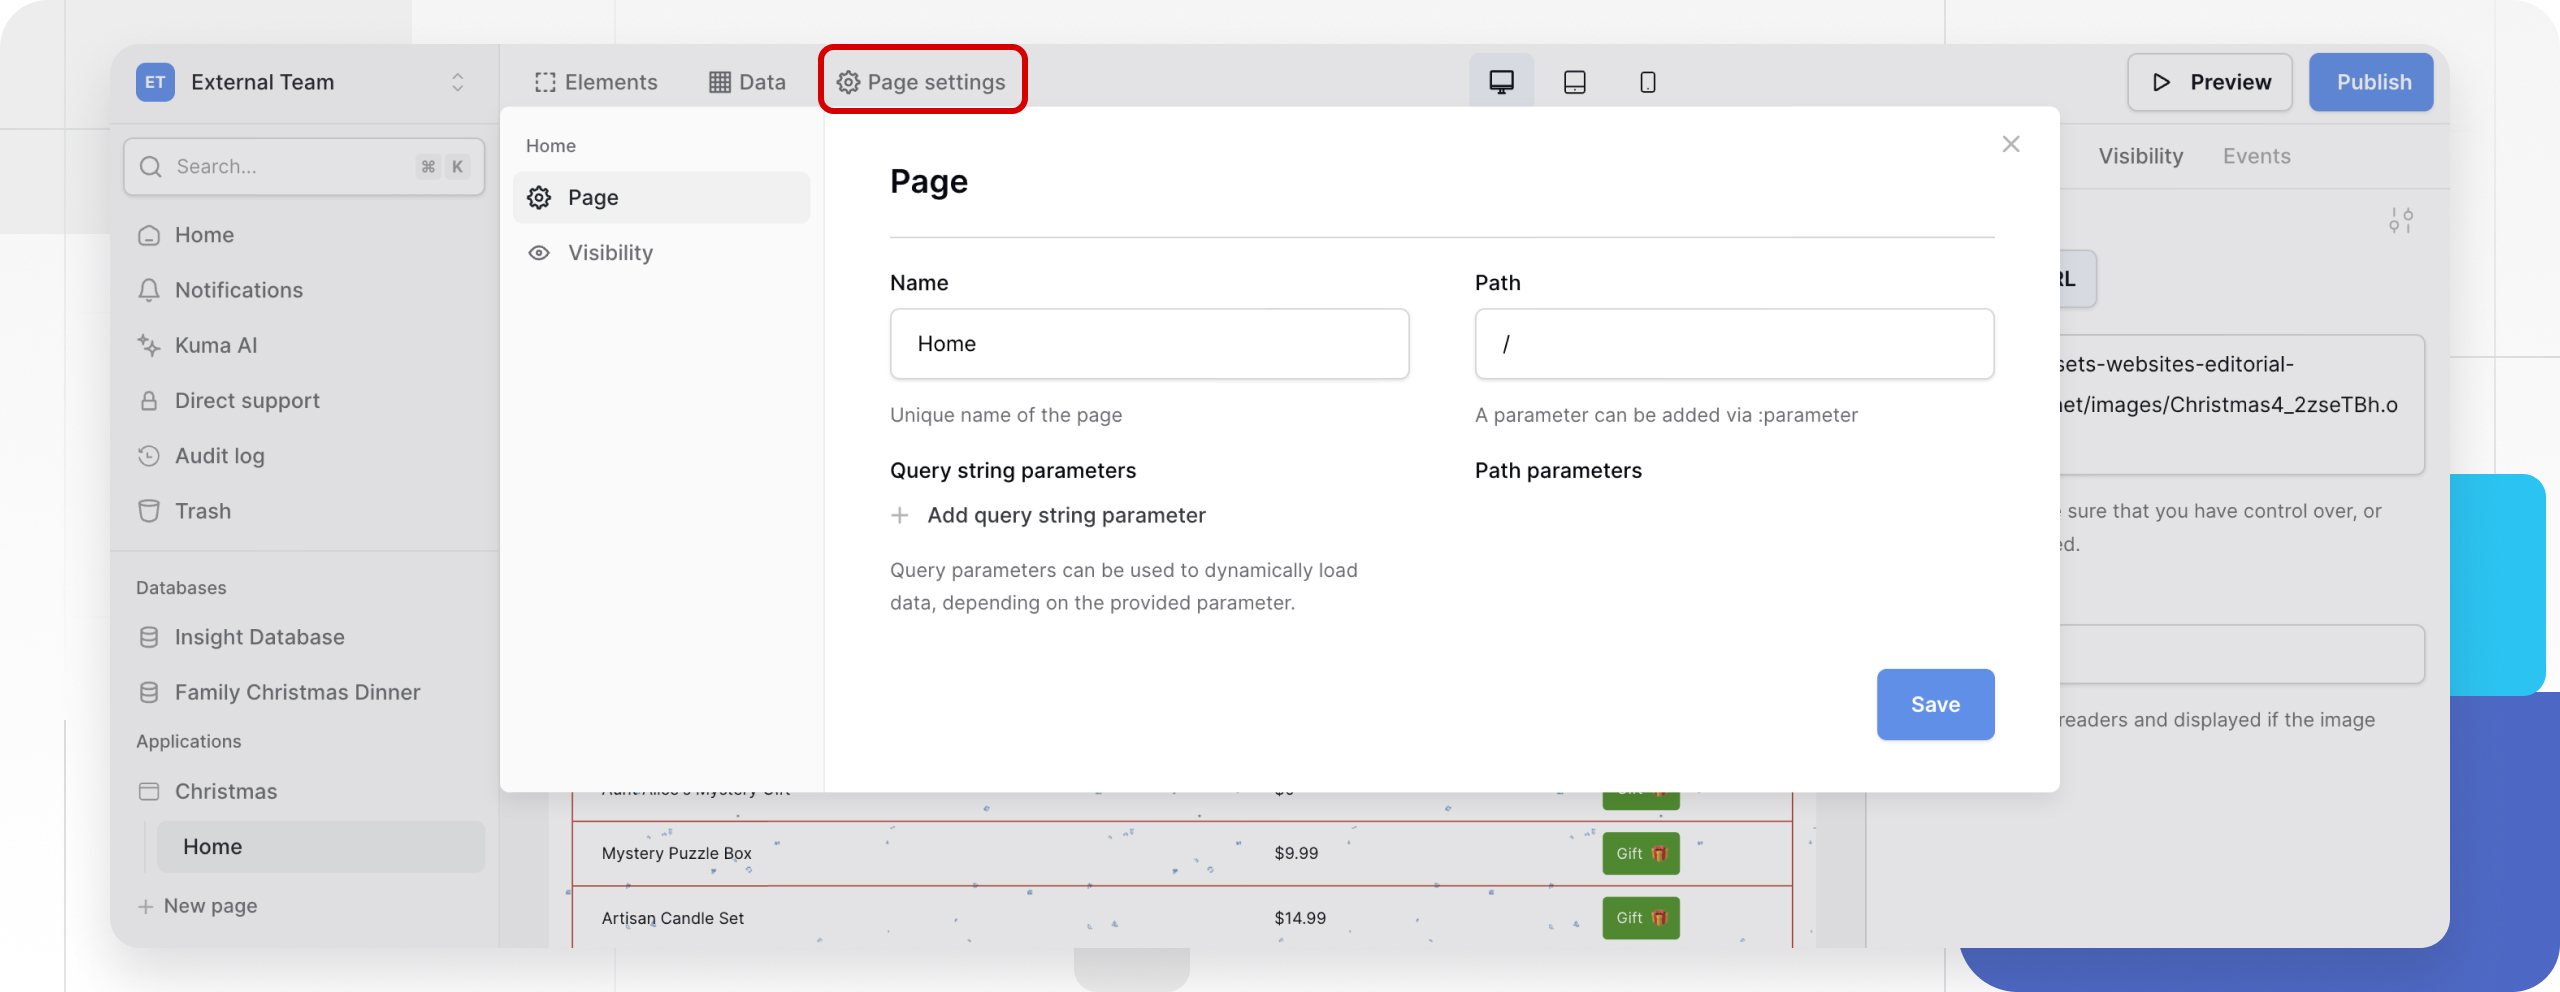
- Configuration: Each page has its own settings, including name, URL path, visibility, query string parameters, and path parameters.
- Context: You can preview pages as specific users to test security and data visibility.
Create a new page
To add content to an application, you must make at least one page. You can start from scratch or copy an existing layout.
Option 1: Start with a blank page
- In the application sidebar, click + Create page.
- Enter a unique name for the page.
- Select Start with a new page.
- Click Add page.
You now have a blank canvas where you can begin adding elements.
Option 2: Duplicate an existing page
Duplicating is useful if you want to modify data or layout without affecting the original page.
- Hover over the page you want to copy in the sidebar.
- Click the three-dot icon
⋮to open the menu. - Select Duplicate.
A copy will appear immediately below the original in the sidebar. You can then modify, reorder, or delete elements on this new page to fit your needs.
Manage pages
You can organize your application structure using the page menu.
Rename a page
- Locate the page in the sidebar.
- Click the three-dot icon
⋮and select Rename. - Enter the new name and save.
- Alternatively: You can rename a page inside the Page Settings panel.
Delete a page
- Click the three-dot icon
⋮next to the page. - Select Delete.
- Warning: This removes the page immediately without a confirmation prompt.
Preview as an authenticated user
By default, the editor shows your page as an anonymous user. To test features like personalized data or restricted content, you can simulate the experience of a logged-in user.

Prerequisites: Before testing, ensure you have:
- Configured User Sources: You need authentication methods (like email/password) set up so there are users to simulate.
- Connected Data Sources: Ensure your data is set up to display or collect information.
How to test:
- Navigate to the page you want to test.
- Use the user dropdown in the top bar (shown in the screenshot above) to select a specific user context.
- Simulate experience: Interact with the page to verify that the correct data is visible and permissions are working as expected.
- Verify: Check for unauthorized access or missing data to ensure your roles are configured correctly.
Frequently asked questions (FAQ)
What is the Homepage?
When you create a new application, it comes with a Homepage by default. This is typically the first page users see. To expand your app, you simply add more pages.
Can I change the URL of a page?
Yes. Page URLs (Paths) are managed in the Page settings. You can define static paths (e.g., /about) or dynamic paths with parameters (e.g., /project/:id).
Related content
Still need help? If you’re looking for something else, please feel free to make recommendations or ask us questions; we’re ready to assist you.
- Ask the Baserow community
- Contact support for questions about Baserow or help with your account.