Configure SAML SSO with Okta
This guide explains how to configure Single Sign-On (SSO) using Okta as your Identity Provider (IdP) for Baserow.
SSO is available on the Baserow Advanced and Enterprise plan. You must have a valid license activated to configure these settings.
Overview
The Baserow Okta integration allows teams to centralize identity management, enabling users to log in to Baserow using their existing Okta credentials via the SAML 2.0 protocol.
Setting up this connection involves three main phases:
- Creating a Baserow application in Okta.
- Mapping user attributes (Email, First Name, Last Name) so Baserow can identify users.
- Importing Okta’s metadata into Baserow to finalize the trust relationship.
Prerequisites
- Baserow: You must be an Instance Admin on a self-hosted plan.
- Okta: You must have Administrator privileges to create applications.
Phase 1: Create the Application in Okta
-
Log in to your Okta Admin Console.
-
Navigate to Applications > Applications in the sidebar.
-
Click Create App Integration.
-
Select SAML 2.0 as the Sign-in method and click Next.
-
General Settings:
- App name: Enter
Baserow. - App logo: (Optional) Upload the Baserow logo for easy recognition.
- Click Next.
- App name: Enter

Phase 2: Configure SAML Settings
In this step, you will tell Okta where to send the authentication data. You will need two URLs from your Baserow instance.
1. Get Baserow URLs
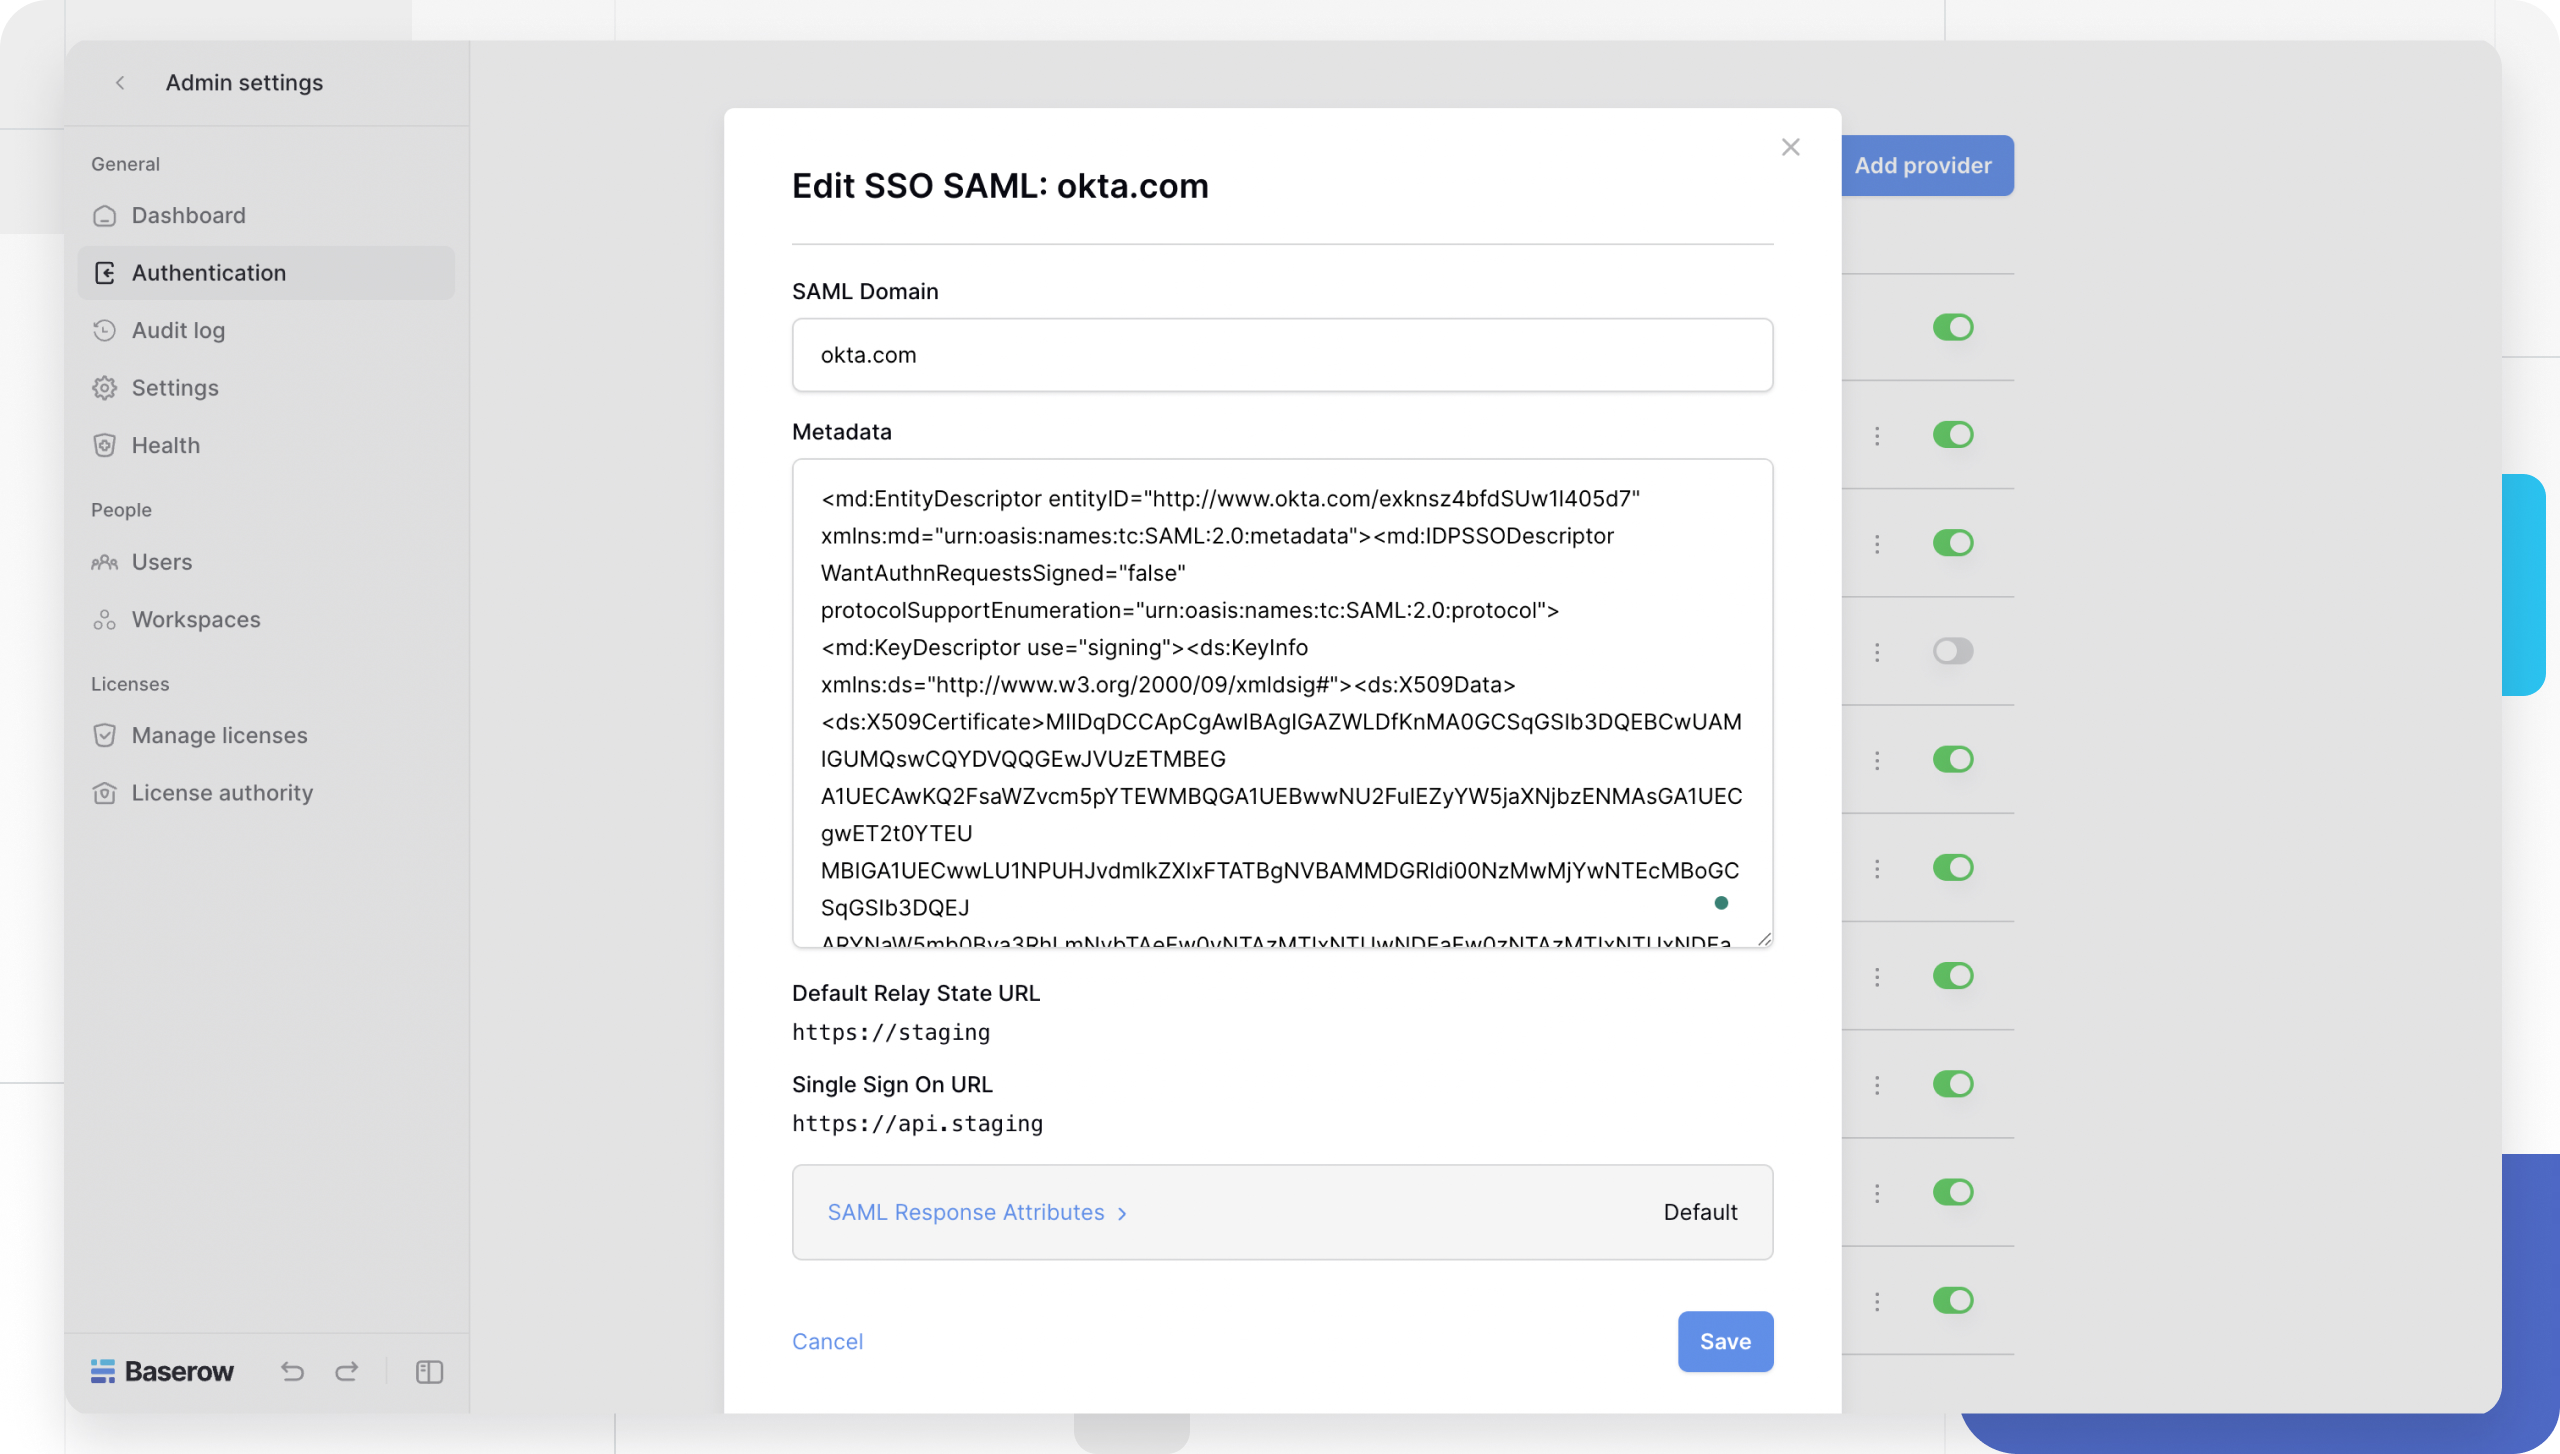
- Open a new tab and log in to your Baserow Admin Panel. Learn how to create and manage providers.
- Go to Authentication > + Add Provider > SSO SAML Provider.
- Copy the Single Sign On URL and Default Relay State URL displayed in the modal.
2. Configure Okta SAML Settings
Return to Okta and paste the URLs into the corresponding fields:
| Okta Field | Value from Baserow |
|---|---|
| Single sign on URL | Paste your Baserow Single Sign On URL |
| Audience URI (SP Entity ID) | Paste your Baserow Single Sign On URL (Again) |
| Default RelayState | Paste your Baserow Default Relay State URL |
If no Default RelayState value is set, a blank RelayState is sent
3. Attribute Statements (Crucial Step)
You must define how Okta sends user data to Baserow. If these are incorrect, users will be created without names or emails.
Scroll down to Attribute Statements and add the following three mappings exactly as written:
| Name (Baserow Variable) | Value (Okta Profile Field) |
|---|---|
user.email |
user.email |
user.first_name |
user.firstName |
user.last_name |
user.lastName |
The “Name” column must be lower-case and use underscores (e.g.,
user.first_name), while the “Value” column refers to Okta’s internal variable naming (e.g.,user.firstName).
- Click Next and then Finish.
You can preview the SAML assertion generated from the information inputted. This displays the XML that will be used in the assertion; use it to verify the information you entered.
Phase 3: Connect Okta to Baserow
Now that the app is created in Okta, you need to give the security metadata back to Baserow.
-
In Okta, go to the Sign On tab of your new Baserow application.
-
Scroll down to the SAML Signing Certificates section.
-
Locate the Active certificate and click Actions > View IdP metadata.
-
A new tab will open with a block of XML code. Copy the entire XML string.
-
Return to your Baserow Admin Panel.
-
In the Add SAML Provider modal (where you copied the URLs earlier):
- Name: Enter
Okta. - Metadata: Paste the XML string you copied from Okta.
- Name: Enter
-
Click Save.

Phase 4: Assign Users
Your connection is set up, but Okta will block users from signing in until you explicitly grant them access.
- In Okta, go to the Assignments tab.
- Click Assign > Assign to People (or Groups).
- Select the users you want to grant access to Baserow.
- Click Done.
Troubleshooting
Attributes not populating (Missing names)
If users are created but their First or Last names are missing, check Configure SAML Settings. The Attribute Statements must precisely match user.first_name and user.last_name.
Frequently Asked Questions (FAQ)
Does Baserow support SCIM with Okta?
Baserow supports Just-In-Time (JIT) provisioning. This means you do not need to manually create users in Baserow. As soon as you assign a user in Okta and they log in for the first time, their account is automatically created in Baserow. Full SCIM (automated deprovisioning) is not currently configured via this UI.
Can I disable password login after setting up Okta?
Yes. Once you have verified that the Okta login works, you can disable the “Email and Password” provider in the Baserow Authentication settings.
What is the Audience URI?
The Audience URI (Entity ID) is a unique identifier that tells Okta exactly which application it is talking to. This is most often the SP Entity ID of your application. For Baserow, this is the same as your Single Sign On URL (e.g., https://baserow.io/api/sso/saml/login/).
Can I map Okta Groups to Baserow Roles (e.g., Admins vs. Editors)?
Currently, Baserow does not support automatic role mapping via SSO attributes. When a user logs in via Okta for the first time, their account is created with a default role (usually a generic member). An Admin must manually assign them to specific Workspaces and Roles within Baserow.
Related content
Still need help? If you’re looking for something else, please feel free to make recommendations or ask us questions; we’re ready to assist you.
-
Contact support for questions about Baserow or help with your account.