View-level permissions (Restricted views)
View-level permissions (also known as restricted views) allow you to give specific users access to only the exact data they should see. This feature operates within Baserow’s role hierarchy (workspace → database → table → view) to provide highly granular, row-level and column-level access control.
This guide covers how to create restricted views, hide specific fields, lock filters, and safely share targeted subsets of your data with internal teams or external partners.
Overview
A restricted view lets you expose only a specific part of a table to selected users. By applying filters and hiding fields, you can create customized, secure access to your data.
Unlike standard collaborative views, where any user with table access can modify filters or switch to another view, users assigned to a restricted view are securely locked in. They:
- Only see the rows that match the view’s predefined filters.
- Cannot see or change the filters.
- Cannot access other views or data in the table.
Learn more about Collaborative and Personal views.
How restricted views work
Other users might inherit access via their respective roles on the parent table, database or workspace. Learn more about permissions.
Interaction with the permission hierarchy
Permissions in Baserow follow a top-down hierarchy: Workspace → Database → Table → View.
With restricted views, you can grant a user access to a specific restricted view even if they do not have access to the rest of the workspace or table.
If a user has broad table access, a restricted view can limit what they see in that specific view (though they could still see the data in other views if their table role permits).
If a user has no workspace access, you can assign them a role directly on the restricted view, effectively making it a secure, isolated application just for them.
Data editing and Default Values
When editing data inside a restricted view, permissions are strictly enforced. Users can only update rows that are currently visible to them.
To support data entry, you can define default values per view. When a user creates a new row inside a restricted view, these default values are automatically applied to ensure the new row instantly matches the view’s filters and remains visible to the user.
Baserow also indicates whether your configured default values satisfy the view filters, making it easier to verify that newly created records will remain visible in the restricted view.
Set up a restricted view
- Navigate to the table where you want to restrict data.
- Create a new view (e.g., Grid, Kanban).
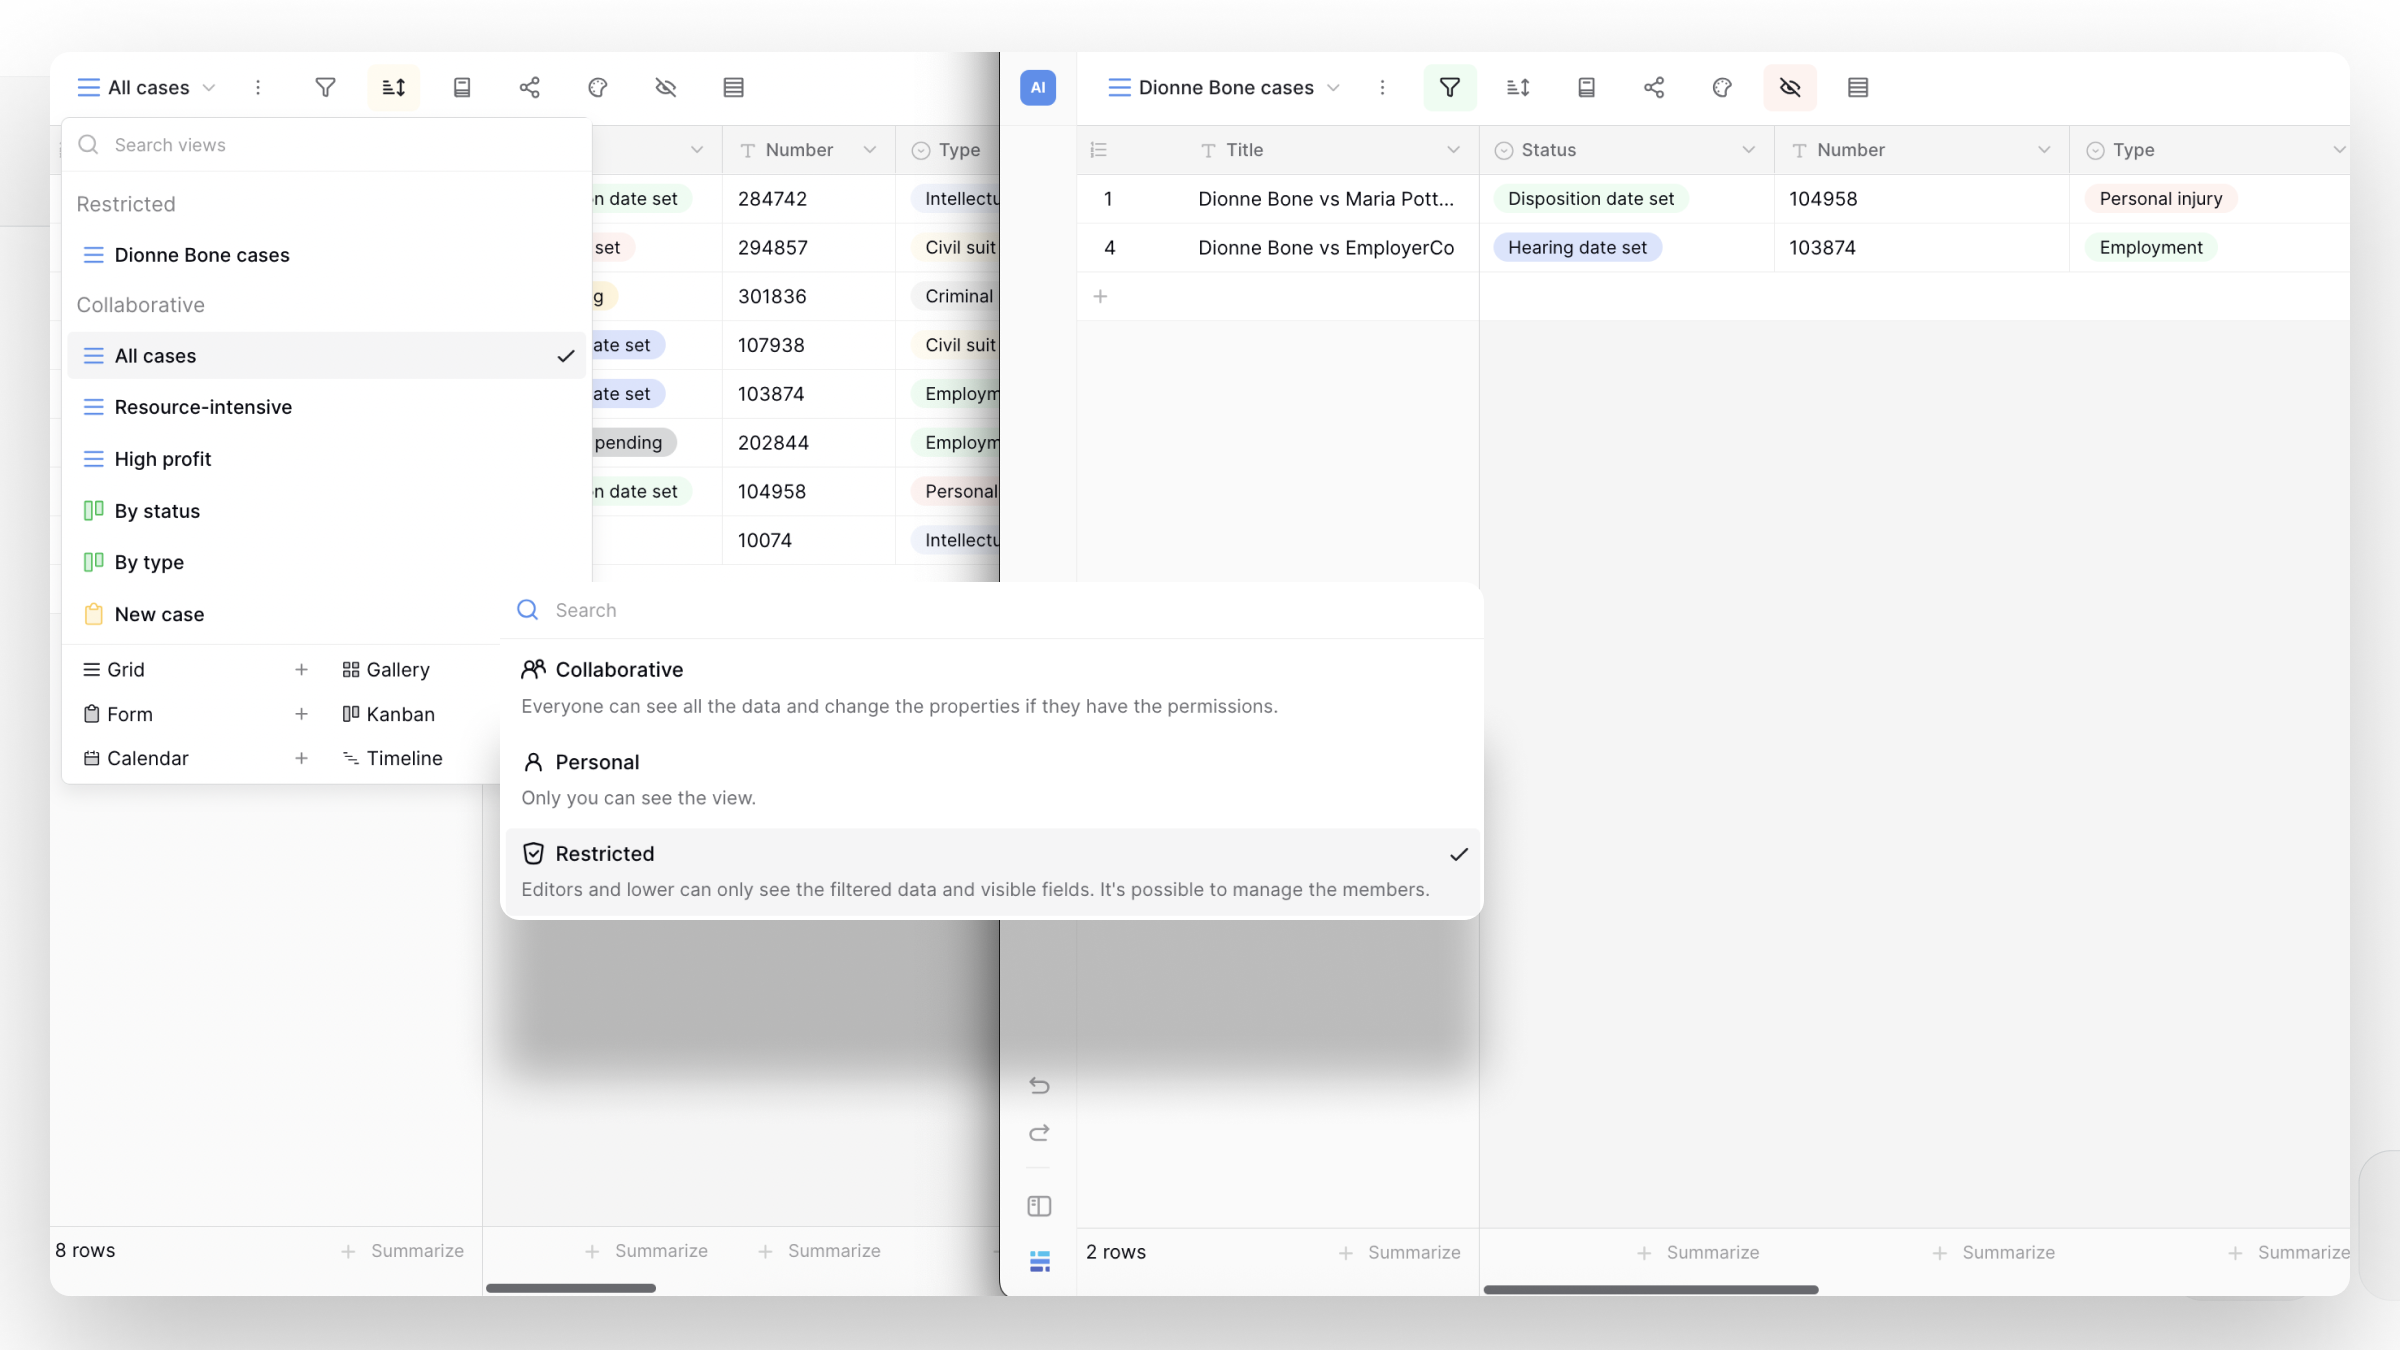
- Select who can edit this view, and click Restricted.
- Configure the view’s layout:
- Apply filters: Set up filters to isolate the exact rows the target users should see (e.g.,
Country contains 'Germany'). - Hide fields: Hide any columns that contain sensitive information the target users shouldn’t see. - Click the View options (three-dot menu ⋮) next to the view name to Manage members.
- Assign specific roles or individual users who should have access to this view.
- Configure Default values for new rows (optional, but recommended if users will be adding data).
- Click Save to enforce the restrictions.
Test the view by logging in as one of the assigned users to verify they cannot alter the filters, see hidden fields, or navigate to other views.
When to use restricted views
Restricted views vs. Collaborative/Personal views
| Feature | Collaborative views | Personal views | Restricted views |
|---|---|---|---|
| Visibility | All members with table access | Only the creator | Only specifically assigned users |
| Filter Control | Editors and up can change | Creator can change | Editors and lower can see the filtered data |
| Field Hiding | Visual only (data still accessible) | Visual only | Strict (hidden data is completely inaccessible) |
| Use Case | Team dashboards, shared processes | Individual organization | Secure data sharing, vendor portals, row-level security |
Restricted views vs. Field/Table permissions
- Use Table permissions when a user needs access to all rows and columns in a table.
- Use Field-level permissions when everyone can see all the rows, but only specific roles should edit certain columns (like locking a “Status” field).
- Use Restricted views when you need to hide specific rows based on conditions (row-level security), hide specific columns from certain users, or grant access to users who shouldn’t see the rest of the database.
Advanced restricted view strategies
Strategy 1: Regional Sales Teams (Row-level security)
Keep your entire company’s sales data in one master table, but ensure regional reps only see their own leads.
- Implementation: Create a restricted view named “EMEA Leads”. Filter by
Region is EMEA. Hide theCommission Ratefield. Assign the EMEA Sales Team group to this view. Define the default value for theRegionfield as “EMEA” so any new lead they add is automatically assigned to their region.
Strategy 2: External Vendor Portals
Allow contractors to update the status of their assigned tasks without seeing your internal workspace or tasks assigned to other vendors.
- Implementation: Create a restricted view for “Vendor A”. Filter by
Assigned To is Vendor A. Hide internal fields likeBudgetandInternal Notes. Grant Vendor A access to only this view. They will log in, see only their tasks, and be completely unaware of the rest of the database.
Strategy 3: Departmental HR Portals
HR maintains a master employee table, but managers need to see the performance reviews of only their direct reports.
- Implementation: Create a restricted view for “Marketing Team”. Filter by
Department is Marketing. The Marketing Manager is granted access to this view. They can review and update their team’s data without accessing Engineering or Sales personnel records.
Troubleshooting restricted views
“Users can still see rows that don’t belong to them”
Check the user’s Table or Database-level permissions. If a user is an Editor on the entire table, restricting a view will not prevent them from simply clicking into a different, unrestricted collaborative view. Restricted views provide true security only when the user’s broader table access is removed or limited.
“New rows disappear as soon as they are created”
This happens when a user creates a row that doesn’t match the view’s strict filters, causing it to instantly filter out. To fix this, set up Default values in the view settings so that new rows automatically populate with data that matches the filter (e.g., automatically setting the “Status” to “New”).
“Users can’t find the view in the sidebar”
Ensure you have explicitly granted the user or their role access to the restricted view in the view’s permission settings. If they don’t have table-level access, they will only see the specific views you invite them to.
Frequently asked questions
Can users in a restricted view export the data?
Users can only export the data that is visible to them within the restricted view. Rows filtered out, and fields that are hidden are excluded from their exports.
What happens if a user changes a cell value so it no longer matches the filter?
If a user updates a record (e.g., changing a status from ‘In Progress’ to ‘Done’ in an “Active Tasks” restricted view), the row will immediately disappear from their view once saved, as it no longer matches the strict filter criteria.
Can I combine restricted views with field-level permissions?
Yes! You can give a user access to a restricted view (limiting which rows they see) and further apply field-level permissions (e.g., setting a visible “Approval Date” column to Read-Only so they can see it, but not edit it).
Related content
- Understanding role hierarchy
- Field-level permissions
- Assign roles at the table level
- Collaborative vs personal views
Still need help? If you’re looking for something else, please feel free to make recommendations or ask us questions; we’re ready to assist you.
- Ask the Baserow community
- Contact support for questions about Baserow or help with your account